💡 Intro
I always wanted to share my own experiences to give others ideas or help them on their projects.
I’m constantly tinkering in my homelab, trying new tools and workflows. Instead of keeping all these experiments in private notes, I decided to create a blog where I can document and publish them easily.
I wanted the entire process to be automated, self-hosted, and integrated into the tools I already use.
🔧 Tools
Obsidian
Before I was using Notion, but some months ago I switched to Obsidian. It’s a markdown-based note-taking app that stores everything locally, which gives me more flexibility and control.
To sync my notes between devices, I use the Obsidian Git plugin, which commits changes to a Git repository hosted on my self-hosted Gitea instance.
This setup not only allows for versioned backups of all my notes but also opens the door to automation.
Gitea
Gitea is a self-hosted Git service similar to GitHub, but lightweight and easy to maintain. I host my personal repositories there, including my Obsidian vault and my blog.
Gitea now supports Gitea Actions, a CI/CD pipeline mechanism compatible with GitHub Actions syntax.
To run those workflows, I installed a Gitea runner on my server, allowing me to create an automated workflow triggered when I update content in my notes, which then builds and deploys my blog.
Hugo
Hugo is a fast and flexible static site generator written in Go. It’s perfect for generating content from Markdown files. Hugo is highly customizable, supports themes, and can generate a complete website in seconds.
It’s ideal for a blog based on Obsidian notes, and it works beautifully in CI/CD pipelines due to its speed and simplicity.
🔁 Workflow
The idea is simple:
- I write blog content in my Obsidian vault, under a specific
Blogfolder. - When I’m done editing the file, the Obisdian Git plugin automatically commits and push updates to the Gitea repository
- When Gitea receives that push, a first Gitea Action is triggered.
- The first action syncs the updated blog content to another separate Git repository which hosts my blog content.
- In that blog repository, another Gitea Action is triggered.
- The second Gitea Action generates the static web pages while upgrading Hugo if needed
- The blog is now updated (the one you are reading).
This way, I never need to manually copy files or trigger deployments. Everything flows from writing markdown in Obsidian to having a fully deployed website.

⚙️ Implementation
Step 1: Obsidian Vault Setup
In my Obsidian vault, I created a Blog folder that contains my blog posts in Markdown. Each post includes Hugo frontmatter (title, date, draft, etc.). The Git plugin is configured to commit and push automatically when I make changes to the Gitea repository.
Step 2: Spin up Gitea Runner
The Obsidian vault is a private Git repository self-hosted in Gitea. I use docker compose to run this instance, to enable the Gitea Actions, I added the Gitea runner in the stack
  runner:
    image: gitea/act_runner:latest
    container_name: gitea_runner
    restart: on-failure
    environment:
      - GITEA_INSTANCE_URL=https://git.vezpi.com
      - GITEA_RUNNER_REGISTRATION_TOKEN=${GITEA_RUNNER_REGISTRATION_TOKEN}$
      - GITEA_RUNNER_NAME=self-hosted
      - GITEA_RUNNER_LABELS=ubuntu:docker://node:lts,alpine:docker://node:lts-alpine
      - CONFIG_FILE=/data/config.yml
    volumes:
      - /var/run/docker.sock:/var/run/docker.sock
      - /appli/data/gitea/runner:/data
      - /appli:/appli
    networks:
      - backend
    depends_on:
      - server
The config.yml only contains the allowed volume to bind in the containers
container:
  valid_volumes:
    - /appli*
The runner appears in the Administration Area, under Actions>Runners. To obtain the registration token, click on the Create new Runner button

Step 3: Set up Gitea Actions for Obsidian Repository
First I enabled the Gitea Actions, this is disabled by default, tick the box Enable Repository Actions in the settings for that repository
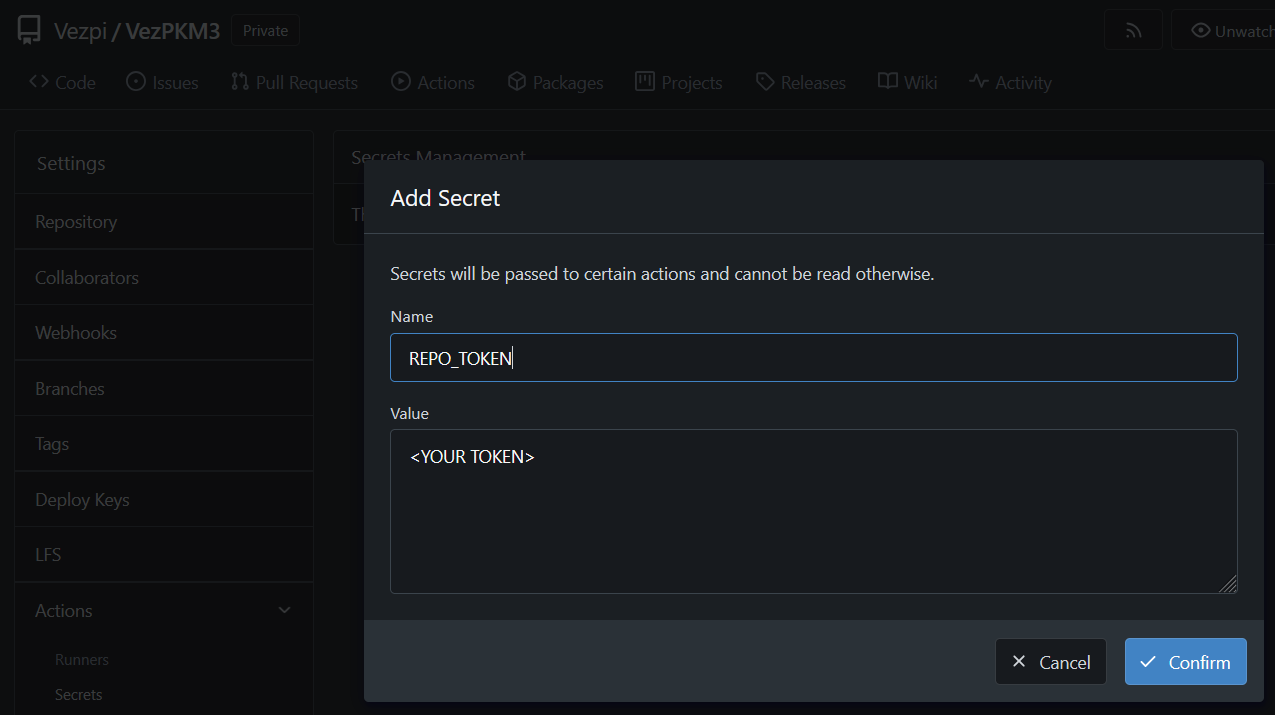
I created a new PAT (Personal Access Token) with RW permission on the repositories
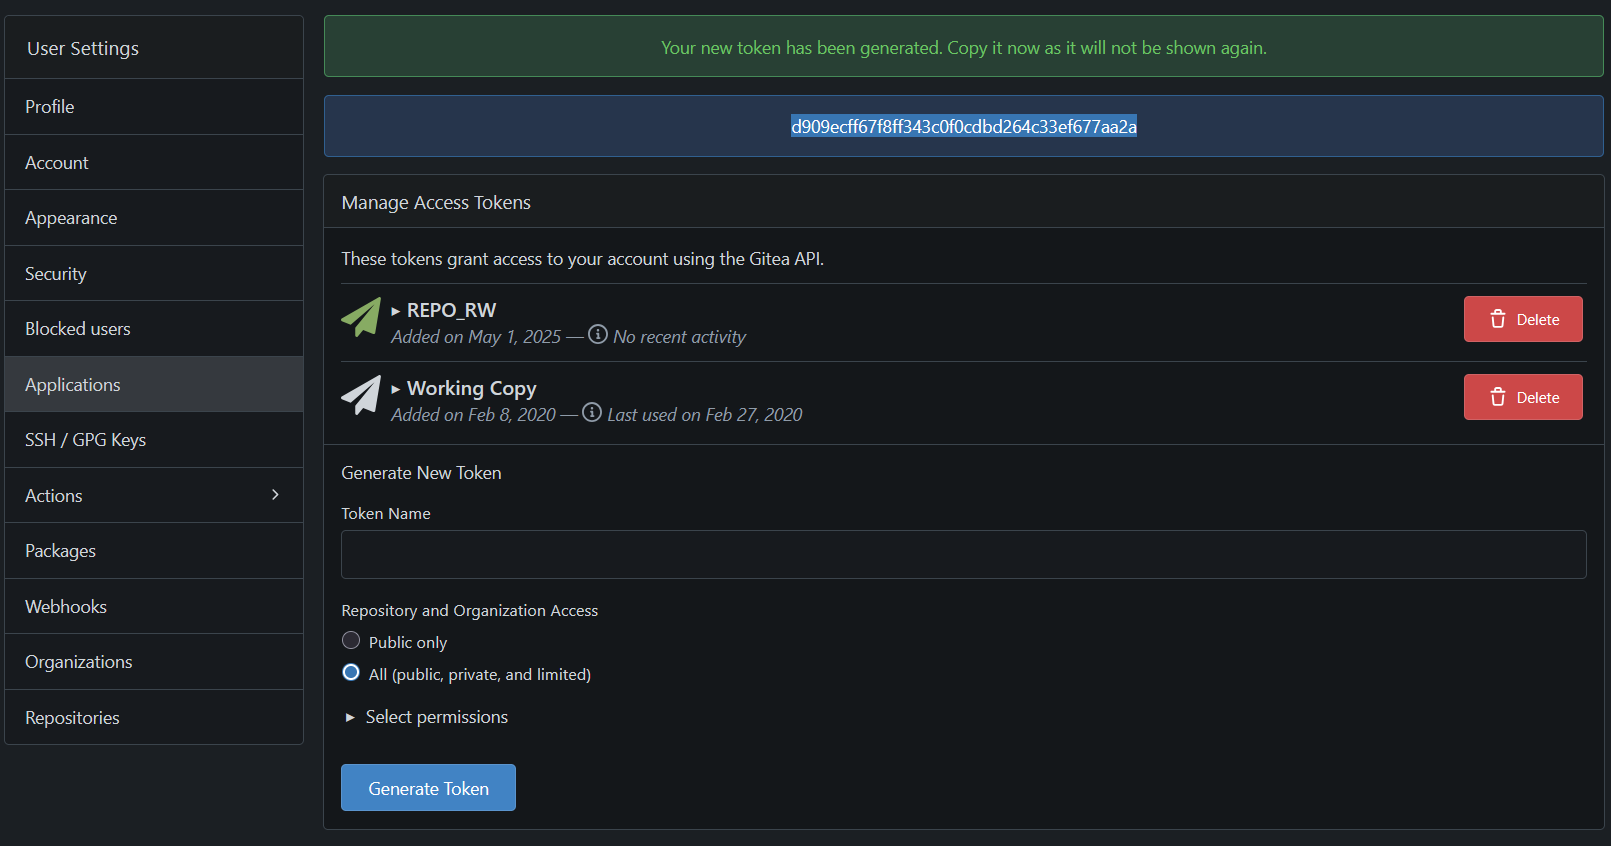
I added this token as secret REPO_TOKEN in the repository
I needed to create the workflow that will spin-up a container and do the following:
- When I push new/updated files in the
Blogfolder - Checkout the current repository (Obsidian vault)
- Clone the blog repository
- Transfer blog content from Obsidian
- Commit the change to the blog repository
sync_blog.yml
name: Synchronize content with the blog repo
on:
  push:
    paths:
      - 'Blog/**'

jobs:
  Sync:
    runs-on: ubuntu
    steps:
      - name: Install prerequisites
        run: apt update && apt install -y rsync

      - name: Check out repository
        uses: actions/checkout@v4

      - name: Clone the blog repository
        run: git clone https://${{ secrets.REPO_TOKEN }}@git.vezpi.com/Vezpi/blog.git

      - name: Transfer blog content from Obsidian
        run: |
          echo "Copy Markdown files"
          rsync -av --delete Blog/ blog/content
          # Gather all used images from markdown files
          used_images=$(grep -rhoE '^!\[\[.*\]\]' blog/content | sed -E 's/!\[\[(.*)\]\]/\1/' | sort -u)
          # Create the target image folder
          mkdir -p blog/static/img
          # Loop over each used image"
          while IFS= read -r image; do
            # Loop through all .md files and replace image links
            grep -rl "$image" blog/content/* | while IFS= read -r md_file; do
              sed -i "s|\!\[\[$image\]\]|\!\[${image// /_}\](img/${image// /_})|g" "$md_file"
            done
            echo "Copy the image ${image// /_} to the static folder"
            cp "Images/$image" "blog/static/img/${image// /_}"
          done <<< "$used_images"

      - name: Commit the change to the blog repository
        run: |
          cd blog
          git config --global user.name "Gitea Actions"
          git config --global user.email "actions@local"
          git config --global --add safe.directory /appli/data/blog
          git add .
          git commit -m "Auto-update blog content from Obsidian: $(date '+%F %T')" || echo "Nothing to commit"
          git push -u origin main
Obsidian uses wiki-style links for images, like ![[image name.png]], which isn’t compatible with Hugo out of the box. Here’s how I automated a workaround in a Gitea Actions workflow:
- I find all used image references in
.mdfiles. - For each referenced image, I update the link in relevant
.mdfiles like. - I then copy those used images to the blog’s static directory while replacing white-spaces by underscores.
Step 4: Gitea Actions for Blog Repository
The blog repository contains the full Hugo site, including the synced content and theme.
Its workflow:
- Checkout the blog repository
- Check if the Hugo version is up-to-date. If not, it downloads the latest release.
- Build the static website using Hugo.
deploy_blog.yml
name: Deploy
on: [push]
jobs:
  Deploy:
    runs-on: ubuntu
    env:
      BLOG_FOLDER: /blog
    container:
      volumes:
        - /appli/data/blog:/blog
    steps:
      - name: Check out repository
        run: |
          cd ${BLOG_FOLDER}
          git config --global user.name "Gitea Actions"
          git config --global user.email "actions@local"
          git config --global --add safe.directory ${BLOG_FOLDER}
          git submodule update --init --recursive
          git fetch origin
          git reset --hard origin/main

      - name: Get current Hugo version
        run: |
          current_version=$(${BLOG_FOLDER}/hugo version | grep -oE 'v[0-9]+\.[0-9]+\.[0-9]+')
          echo "current_version=$current_version" | tee -a $GITEA_ENV

      - name: Verify latest Hugo version
        run: |
          latest_version=$(curl -s https://api.github.com/repos/gohugoio/hugo/releases/latest | grep -oP '"tag_name": "\K[^"]+')
          echo "latest_version=$latest_version" | tee -a $GITEA_ENV

      - name: Download latest Hugo version
        if: env.current_version != env.latest_version
        run: |
          rm -f ${BLOG_FOLDER}/{LICENSE,README.md,hugo}
          curl -L https://github.com/gohugoio/hugo/releases/download/$latest_version/hugo_extended_${latest_version#v}_Linux-64bit.tar.gz -o hugo.tar.gz
          tar -xzvf hugo.tar.gz -C ${BLOG_FOLDER}/

      - name: Generate the static files with Hugo
        run: |
          rm -f ${BLOG_FOLDER}/content/posts/template.md
          rm -rf ${BLOG_FOLDER}/private/* ${BLOG_FOLDER}/public/*
          ${BLOG_FOLDER}/hugo -D -b https://blog-dev.vezpi.me -s ${BLOG_FOLDER} -d ${BLOG_FOLDER}/private
          ${BLOG_FOLDER}/hugo -s ${BLOG_FOLDER} -d ${BLOG_FOLDER}/public
          chown 1000:1000 -R ${BLOG_FOLDER}
🚀 Results
This workflow allows me to focus on what matters most: writing and refining my content. By automating the publishing pipeline, from syncing my Obsidian notes to building the blog with Hugo, I no longer need to worry about manually managing content in a CMS.
Every note I draft can evolve naturally into a clear, structured article, and the technical workflow fades into the background. It’s a simple yet powerful way to turn personal knowledge into shareable documentation.