Intro
After building my own Kubernetes cluster in my homelab using kubeadm in that post, my next challenge is to expose a simple pod externally, reachable with an URL and secured with a TLS certificate verified by Let’s Encrypt.
To achieve this, I needed to configure several components:
- Service: Expose the pod inside the cluster and provide an access point.
- Ingress: Define routing rules to expose HTTP(S) services externally.
- Ingress Controller: Listen to Ingress resources and handles actual traffic routing.
- TLS Certificates: Secure traffic with HTTPS using certificates from Let’s Encrypt.
This post guides you through each step to understand how external access works in Kubernetes in a homelab environment.
Let’s dive in.
Helm
I use Helm, the de facto package manager for Kubernetes, to install external components like the Ingress controller or cert-manager.
Why Helm
Helm simplifies the deployment and management of Kubernetes applications. Instead of writing and maintaining large YAML manifests, Helm lets you install applications with a single command, using versioned and configurable charts.
Install Helm
I install Helm on my LXC bastion host, which already has access to the Kubernetes cluster:
curl https://baltocdn.com/helm/signing.asc | gpg --dearmor | sudo tee /usr/share/keyrings/helm.gpg > /dev/null
echo "deb [arch=$(dpkg --print-architecture) signed-by=/usr/share/keyrings/helm.gpg] https://baltocdn.com/helm/stable/debian/ all main" | sudo tee /etc/apt/sources.list.d/helm-stable-debian.list
sudo apt update
sudo apt install helm
Kubernetes Services
Before we can expose a pod externally, we need a way to make it reachable inside the cluster. That’s where Kubernetes Services come in.
Services act as the bridge between pods and the network, making sure applications remain reachable even as pods are rescheduled.
There are several types of Kubernetes Services, each serving a different purpose:
- ClusterIP exposes the Service on a cluster-internal IP, only accessible inside the cluster.
- NodePort exposes the Service on a static port on each node’s IP, accessible from outside the cluster.
- LoadBalancer exposes the Service on an external IP, typically using cloud integrations (or BGP in a homelab).
Expose a LoadBalancer Service with BGP
Initially, I considered using MetalLB to expose service IPs to my home network. That’s what I used in the past when relying on my ISP box as the main router. But after reading this post, Use Cilium BGP integration with OPNsense, I realize I can achieve the same (or even better) using BGP with my OPNsense router and Cilium, my CNI.
What Is BGP?
BGP (Border Gateway Protocol) is a routing protocol used to exchange network routes between systems. In the Kubernetes homelab context, BGP allows your Kubernetes nodes to advertise IPs directly to your network router or firewall. Your router then knows how to reach the IPs managed by your cluster.
So instead of MetalLB managing IP allocation and ARP replies, your nodes directly tell your router: « Hey, I own 192.168.1.240 ».
Legacy MetalLB Approach
Without BGP, MetalLB in Layer 2 mode works like this:
- Assigns a
LoadBalancerIP (e.g.,192.168.1.240) from a pool. - One node responds to ARP for that IP on your LAN.
Yes, MetalLB can also work with BGP, but what if my CNI (Cilium) can handle it out of the box?
BGP with Cilium
With Cilium + BGP, you get:
- Cilium’s agent on the node advertises LoadBalancer IPs over BGP.
- Your router learns that IP and routes to the correct node.
- No need for MetalLB.
BGP Setup
BGP is disabled by default on both OPNsense and Cilium. Let’s enable it on both ends.
On OPNsense
According to the official OPNsense documentation, enabling BGP requires installing a plugin.
Head to System > Firmware > Plugins and install the os-frr plugin:
 Install
 os-frr plugin in OPNsense
Once installed, enable the plugin under Routing > General:
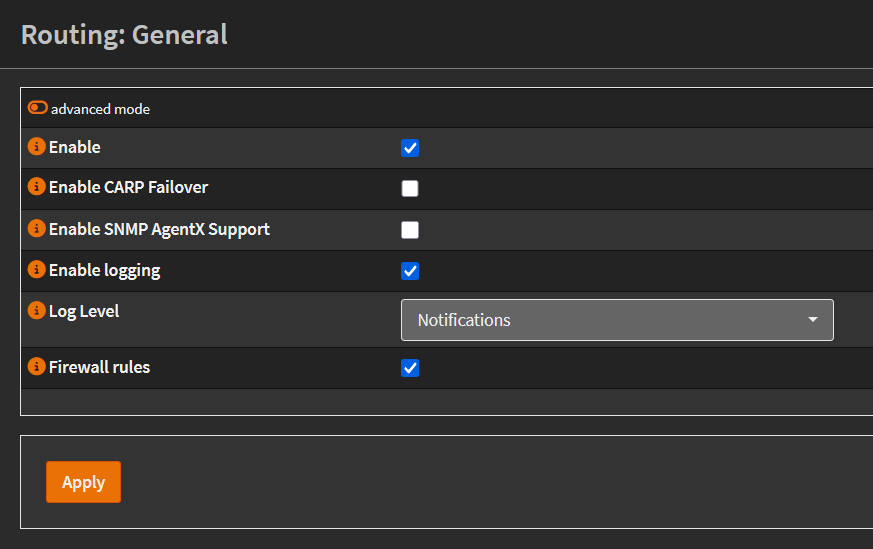 Enable routing in OPNsense
Then navigate to the BGP section. In the General tab:
- Tick the box to enable BGP.
- Set your BGP ASN. I used
64512, the first private ASN from the reserved range (see ASN table):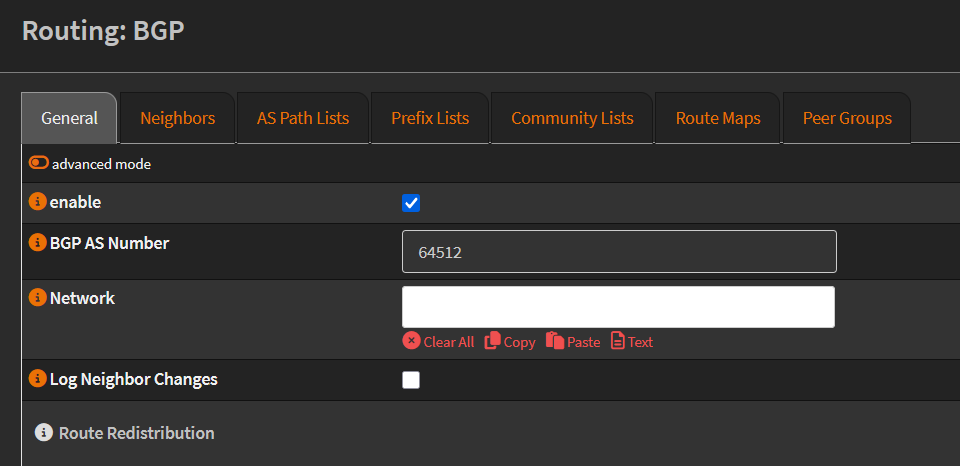 General BGP configuration in OPNsense
Now create your BGP neighbors. I’m only peering with my worker nodes (since only they run workloads). For each neighbor:
- Set the node’s IP in
Peer-IP - Use
64513as the Remote AS (Cilium’s ASN) - Set
Update-Source InterfacetoLab - Tick
Next-Hop-Self:
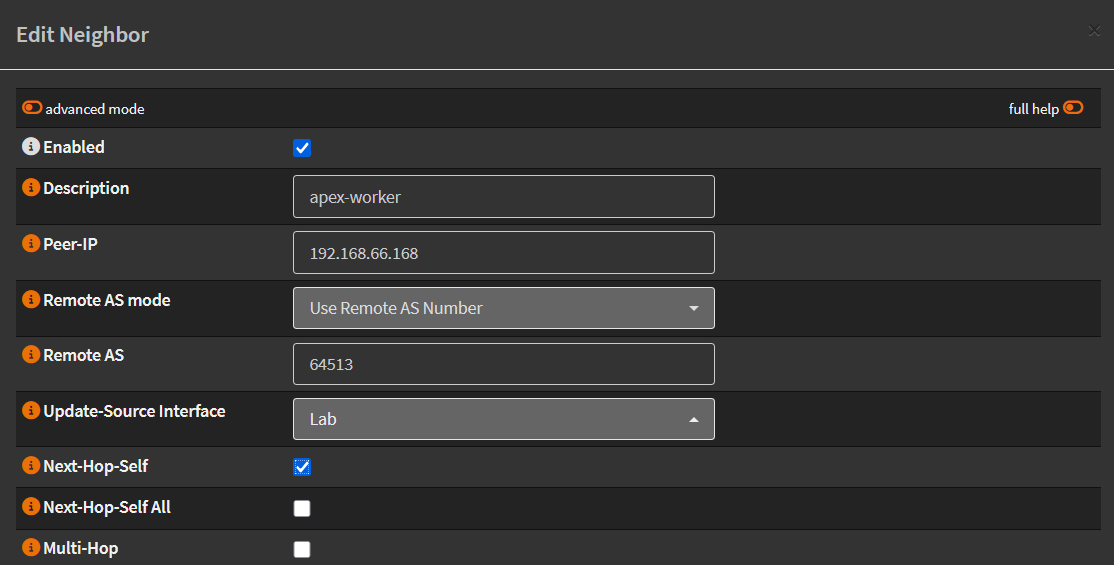 BGP neighbor configuration in OPNsense
Here’s how my neighbors list looks once complete:
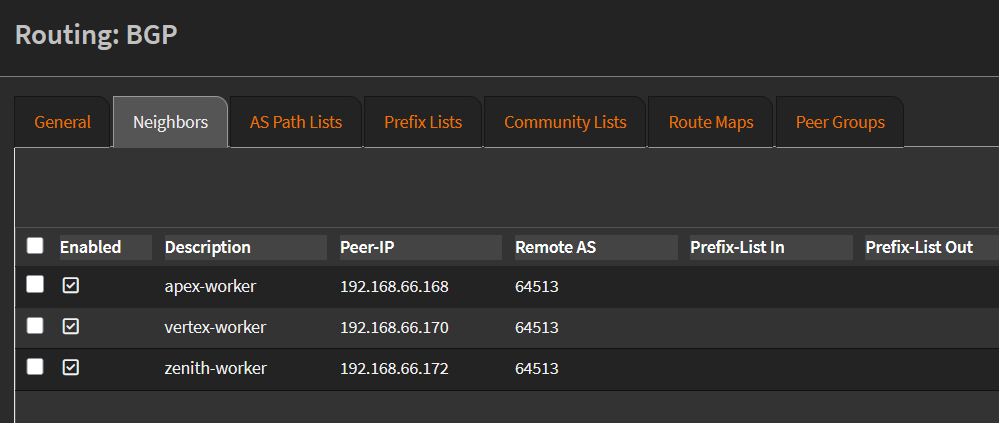 BGP neighbor list
Don’t forget to create a firewall rule allowing BGP (port 179/TCP) from the Lab VLAN to the firewall:
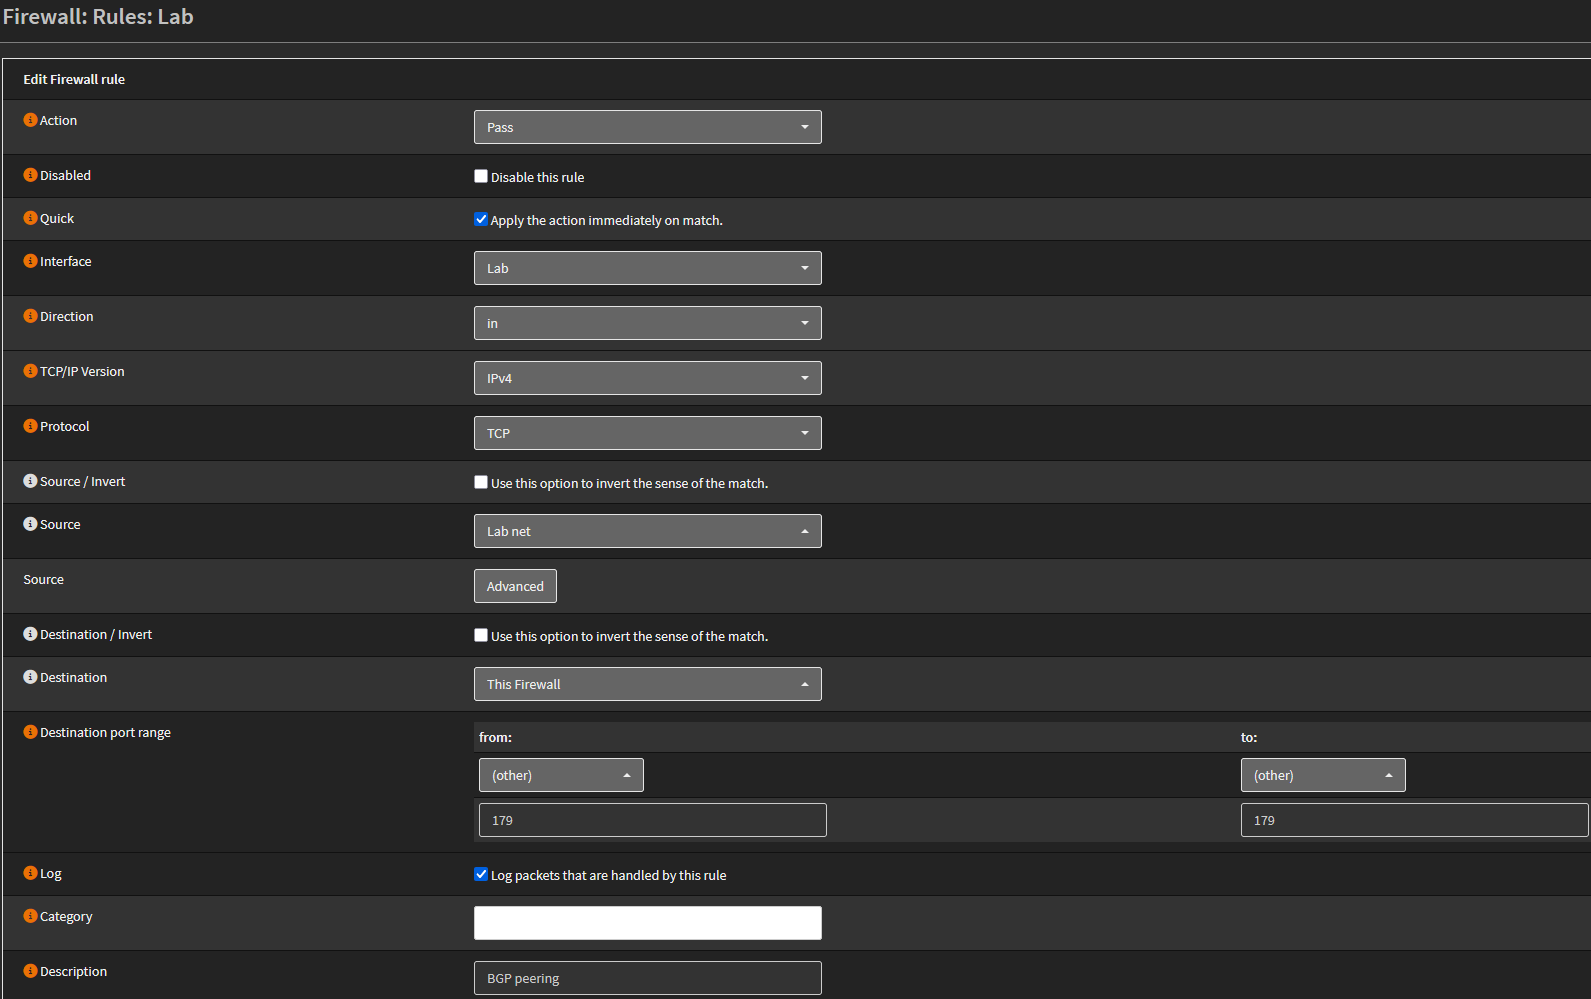 Allow TCP/179 from Lab to OPNsense
In Cilium
I already have Cilium installed and couldn’t find a way to enable BGP with the CLI, so I simply reinstall it with the BGP option:
cilium uninstall
cilium install --set bgpControlPlane.enabled=true
I configure only worker nodes to establish BGP peering by labeling them for the nodeSelector:
kubectl label node apex-worker node-role.kubernetes.io/worker=""
kubectl label node vertex-worker node-role.kubernetes.io/worker=""
kubectl label node zenith-worker node-role.kubernetes.io/worker=""
NAME            STATUS   ROLES           AGE    VERSION
apex-master     Ready    control-plane   5d4h   v1.32.7
apex-worker     Ready    worker          5d1h   v1.32.7
vertex-master   Ready    control-plane   5d1h   v1.32.7
vertex-worker   Ready    worker          5d1h   v1.32.7
zenith-master   Ready    control-plane   5d1h   v1.32.7
zenith-worker   Ready    worker          5d1h   v1.32.7
For the entire BGP configuration, I need:
- CiliumBGPClusterConfig: BGP settings for the Cilium cluster, including its local ASN and its peer
- CiliumBGPPeerConfig: Sets BGP timers, graceful restart, and route advertisement settings.
- CiliumBGPAdvertisement: Defines which Kubernetes services should be advertised via BGP.
- CiliumLoadBalancerIPPool: Configures the range of IPs assigned to Kubernetes LoadBalancer services.
---
apiVersion: cilium.io/v2alpha1
kind: CiliumBGPClusterConfig
metadata:
  name: bgp-cluster
spec:
  nodeSelector:
    matchLabels:
      node-role.kubernetes.io/worker: "" # Only for worker nodes
  bgpInstances:
  - name: "cilium-bgp-cluster"
    localASN: 64513 # Cilium ASN
    peers:
    - name: "pfSense-peer"
      peerASN: 64512 # OPNsense ASN
      peerAddress: 192.168.66.1  # OPNsense IP
      peerConfigRef:
        name: "bgp-peer"
---
apiVersion: cilium.io/v2alpha1
kind: CiliumBGPPeerConfig
metadata:
  name: bgp-peer
spec:
  timers:
    holdTimeSeconds: 9
    keepAliveTimeSeconds: 3
  gracefulRestart:
    enabled: true
    restartTimeSeconds: 15
  families:
    - afi: ipv4
      safi: unicast
      advertisements:
        matchLabels:
          advertise: "bgp"
---
apiVersion: cilium.io/v2alpha1
kind: CiliumBGPAdvertisement
metadata:
  name: bgp-advertisement
  labels:
    advertise: bgp
spec:
  advertisements:
    - advertisementType: "Service"
      service:
        addresses:
          - LoadBalancerIP
      selector:
        matchExpressions:
          - { key: somekey, operator: NotIn, values: [ never-used-value ] }
---
apiVersion: "cilium.io/v2alpha1"
kind: CiliumLoadBalancerIPPool
metadata:
  name: "dmz"
spec:
  blocks:
  - start: "192.168.55.20" # LB Range Start IP
    stop: "192.168.55.250" # LB Range End IP
Apply it:
kubectl apply -f bgp.yaml

ciliumbgpclusterconfig.cilium.io/bgp-cluster created
ciliumbgppeerconfig.cilium.io/bgp-peer created
ciliumbgpadvertisement.cilium.io/bgp-advertisement created
ciliumloadbalancerippool.cilium.io/dmz created
If everything works, you should see the BGP sessions established with your workers:
cilium bgp peers

Node            Local AS   Peer AS   Peer Address   Session State   Uptime   Family         Received   Advertised
apex-worker     64513      64512     192.168.66.1   established     6m30s    ipv4/unicast   1          2
vertex-worker   64513      64512     192.168.66.1   established     7m9s     ipv4/unicast   1          2
zenith-worker   64513      64512     192.168.66.1   established     6m13s    ipv4/unicast   1          2
Deploying a LoadBalancer Service with BGP
Let’s quickly validate that the setup works by deploying a test Deployment and LoadBalancer Service:
---
apiVersion: v1
kind: Service
metadata:
  name: test-lb
spec:
  type: LoadBalancer
  ports:
  - port: 80
    targetPort: 80
    protocol: TCP
    name: http
  selector:
    svc: test-lb
---
apiVersion: apps/v1
kind: Deployment
metadata:
  name: nginx
spec:
  selector:
    matchLabels:
      svc: test-lb
  template:
    metadata:
      labels:
        svc: test-lb
    spec:
      containers:
      - name: web
        image: nginx
        imagePullPolicy: IfNotPresent
        ports:
        - containerPort: 80
        readinessProbe:
          httpGet:
            path: /
            port: 80
Check if it gets an external IP:
kubectl get services test-lb

NAME         TYPE           CLUSTER-IP       EXTERNAL-IP     PORT(S)        AGE
test-lb      LoadBalancer   10.100.167.198   192.168.55.20   80:31350/TCP   169m
The service got the first IP from our defined pool: 192.168.55.20.
Now from any device on the LAN, try to reach that IP on port 80:
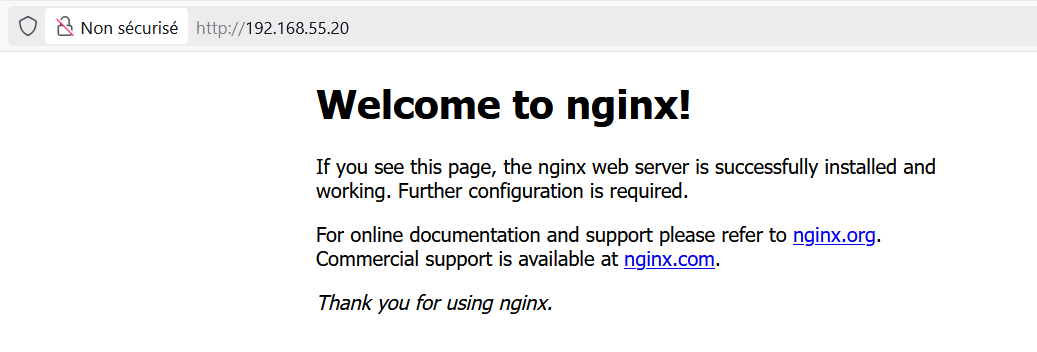
✅ Our pod is reachable through BGP-routed LoadBalancer IP, first step successful!
Kubernetes Ingress
We managed to expose a pod externally using a LoadBalancer service and a BGP-assigned IP address. This approach works great for testing, but it doesn’t scale well.
Imagine having 10, 20, or 50 different services, would I really want to allocate 50 IP addresses, and clutter my firewall and routing tables with 50 BGP entries? Definitely not.
That’s where Ingress kicks in.
What Is a Kubernetes Ingress?
A Kubernetes Ingress is an API object that manages external access to services in a cluster, typically HTTP and HTTPS, all through a single entry point.
Instead of assigning one IP per service, you define routing rules based on:
- Hostnames (
app1.vezpi.me,blog.vezpi.me, etc.) - Paths (
/grafana,/metrics, etc.)
With Ingress, I can expose multiple services over the same IP and port (usually 443 for HTTPS), and Kubernetes will know how to route the request to the right backend service.
Here is an example of a simple Ingress, routing traffic of test.vezpi.me to the test-lb service on port 80:
---
apiVersion: networking.k8s.io/v1
kind: Ingress
metadata:
  name: test-ingress
spec:
  rules:
    - host: test.vezpi.me
      http:
        paths:
          - path: /
            pathType: Prefix
            backend:
              service:
                name: test-lb
                port:
                  number: 80
Ingress Controller
On its own, an Ingress is just a set of routing rules. It doesn’t actually handle traffic. To bring it to life, I need an Ingress Controller, which will:
- Watches the Kubernetes API for
Ingressresources. - Opens HTTP(S) ports on a
LoadBalancerorNodePortservice. - Routes traffic to the correct
Servicebased on theIngressrules.
Popular controllers include NGINX, Traefik, HAProxy, and more. Since I was looking for something simple, stable, and widely adopted, I picked the NGINX Ingress Controller.
Install NGINX Ingress Controller
I use Helm to install the controller, and I set controller.ingressClassResource.default=true so that all my future ingresses use it by default:
helm install ingress-nginx \
  --repo=https://kubernetes.github.io/ingress-nginx \
  --namespace=ingress-nginx \
  --create-namespace ingress-nginx \
  --set controller.ingressClassResource.default=true \
  --set controller.config.strict-validate-path-type=false
The controller is deployed and exposes a LoadBalancer service. In my setup, it picks the second available IP in the BGP range:
NAME                       TYPE           CLUSTER-IP      EXTERNAL-IP     PORT(S)                      AGE   SELECTOR
ingress-nginx-controller   LoadBalancer   10.106.236.13   192.168.55.21   80:31195/TCP,443:30974/TCP   75s   app.kubernetes.io/component=controller,app.kubernetes.io/instance=ingress-nginx,app.kubernetes.io/name=ingress-nginx
Reserving a Static IP for the Controller
I want to make sure the Ingress Controller always receives the same IP address. To do this, I created two separate Cilium IP pools:
- One dedicated for the Ingress Controller with a single IP.
- One for everything else.
---
# Pool for Ingress Controller
apiVersion: cilium.io/v2alpha1
kind: CiliumLoadBalancerIPPool
metadata:
  name: ingress-nginx
spec:
  blocks:
    - cidr: 192.168.55.55/32
  serviceSelector:
    matchLabels:
      app.kubernetes.io/name: ingress-nginx
      app.kubernetes.io/component: controller
---
# Default pool for other services
apiVersion: cilium.io/v2alpha1
kind: CiliumLoadBalancerIPPool
metadata:
  name: default
spec:
  blocks:
    - start: 192.168.55.100
      stop: 192.168.55.250
  serviceSelector:
    matchExpressions:
      - key: app.kubernetes.io/name
        operator: NotIn
        values:
          - ingress-nginx
After replacing the previous shared pool with these two, the Ingress Controller gets the desired IP 192.168.55.55, and the test-lb service picks 192.168.55.100 as expected:
NAMESPACE       NAME                                 TYPE           CLUSTER-IP       EXTERNAL-IP      PORT(S)                      AGE
default         test-lb                              LoadBalancer   10.100.167.198   192.168.55.100   80:31350/TCP                 6h34m
ingress-nginx   ingress-nginx-controller             LoadBalancer   10.106.236.13    192.168.55.55    80:31195/TCP,443:30974/TCP   24m
Associate a Service to an Ingress
Now let’s wire up a service to this controller.
First, I update the original LoadBalancer service and convert it into a ClusterIP (since the Ingress Controller will now expose it externally):
---
apiVersion: v1
kind: Service
metadata:
  name: test-lb
spec:
  ports:
    - port: 80
      targetPort: 80
      protocol: TCP
      name: http
  selector:
    svc: test-lb
---
apiVersion: networking.k8s.io/v1
kind: Ingress
metadata:
  name: test-ingress
spec:
  rules:
    - host: test.vezpi.me
      http:
        paths:
          - path: /
            pathType: Prefix
            backend:
              service:
                name: test-lb
                port:
                  number: 80
Then I apply the Ingress manifest as shown earlier to expose the service over HTTP.
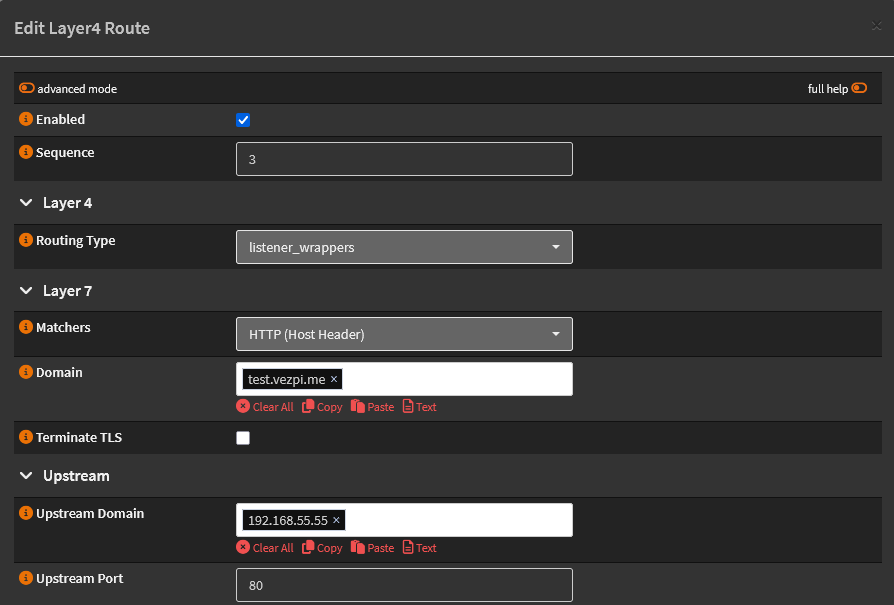
Since I’m using the Caddy plugin on OPNsense, I still need a local Layer 4 route to forward traffic for test.vezpi.me to the NGINX Ingress Controller IP (192.168.55.55). I simply create a new rule in the Caddy plugin.
Now let’s test it in the browser:
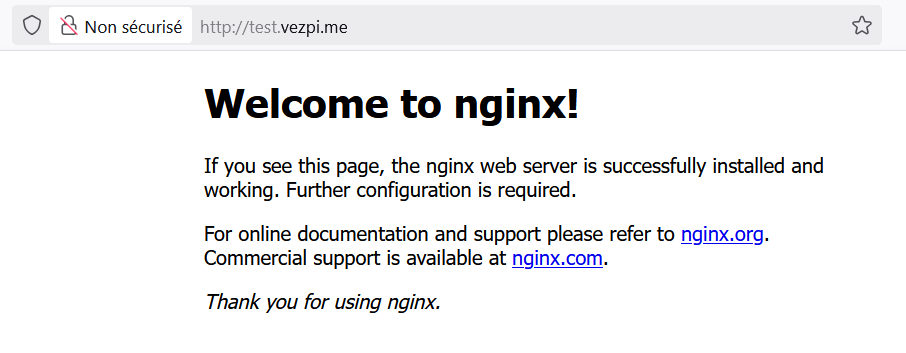 Test Ingress on HTTP
✅ Our pod is now reachable on its HTTP URL using an Ingress. Second step complete!
Secure Connection with TLS
Exposing services over plain HTTP is fine for testing, but in practice we almost always want HTTPS. TLS certificates encrypt traffic and provide authenticity and trust to users.
Cert-Manager
To automate certificate management in Kubernetes, we use Cert-Manager. It can request, renew, and manage TLS certificates without manual intervention.
Install Cert-Manager
We deploy it with Helm on the cluster:
helm repo add jetstack https://charts.jetstack.io
helm repo update
helm install cert-manager jetstack/cert-manager \
  --namespace cert-manager \
  --create-namespace \
  --set crds.enabled=true
Setup Cert-Manager
Next, we configure a ClusterIssuer for Let’s Encrypt. This resource tells Cert-Manager how to request certificates:
---
apiVersion: cert-manager.io/v1
kind: ClusterIssuer
metadata:
  name: letsencrypt-staging
spec:
  acme:
    server: https://acme-staging-v02.api.letsencrypt.org/directory
    email: <email>
    privateKeySecretRef:
      name: letsencrypt-staging-key
    solvers:
    - http01:
        ingress:
          ingressClassName: nginx
ℹ️ Here I define the staging Let’s Encrypt ACME server for testing purposes. Staging certificates are not trusted by browsers, but they prevent hitting Let’s Encrypt’s strict rate limits during development.
Apply it:
kubectl apply -f clusterissuer.yaml
Verify if your ClusterIssuer is Ready:
kubectl get clusterissuers.cert-manager.io
NAME                  READY   AGE
letsencrypt-staging   True    14m
If it doesn’t become Ready, use kubectl describe on the resource to troubleshoot.
Add TLS in an Ingress
Now we can secure our service with TLS by adding a tls section in the Ingress spec and referencing the ClusterIssuer:
---
apiVersion: networking.k8s.io/v1
kind: Ingress
metadata:
  name: test-ingress-https
  annotations:
    nginx.ingress.kubernetes.io/rewrite-target: /
    cert-manager.io/cluster-issuer: letsencrypt-staging
spec:
  tls:
    - hosts:
      - test.vezpi.me
      secretName: test-vezpi-me-tls
  rules:
    - host: test.vezpi.me
      http:
        paths:
          - path: /
            pathType: Prefix
            backend:
              service:
                name: test-lb
                port:
                  number: 80
Behind the scenes, Cert-Manager goes through this workflow to issue the certificate:
- Detects the
Ingresswithtlsand theClusterIssuer. - Creates a Certificate CRD that describes the desired cert + Secret storage.
- Creates an Order CRD to represent one issuance attempt with Let’s Encrypt.
- Creates a Challenge CRD (e.g., HTTP-01 validation).
- Provisions a temporary solver Ingress/Pod to solve the challenge.
- Creates a CertificateRequest CRD and sends the CSR to Let’s Encrypt.
- Receives the signed certificate and stores it in a Kubernetes Secret.
- The Ingress automatically uses the Secret to serve HTTPS.
✅ Once this process completes, your Ingress is secured with a TLS certificate.

Switch to Production Certificates
Once staging works, we can safely switch to the production ACME server to get a trusted certificate from Let’s Encrypt:
---
apiVersion: cert-manager.io/v1
kind: ClusterIssuer
metadata:
  name: letsencrypt
spec:
  acme:
    server: https://acme-v02.api.letsencrypt.org/directory
    email: <email>
    privateKeySecretRef:
      name: letsencrypt-key
    solvers:
    - http01:
        ingress:
          ingressClassName: nginx
Update the Ingress to reference the new ClusterIssuer:
---
apiVersion: networking.k8s.io/v1
kind: Ingress
metadata:
  name: test-ingress-https
  annotations:
    cert-manager.io/cluster-issuer: letsencrypt
spec:
  tls:
    - hosts:
      - test.vezpi.me
      secretName: test-vezpi-me-tls
  rules:
    - host: test.vezpi.me
      http:
        paths:
          - path: /
            pathType: Prefix
            backend:
              service:
                name: test-lb
                port:
                  number: 80
Since the staging certificate is still stored in the Secret, I delete it to trigger a fresh request against production:
kubectl delete secret test-vezpi-me-tls
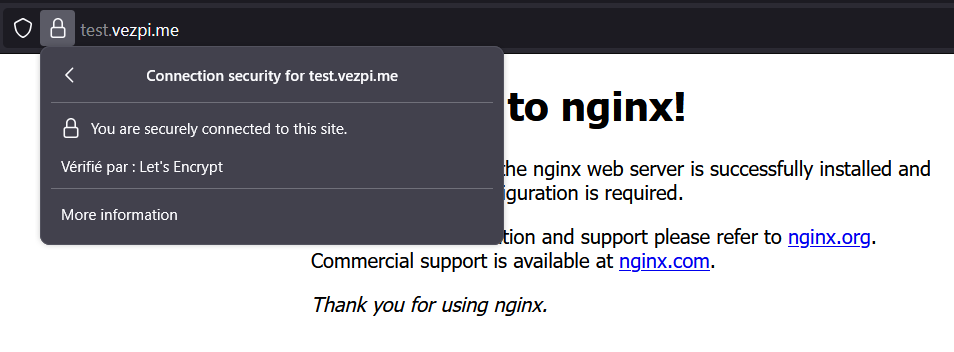
🎉 My Ingress is now secured with a valid TLS certificate from Let’s Encrypt. Requests to https://test.vezpi.me are encrypted end-to-end and routed by the NGINX Ingress Controller to my nginx pod:
Conclusion
In this journey, I started from the basics, exposing a single pod with a LoadBalancer service, and step by step built a production-ready setup:
- Learned about Kubernetes Services and their different types.
- Used BGP with Cilium and OPNsense to assign external IPs directly from my network.
- Introduced Ingress to scale better, exposing multiple services through a single entry point.
- Installed the NGINX Ingress Controller to handle routing.
- Automated certificate management with Cert-Manager, securing my services with Let’s Encrypt TLS certificates.
🚀 The result: my pod is now reachable at a real URL, secured with HTTPS, just like any modern web application.
This is a huge milestone in my homelab Kubernetes journey. In the next article, I want to explore persistent storage and connect my Kubernetes cluster to my Ceph setup on Proxmox.