Intro
I recently encountered my first real problem, my physical OPNsense box crashed because of a kernel panic, I’ve detailed what happened in that post.
That failure made me rethink my setup. A unique firewall is a single point of failure, so to improve resilience I decided to take a new approach: virtualize OPNsense.
Of course, just running one VM wouldn’t be enough. To get real redundancy, I need two OPNsense instances in High Availability, with one active and the other standing by.
Before rolling this out in my network, I wanted to demonstrate the idea in my homelab. In this post, I’ll walk through the proof of concept: deploying two OPNsense VMs inside a Proxmox VE cluster and configuring them to provide a highly available firewall.
Current Infrastructure
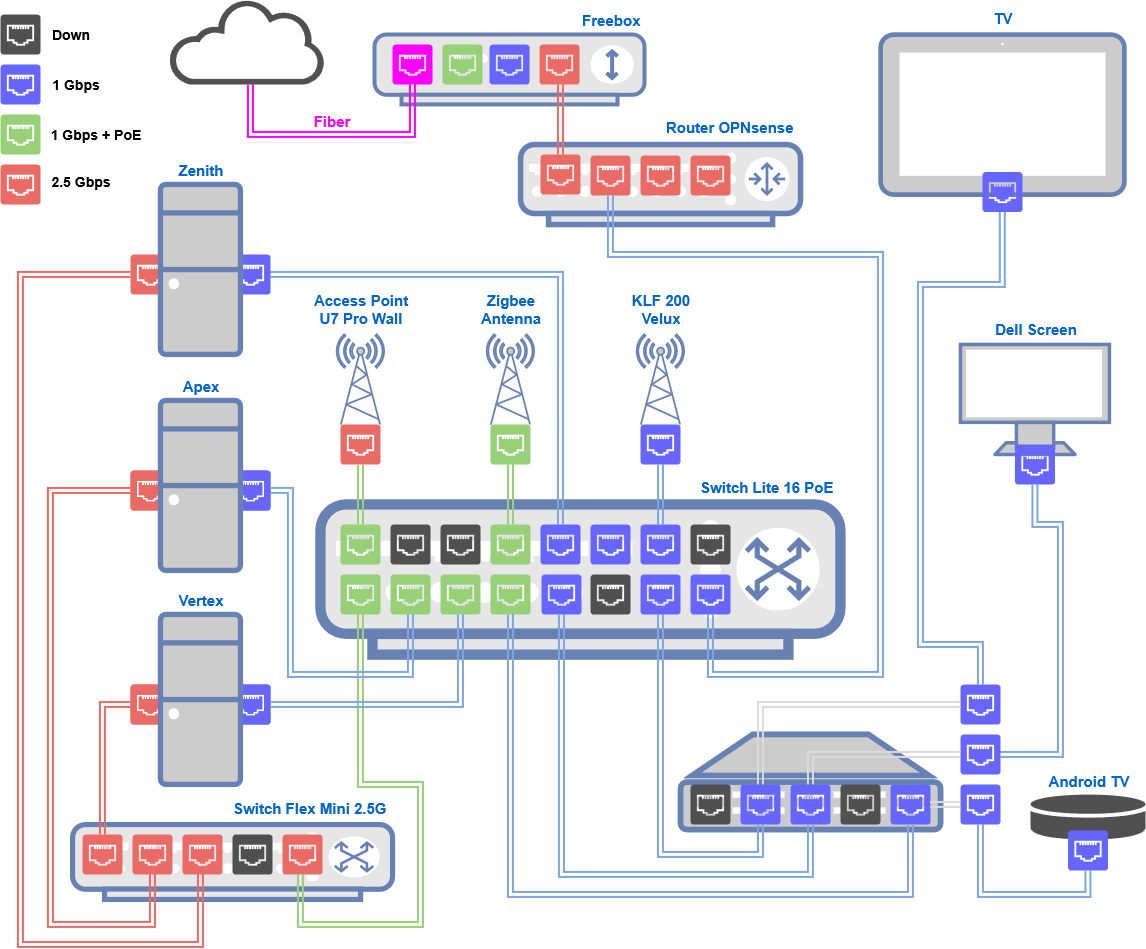
On top of my setup, my ISP modem, a Freebox in bridge mode, connects directly to the igc0 interface of my OPNsense box, serving as the WAN. On igc1, the LAN is linked to my main switch using a trunk port, with VLAN 1 as the native VLAN for my management network.
The switch also connects my three Proxmox nodes, each on trunk ports with the same native VLAN. Every node has two NICs: one for general networking and the other dedicated to the Ceph storage network, which runs through a separate 2.5 Gbps switch.
Since the OPNsense crash, I’ve simplified things by removing the LACP link, it wasn’t adding real value:
Until recently, Proxmox networking on my cluster was very basic: each node was configured individually with no real overlay logic. That changed after I explored Proxmox SDN, where I centralized VLAN definitions across the cluster. I described that step in this article.
Proof of Concept
Time to move into the lab. Here are the main steps:
- Add some VLANs in my Homelab
- Create Fake ISP router
- Build two OPNsense VMs
- Configure high availability
- Test failover
Add VLANs in my Homelab
For this experiment, I create 3 new VLANs:
- VLAN 101: POC WAN
- VLAN 102: POC LAN
- VLAN 103: POC pfSync
In the Proxmox UI, I navigate to Datacenter > SDN > VNets and I click Create:

Once the 3 new VLAN have been created, I apply the configuration.
Additionally, I add these 3 VLANs in my UniFi Controller. Here only the VLAN ID and name are needed, since the controller will propagate them through the trunks connected to my Proxmox VE nodes.
Create “Fake ISP Box“ VM
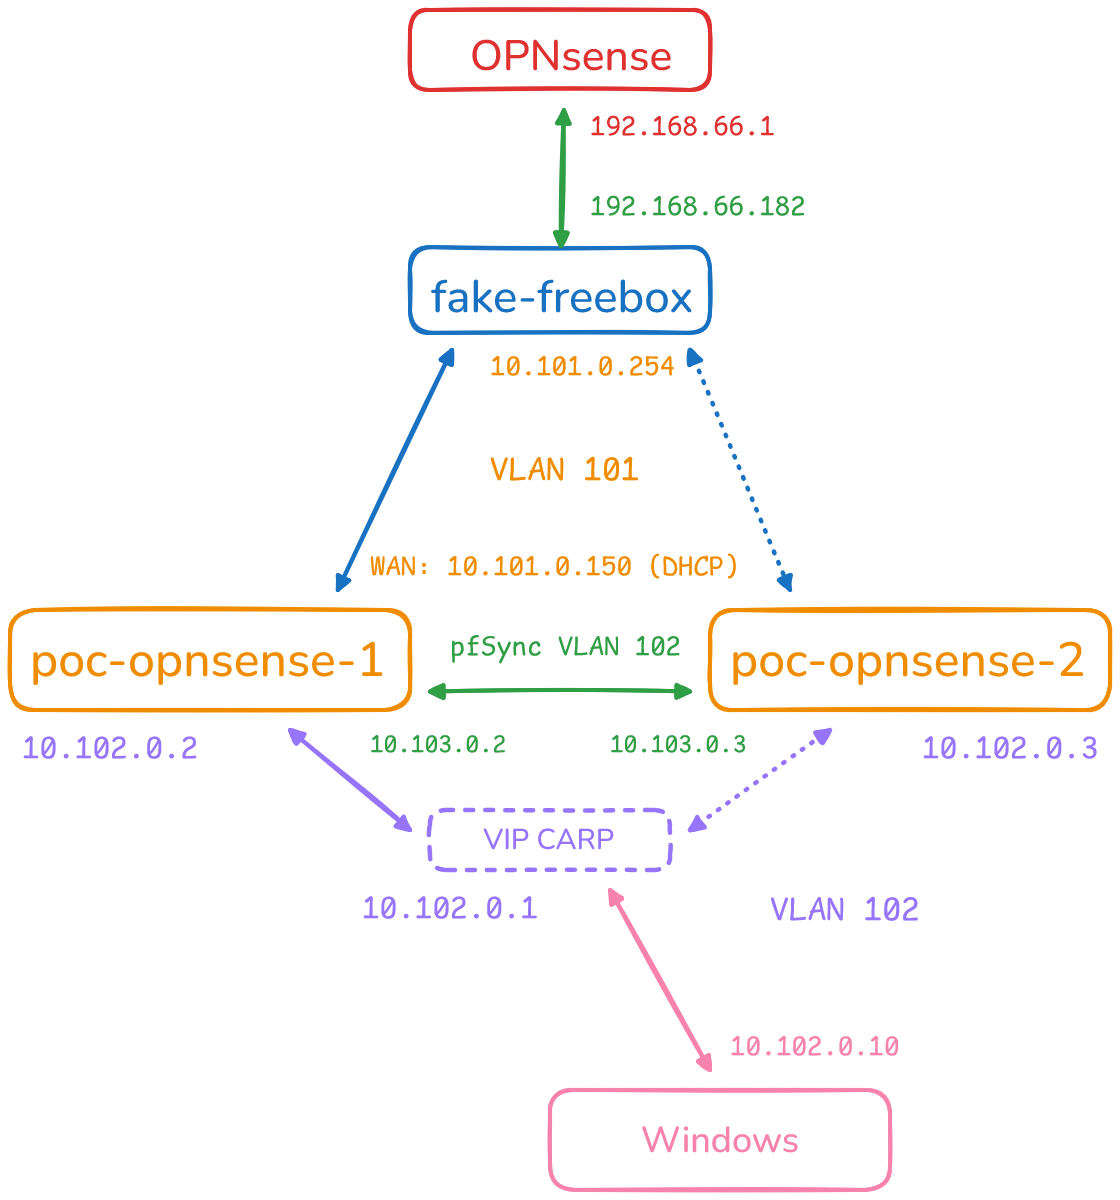
To simulate my current ISP modem, I built a VM named fake-freebox. This VM routes traffic between the POC WAN and Lab networks and runs a DHCP server that serves only one lease, just like my real Freebox in bridge mode.
This VM has 2 NICs, I configure Netplan with:
eth0(POC WAN VLAN 101): static IP address10.101.0.254/24- enp6s19 (Lab VLAN 66): DHCP address given by my current OPNsense router, in upstream
network:
  version: 2
  ethernets:
    eth0:
      addresses:
        - 10.101.0.254/24
    enp6s19:
      dhcp4: true
I enable packet forward to allow this VM to route traffic:
echo "net.ipv4.ip_forward=1" | sudo tee -a /etc/sysctl.conf
sudo sysctl -p
Then I set up masquerading so packets leaving through the lab network wouldn’t be dropped by my current OPNsense:
sudo iptables -t nat -A POSTROUTING -o enp6s19 -j MASQUERADE
sudo apt install iptables-persistent -y
sudo netfilter-persistent save
I install dnsmasq as a lightweight DHCP server:
sudo apt install dnsmasq -y
In /etc/dnsmasq.conf, I configure to serve exactly one lease (10.101.0.150) with DNS pointing to my current OPNsense router, in the Lab VLAN:
interface=eth0
bind-interfaces
dhcp-range=10.101.0.150,10.101.0.150,255.255.255.0,12h
dhcp-option=3,10.101.0.254      # default gateway = this VM
dhcp-option=6,192.168.66.1      # DNS server
I restart the dnsmasq service to apply the configuration:
sudo systemctl restart dnsmasq
The fake-freebox VM is now ready to serve DHCP on VLAN 101 and serve only one lease.
Build OPNsense VMs
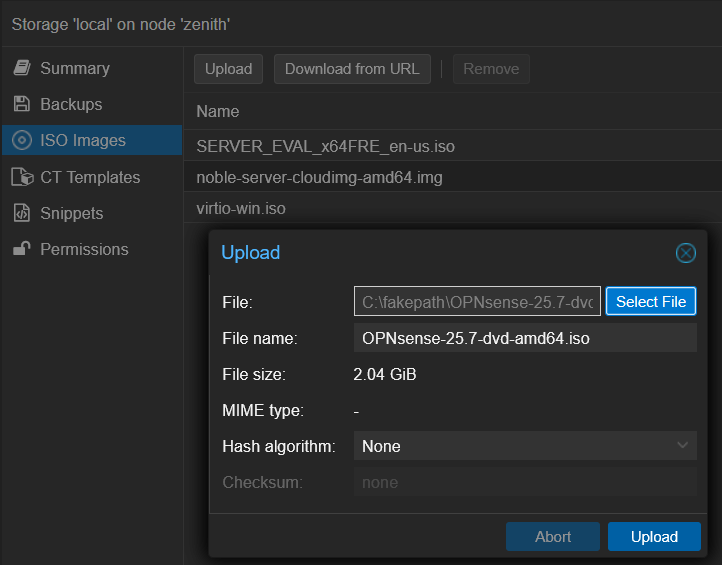
First I download the OPNsense ISO and upload it to one of my Proxmox nodes:
VM Creation
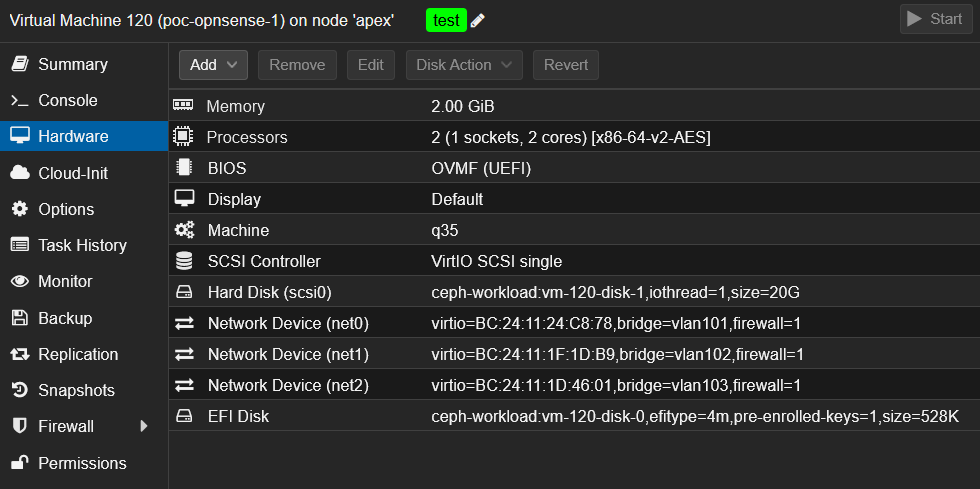
I create the first VM poc-opnsense-1, with the following settings:
- OS type: Linux (even though OPNsense is FreeBSD-based)
- Machine type:
q35 - BIOS:
OVMF (UEFI), EFI storage on my Ceph pool - Disk: 20 GiB also on Ceph
- CPU/RAM: 2 vCPU, 2 GiB RAM
- NICs:
- VLAN 101 (POC WAN)
- VLAN 102 (POC LAN)
- VLAN 103 (POC pfSync)
ℹ️ Before booting it, I clone this VM to prepare the second one: poc-opnsense-2
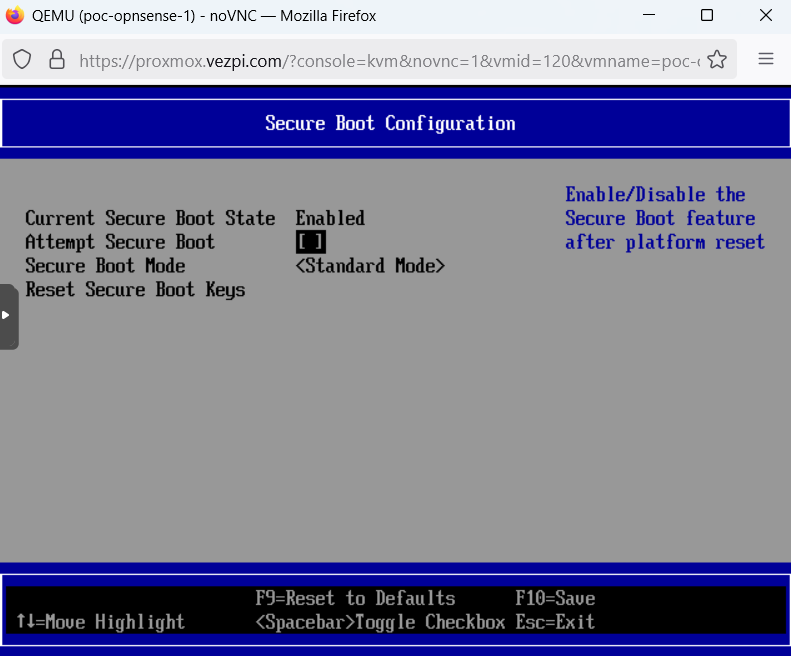
On first boot, I hit an “access denied” error. To fix this, I enter the BIOS, go to Device Manager > Secure Boot Configuration, uncheck Attempt Secure Boot, and restart the VM:
OPNsense Installation
The VM boots on the ISO, I touch nothing until I get into the login screen:
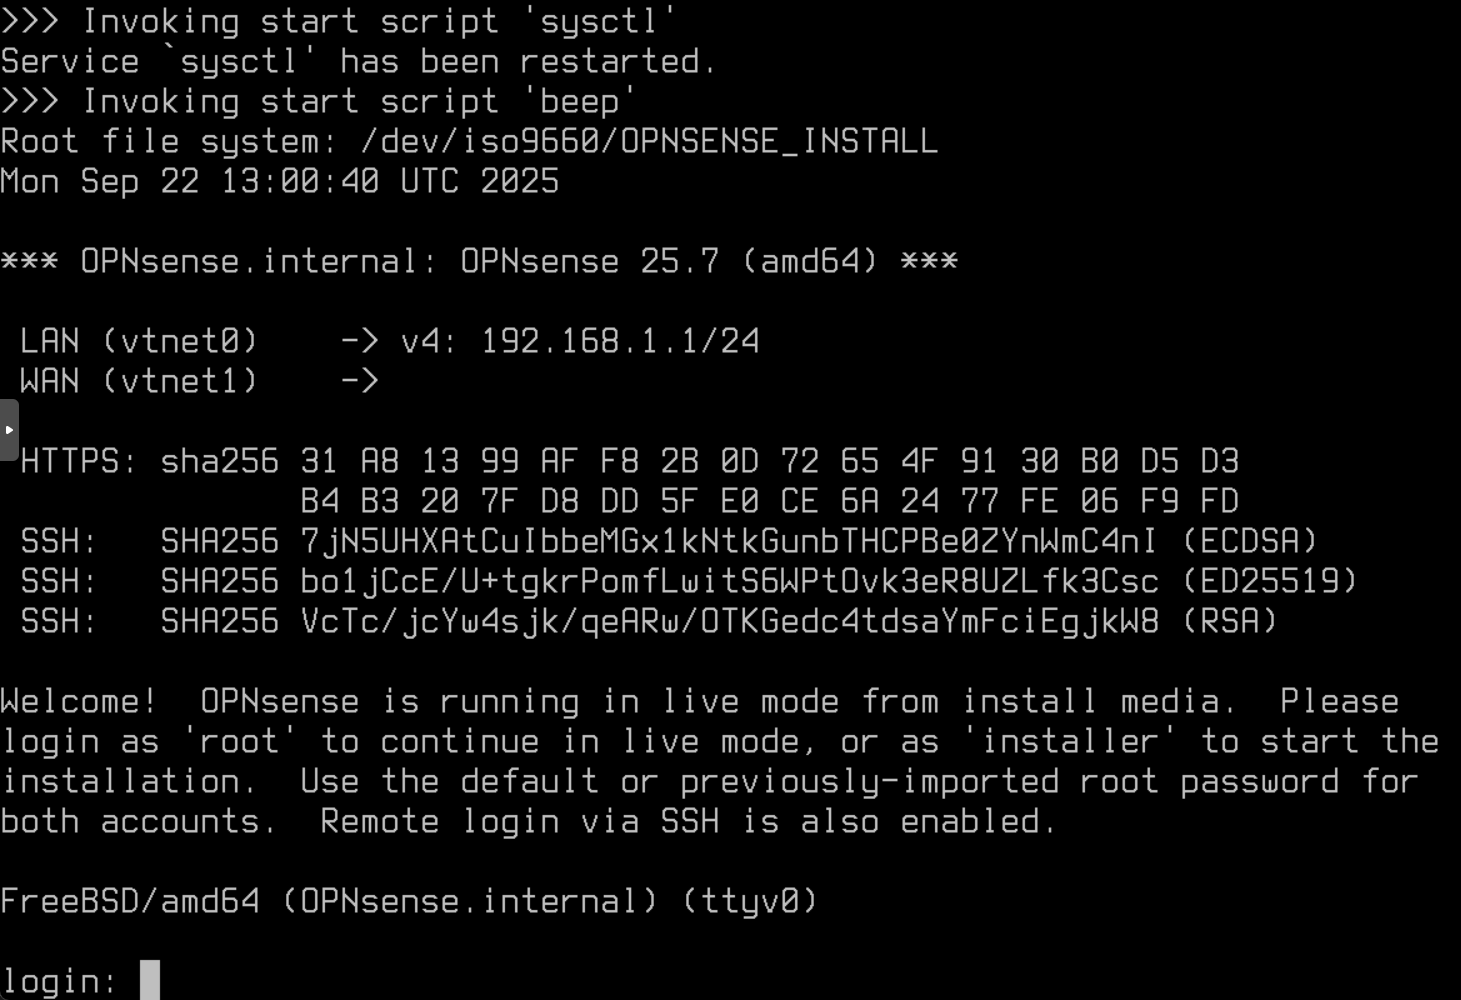
I log in as installer / opnsense and launch the installer. I select the QEMU hard disk of 20GB as destination and launch the installation:
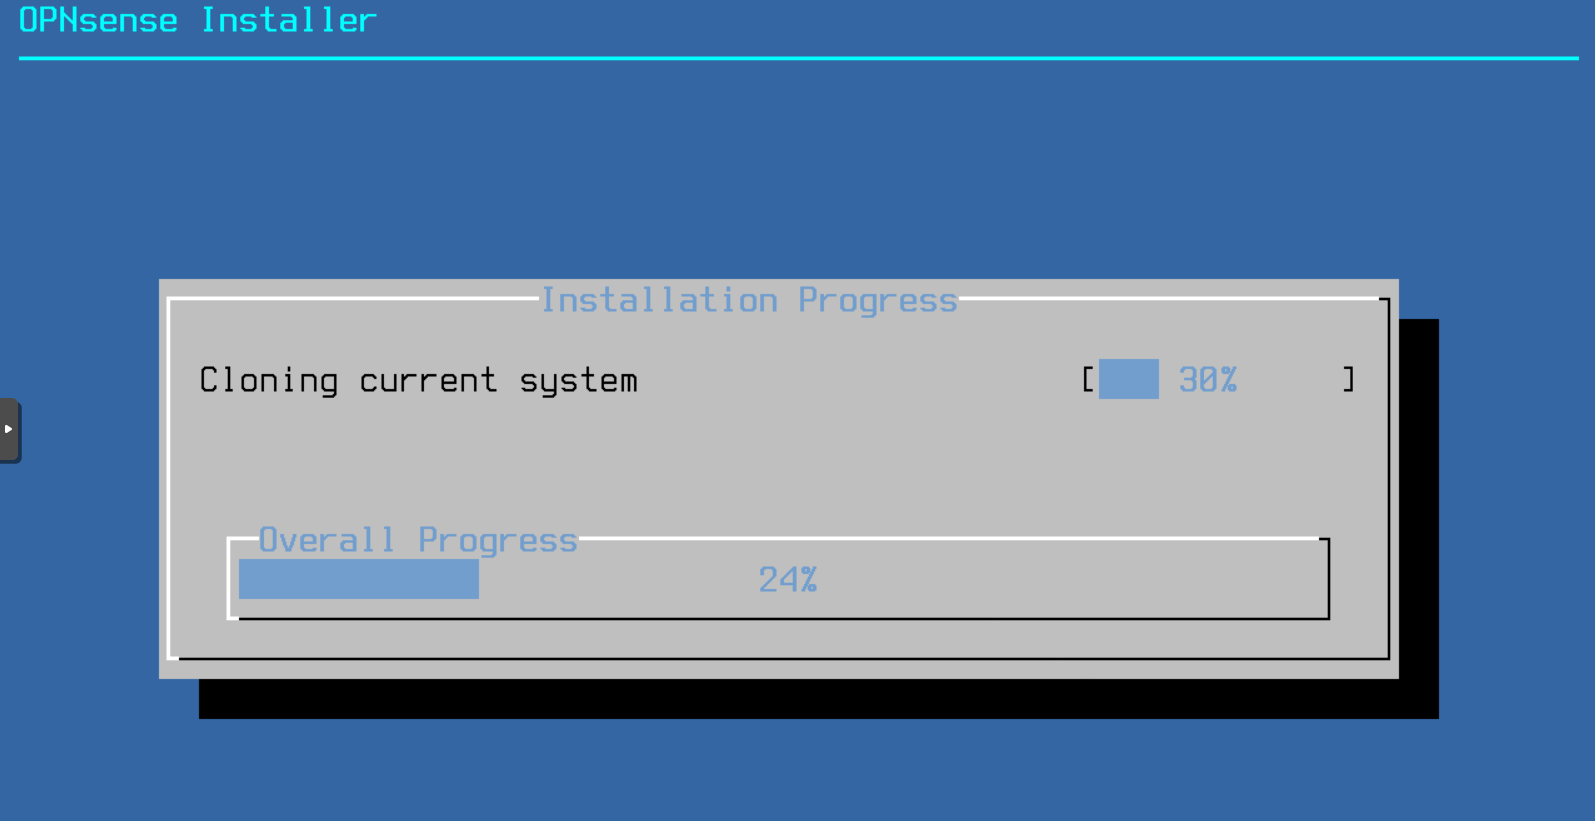
Once the installation is finished, I remove the ISO from the drive and restart the machine.
OPNsense Basic Configuration
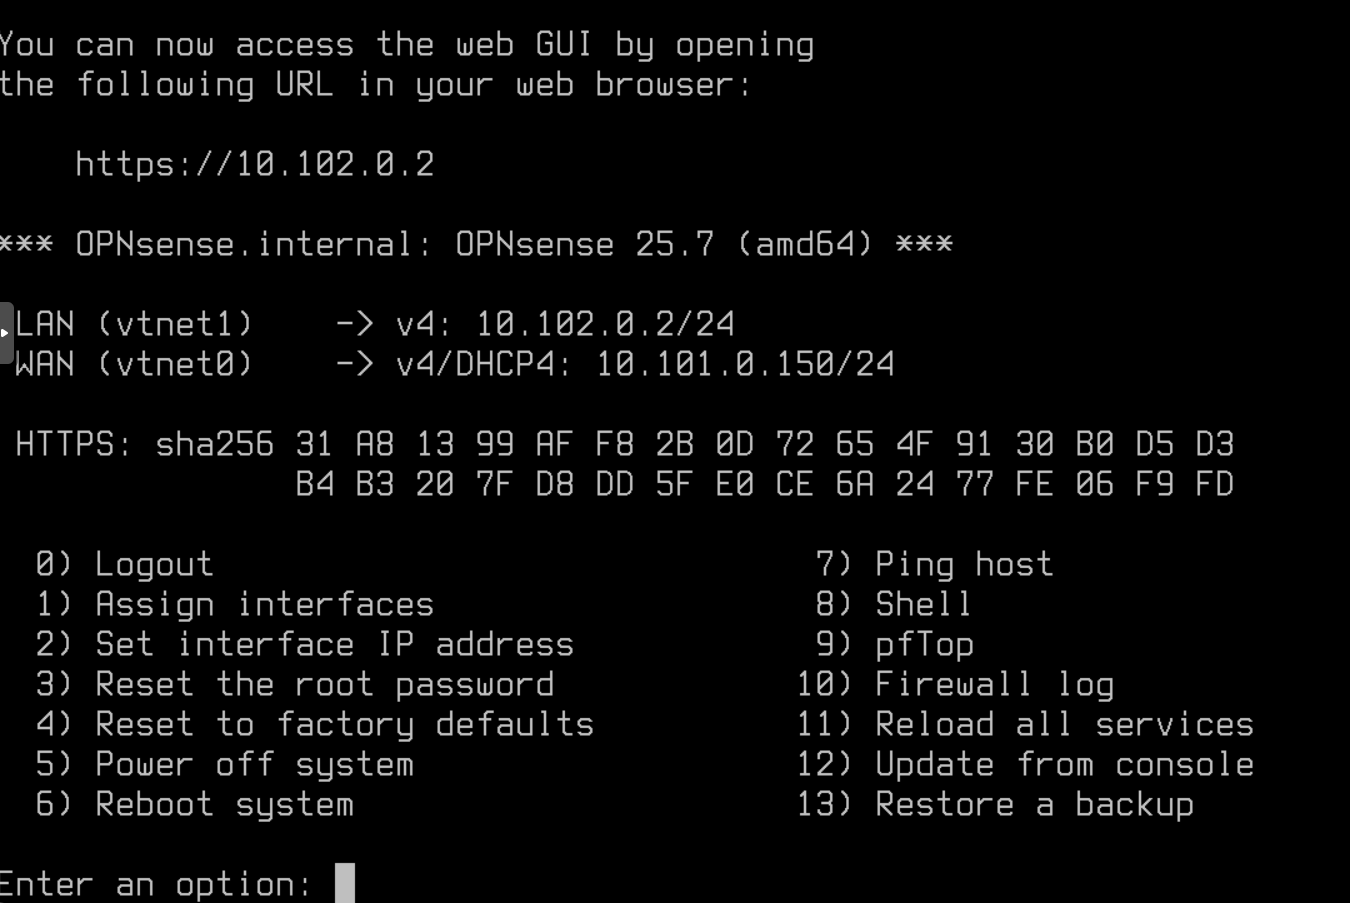
After reboot, I log in as root / opnsense and get into the CLI menu:
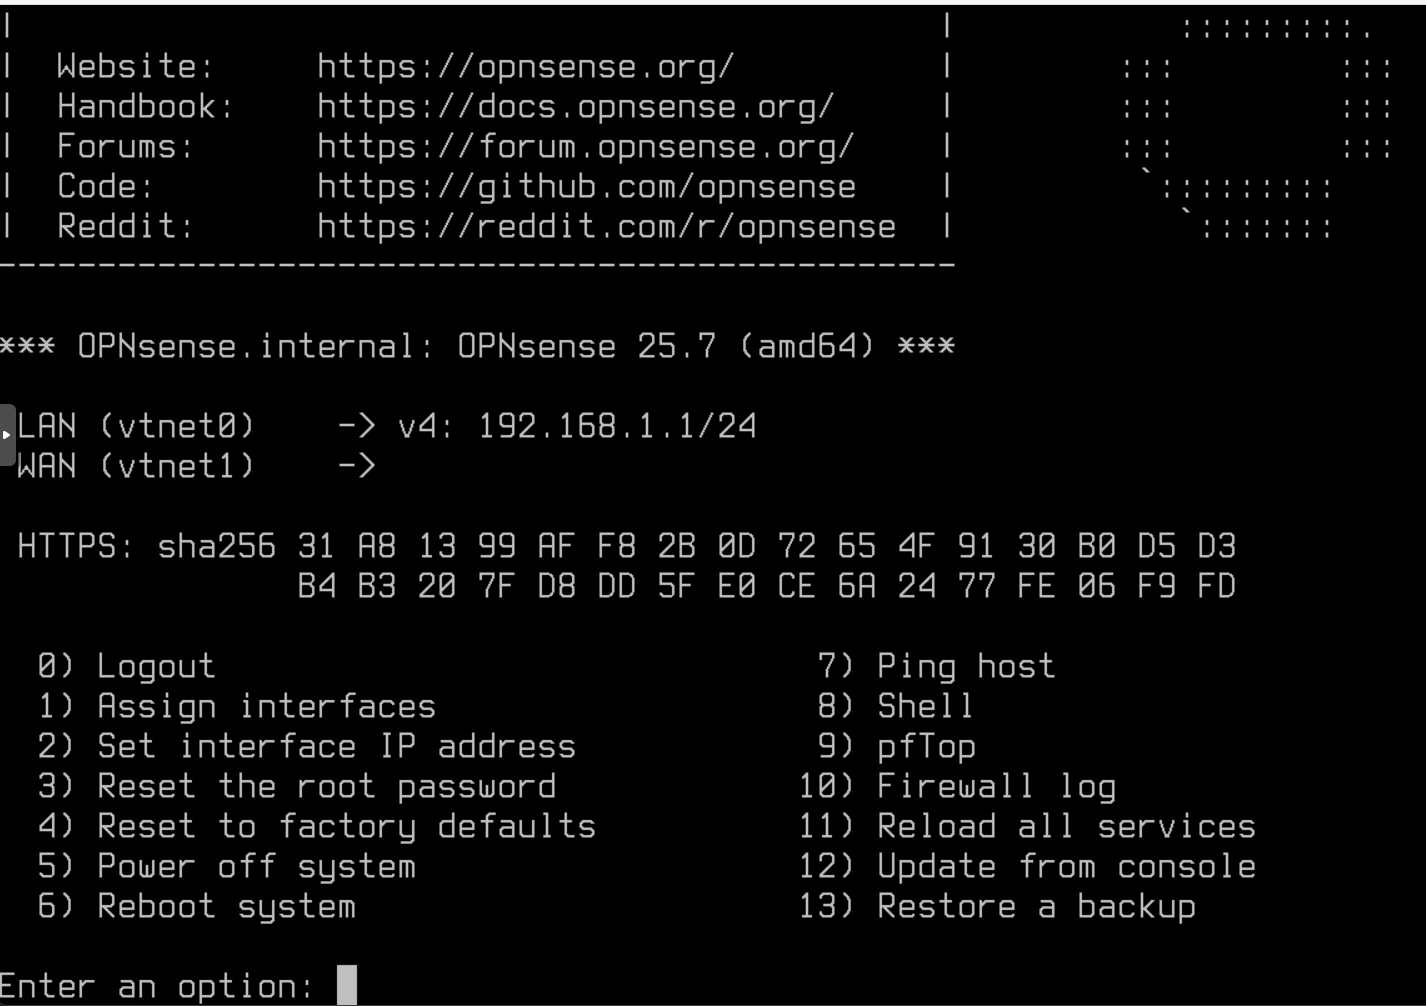
Using option 1, I reassigned interfaces:
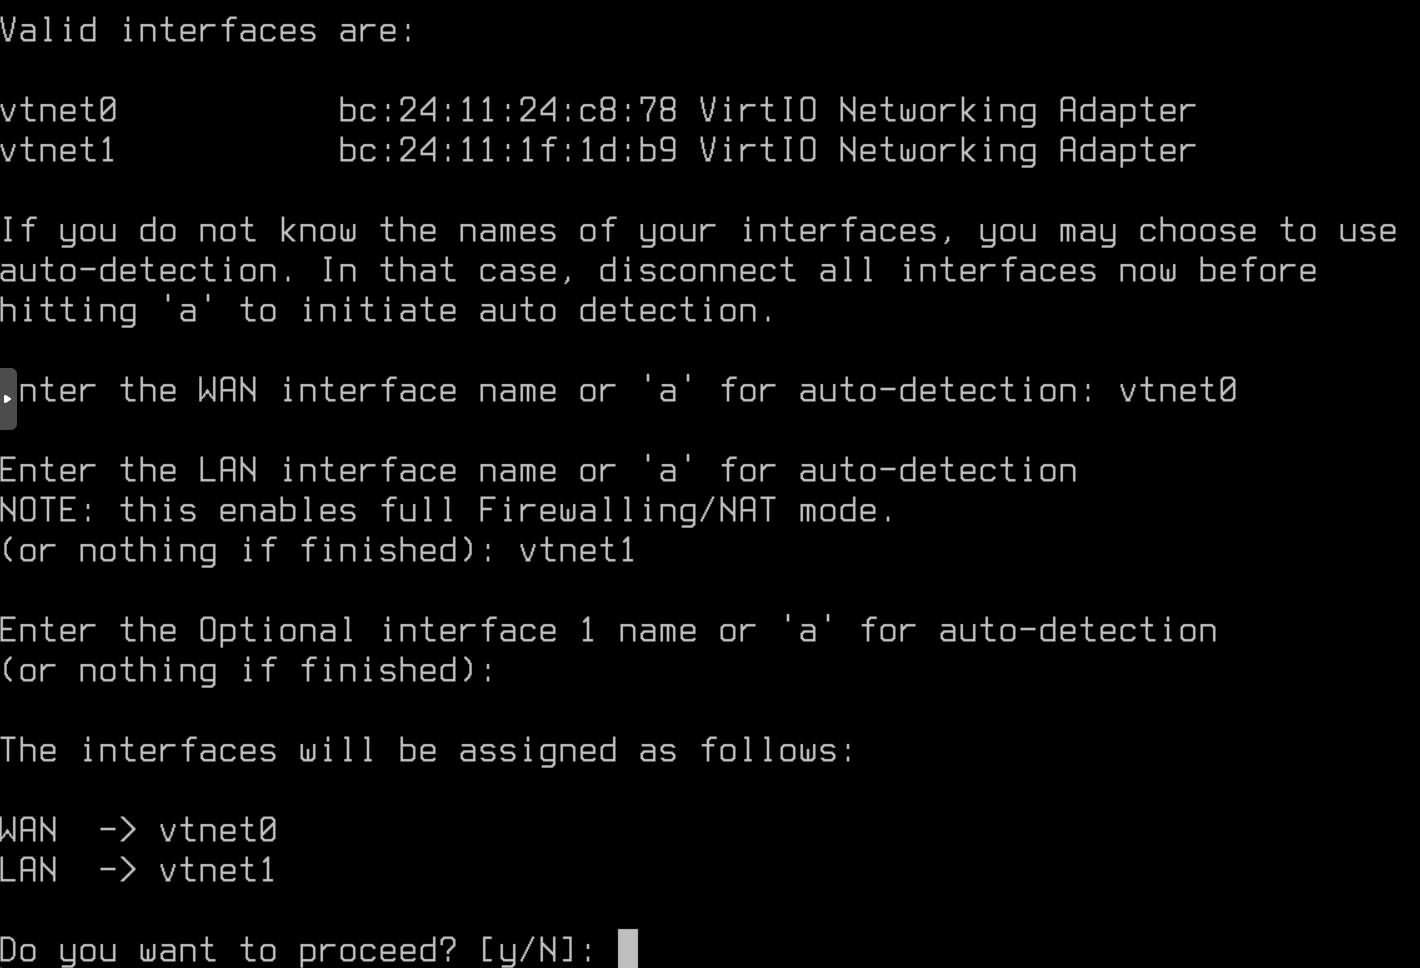
The WAN interface successfully pulled 10.101.0.150/24 from the fake-freebox. I set the LAN interface to 10.102.0.2/24 and configured a DHCP pool from 10.102.0.10 to 10.102.0.99:
✅ The first VM is ready, I start over for the second OPNsense VM, poc-opnsense-2 which will have the IP 10.102.0.3
Configure OPNsense Highly Available
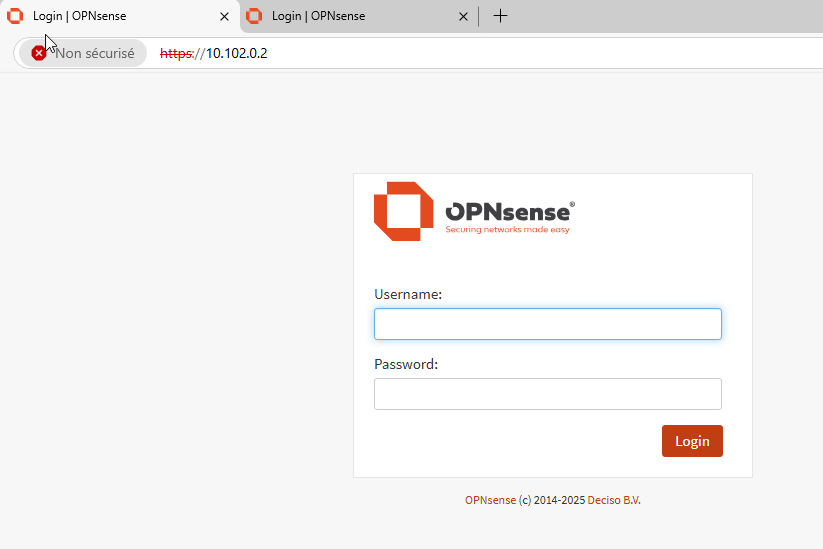
With both OPNsense VMs operational, it’s time to configure them from the WebGUI. To access the interface, I connected a Windows VM into the POC LAN VLAN and browsed to the OPNsense IP on port 443:
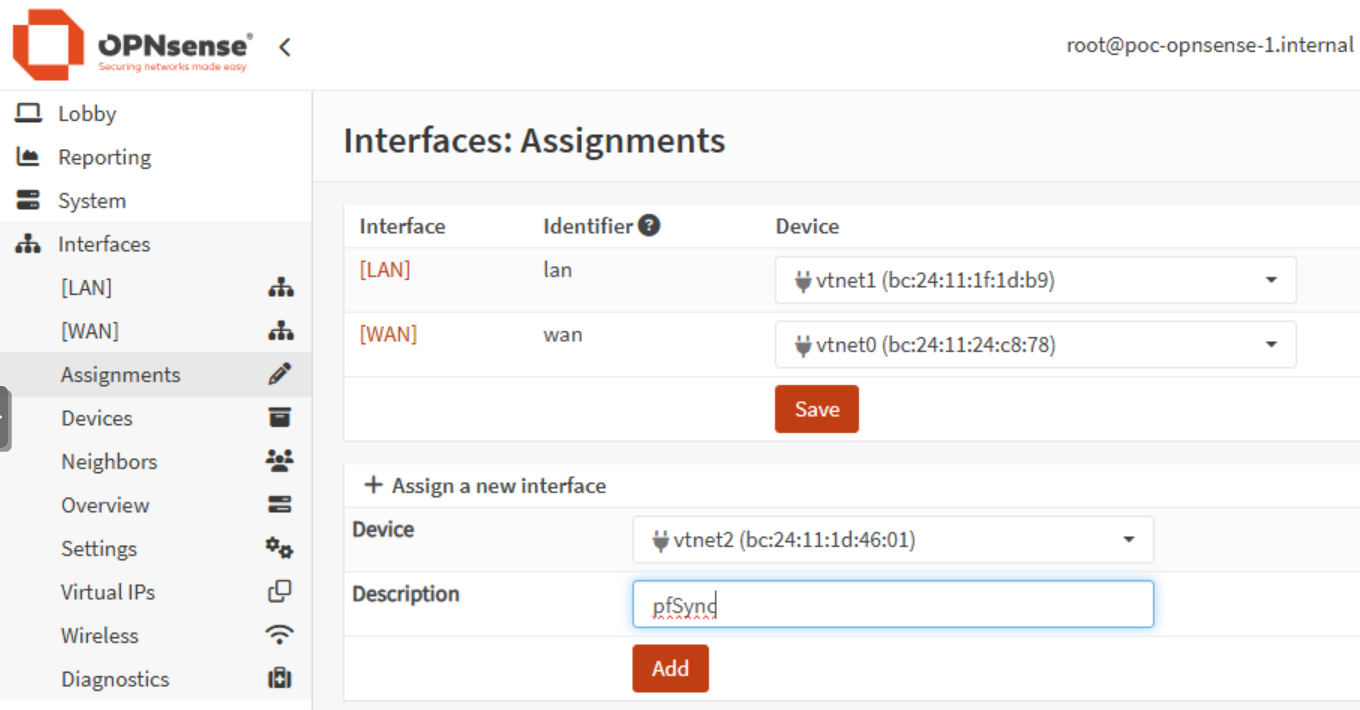
Add pfSync Interface
The third NIC (vtnet2) is assigned to the pfSync interface. This dedicated network allows the two firewalls to synchronize states on the VLAN POC pfSync:
I enable the interface on each instance and configure it with a static IP address:
- poc-opnsense-1:
10.103.0.2/24 - poc-opnsense-2:
10.103.0.3/24
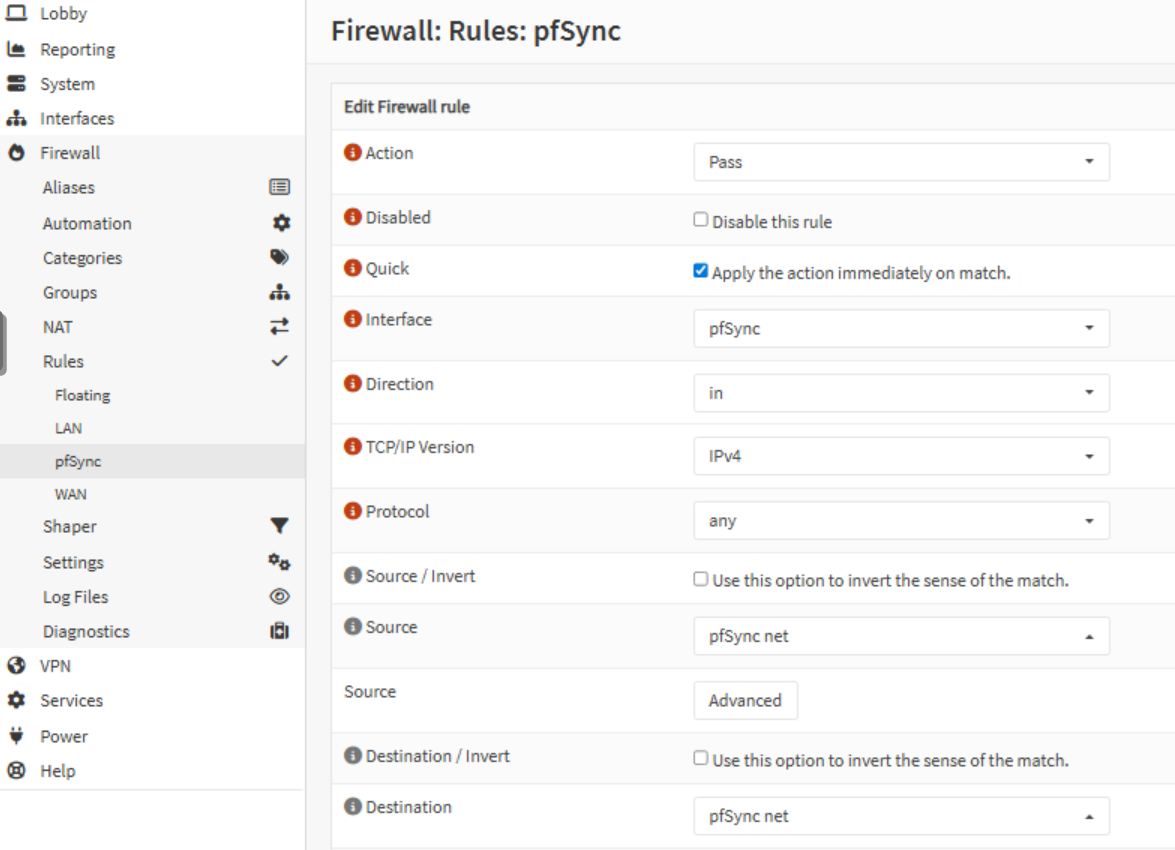
Then, I add a firewall rule on each node to allow all traffic coming from this network on that pfSync interface:
Setup High Availability
Next, in System > High Availability > Settings.
- On the master (
poc-opnsense-1), I configure both theGeneral Settingsand theSynchronization Settings. - On the backup (
poc-opnsense-2), onlyGeneral Settingsare needed, you don’t want your backup overwrite the master config.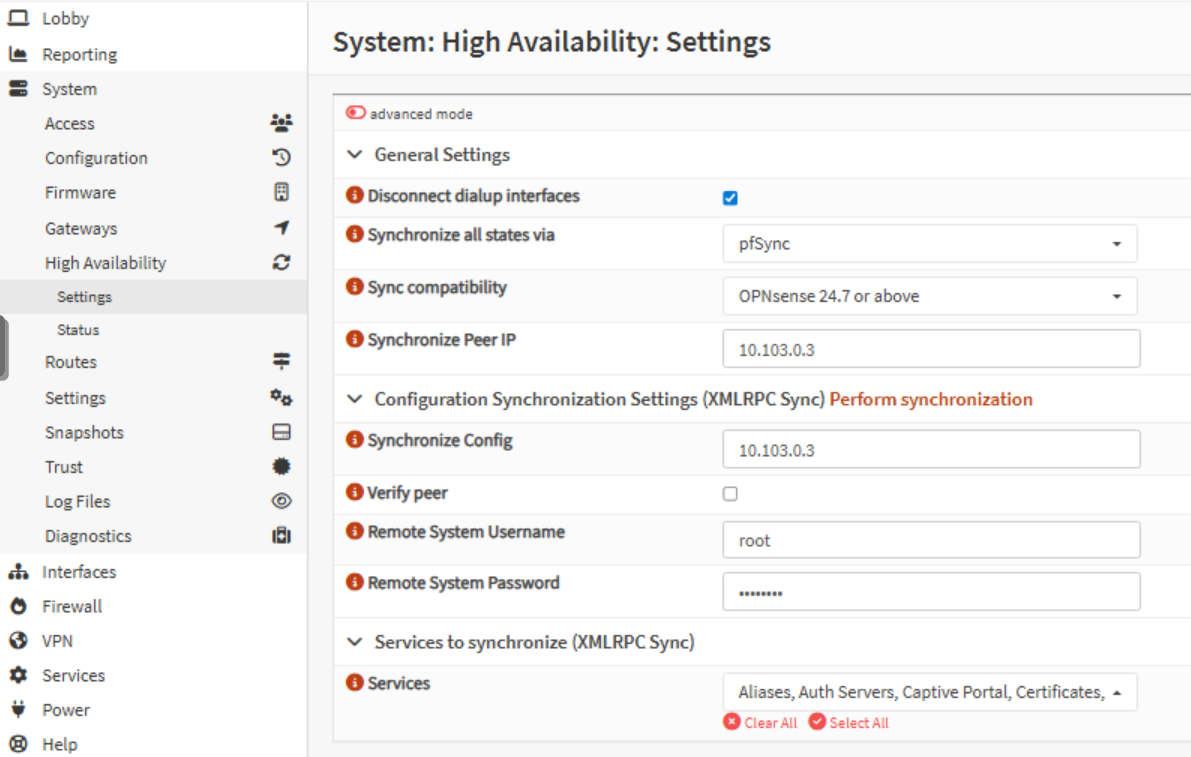
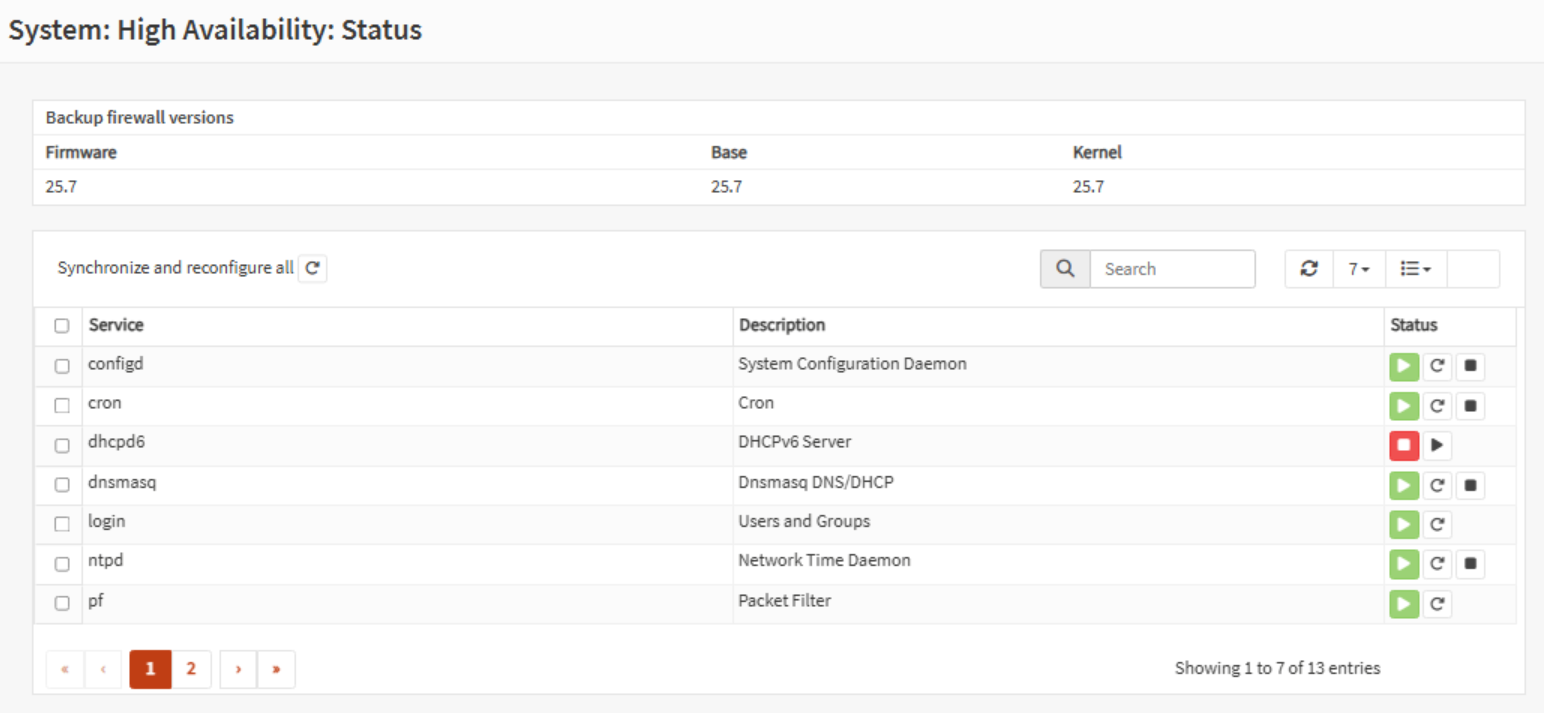
Once applied, I verify synchronization on the Status page:
Create Virtual IP Address
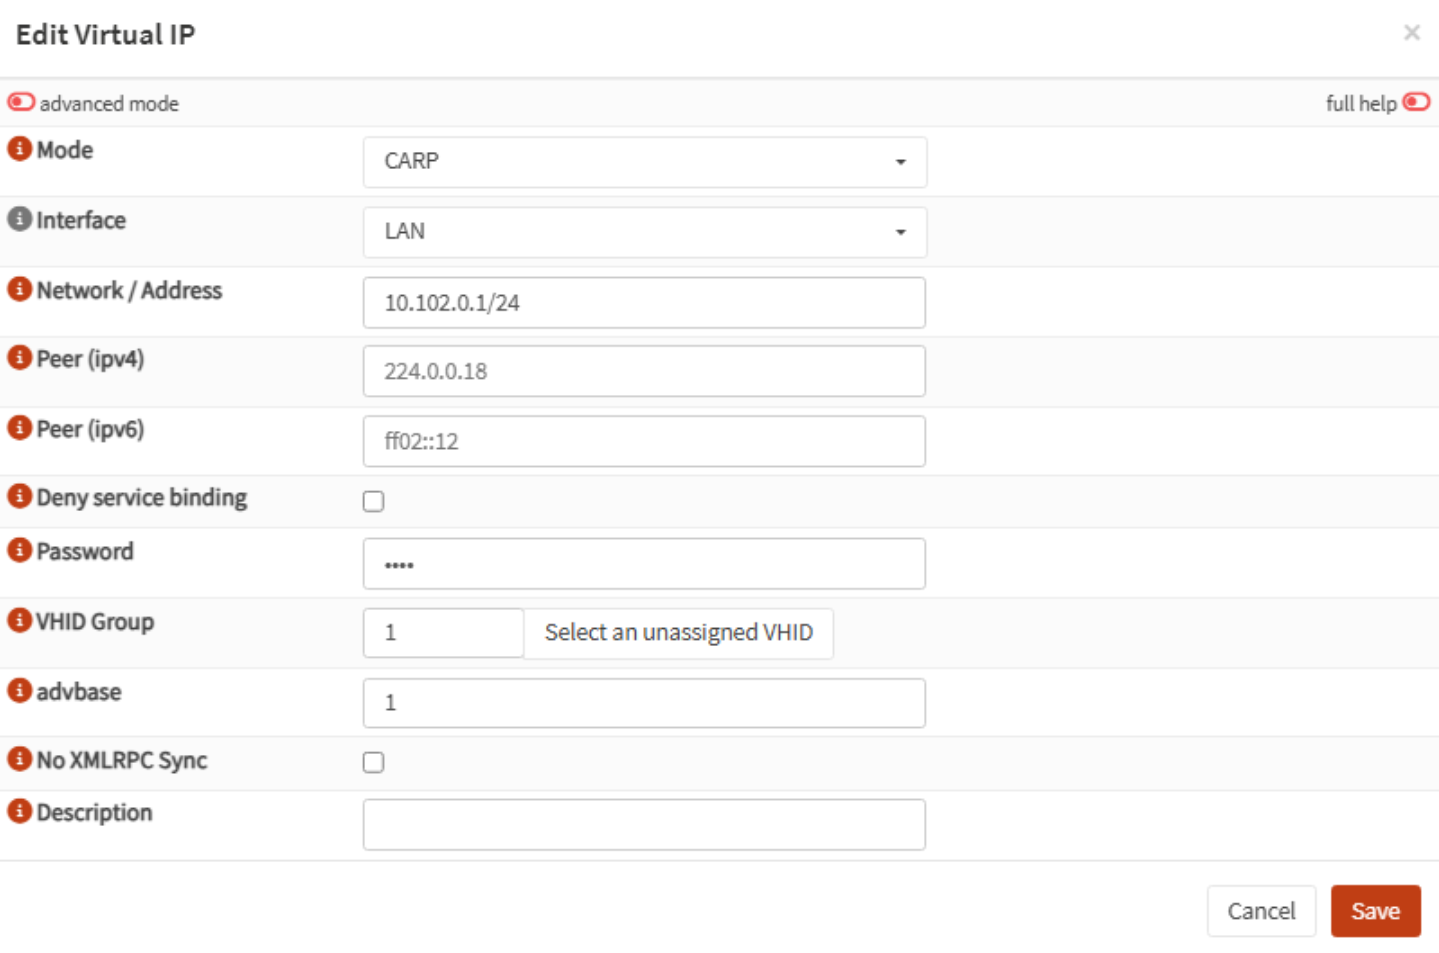
To provide a shared gateway for clients, I create a CARP Virtual IP (VIP) on the LAN interface. It is using the Common Address Redundancy Protocol. This IP is claimed by the active node and automatically fails over.
Navigate to Interfaces > Virtual IPs > Settings:
To replicate the config, I go to System > High Availability > Status and click the button next to Synchronize and reconfigure all.
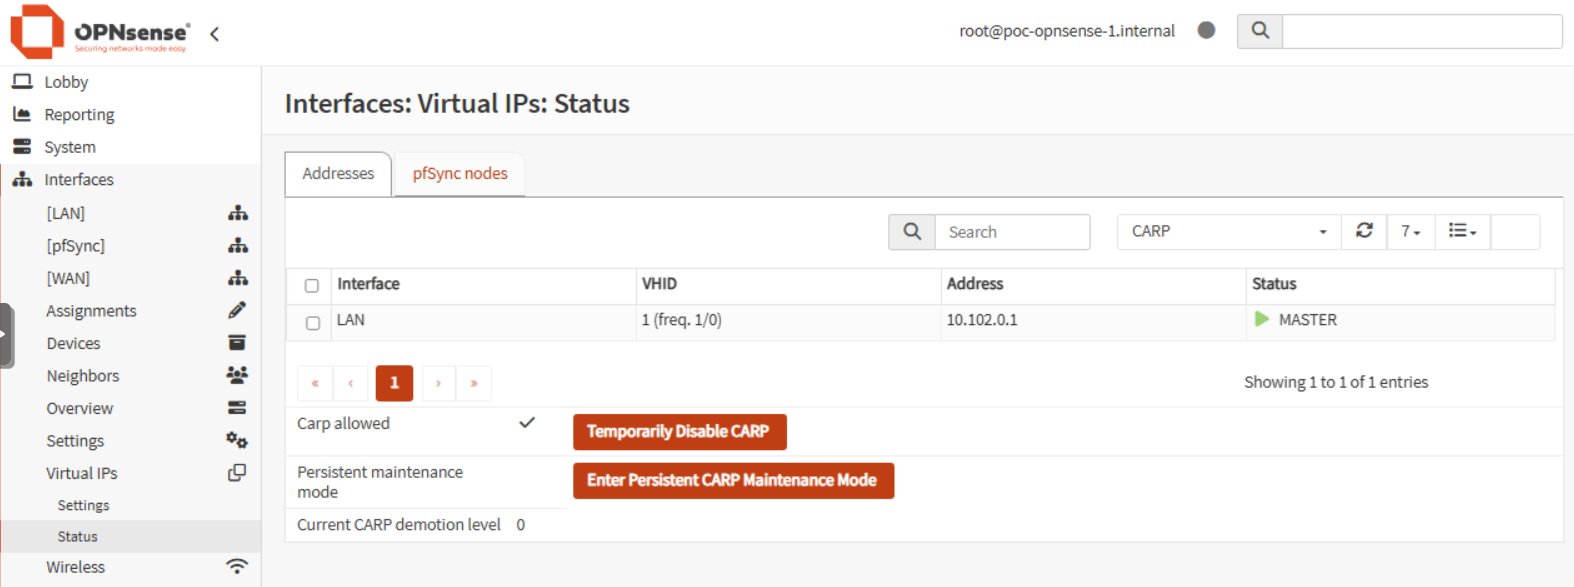
On the Interfaces > Virtual IPs > Status page, the master show the VIP as MASTER, while the backup report BACKUP.
Reconfigure DHCP
For HA, I need to adjust the DHCP setup. Since Dnsmasq does not support lease synchronization, both instances must serve leases independently.
On the master:
Services>Dnsmasq DNS & DHCP>General: tick theDisable HA syncbox.DHCP ranges: also tick theDisable HA syncboxDHCP options: add the optionrouter [3]with the value10.102.0.1(LAN VIP)DHCP options: clone the rule forrouter [6]pointing to the same VIP.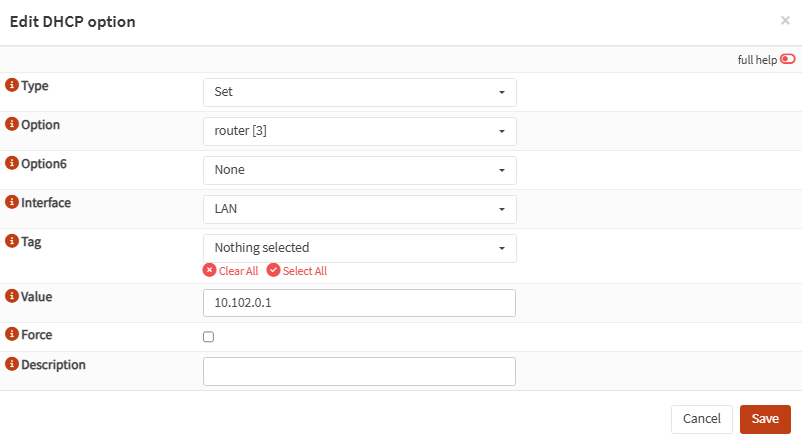
On the backup:
Services>Dnsmasq DNS & DHCP>General: also tick theDisable HA syncbox- Set
DHCP reply delayto5seconds, to give master priority to answer. DHCP ranges: Use a different pool, smaller (10.102.0.200->220)- but I also set the value
5toDHCP reply delay. This would give enough time to the master node to provide a DHCP lease before the backup node. InDHCP ranges, I edit the current one and give a smaller pool, different than the master’s. Here I also tick theDisable HA syncbox.
This way, only DHCP options sync between nodes, while lease ranges stay separate.
WAN Interface
My ISP modem only provides a single DHCP lease, I don’t want my 2 VMs compete to claim it. To handle this:
- In Proxmox, I copy the MAC of the
net0(WAN) interface frompoc-opnsense-1and applied it topoc-opnsense-2. This way, the DHCP lease could be shared among the nodes. ⚠️ If both VMs bring up the same MAC, it can cause ARP conflicts and break connectivity, only the MASTER should keep its WAN active. - CARP event hook provides the possibility to run scripts, I deployed this Gist script in
/usr/local/etc/rc.syshook.d/carp/10-wanon both nodes. This ensures the WAN is active only on the MASTER, avoiding conflicts.
#!/usr/local/bin/php
<?php

require_once("config.inc");
require_once("interfaces.inc");
require_once("util.inc");
require_once("system.inc");

$subsystem = !empty($argv[1]) ? $argv[1] : '';
$type = !empty($argv[2]) ? $argv[2] : '';

if ($type != 'MASTER' && $type != 'BACKUP') {
    log_error("Carp '$type' event unknown from source '{$subsystem}'");
    exit(1);
}

if (!strstr($subsystem, '@')) {
    log_error("Carp '$type' event triggered from wrong source '{$subsystem}'");
    exit(1);
}

$ifkey = 'wan';

if ($type === "MASTER") {
    log_error("enable interface '$ifkey' due CARP event '$type'");
    $config['interfaces'][$ifkey]['enable'] = '1';
    write_config("enable interface '$ifkey' due CARP event '$type'", false);
    interface_configure(false, $ifkey, false, false);
} else {
    log_error("disable interface '$ifkey' due CARP event '$type'");
    unset($config['interfaces'][$ifkey]['enable']);
    write_config("disable interface '$ifkey' due CARP event '$type'", false);
    interface_configure(false, $ifkey, false, false);
}
Test Failover
Time for the real test!
OPNsense provides a CARP Maintenance Mode. With the master active, WAN was enabled only on that node. Entering maintenance mode flipped the roles: the master became backup, its WAN disabled, while the backup enabled its WAN:
While pinging outside the network, I observed zero packet loss during the failover.
Finally, I simulated a crash by powering off the master. The backup took over seamlessly, I saw only one dropped packet, and thanks to state synchronization, even my SSH session stayed alive. 🎉
Conclusion
This proof of concept showed that running OPNsense in high availability on Proxmox VE is possible, even with a single WAN IP address. To achieve this, I needed these components:
- VLAN segmentation.
- Dedicated pfSync network.
- Shared virtual IP.
- Script to manage the WAN interface.
The setup behave exactly as expected, seamless failover, synchronized firewall states, and even live sessions surviving a node crash. The most delicate part was handling the WAN lease, since my ISP modem only provides one IP, but the CARP hook script solved that challenge.
🚀 The next milestone will be to prepare a new OPNsense HA cluster with the aim to completely replace my current physical box. Stay tuned!