Intro
In my homelab, I like to play with tools like Ansible and Terraform. The primary interface is the CLI, which I love, but sometimes a fancy web UI is just nice.
After setting up my OPNsense cluster, I wanted a way to keep it up to date on a schedule. Automation means Ansible to me, but how do you automate and schedule playbooks?
At work I use Red Hat Ansible Automation Platform, which is great, but overkill for my lab. That’s how I found Semaphore UI. Let’s see what it can do.
What is Semaphore UI
Semaphore UI is a sleek web interface designed to run automation with tools like Ansible and Terraform, and even Bash, Powershell or Python scripts.
Initially began as Ansible Semaphore, a web interface created to provide a simple front-end for running solely Ansible playbooks. Over time the community evolved the project into a multi-tool automation control plane.
It is a self-contained Go application with minimal dependencies capable of using different database backend, such as PostgreSQL, MySQL, or BoltDB.
Installation
Semaphore UI supports several installation methods: Docker, Kubernetes, package manager or simple binary file.
I used Docker for my setup, you can see how I currently deploy application in this post
Here my docker-compose.yml file I’ve configured using PostgreSQL:
services:
  semaphore:
    image: semaphoreui/semaphore:v2.16.45
    container_name: semaphore_ui
    environment:
      - TZ=Europe/Paris
      - SEMAPHORE_DB_USER=${POSTGRES_USER}
      - SEMAPHORE_DB_PASS=${POSTGRES_PASSWORD}
      - SEMAPHORE_DB_HOST=postgres
      - SEMAPHORE_DB_PORT=5432
      - SEMAPHORE_DB_DIALECT=postgres
      - SEMAPHORE_DB=${POSTGRES_DB}
      - SEMAPHORE_PLAYBOOK_PATH=/tmp/semaphore/
      - SEMAPHORE_ADMIN_PASSWORD=${SEMAPHORE_ADMIN_PASSWORD}
      - SEMAPHORE_ADMIN_NAME=${SEMAPHORE_ADMIN_NAME}
      - SEMAPHORE_ADMIN_EMAIL=${SEMAPHORE_ADMIN_EMAIL}
      - SEMAPHORE_ADMIN=${SEMAPHORE_ADMIN}
      - SEMAPHORE_ACCESS_KEY_ENCRYPTION=${SEMAPHORE_ACCESS_KEY_ENCRYPTION}
      - SEMAPHORE_LDAP_ACTIVATED='no'
      # - SEMAPHORE_LDAP_HOST=dc01.local.example.com
      # - SEMAPHORE_LDAP_PORT='636'
      # - SEMAPHORE_LDAP_NEEDTLS='yes'
      # - SEMAPHORE_LDAP_DN_BIND='uid=bind_user,cn=users,cn=accounts,dc=local,dc=shiftsystems,dc=net'
      # - SEMAPHORE_LDAP_PASSWORD='ldap_bind_account_password'
      # - SEMAPHORE_LDAP_DN_SEARCH='dc=local,dc=example,dc=com'
      # - SEMAPHORE_LDAP_SEARCH_FILTER="(\u0026(uid=%s)(memberOf=cn=ipausers,cn=groups,cn=accounts,dc=local,dc=example,dc=com))"
    depends_on:
      - postgres
    networks:
      - backend
      - web
    labels:
      - traefik.enable=true
      - traefik.http.routers.semaphore.rule=Host(`semaphore.vezpi.com`)
      - traefik.http.routers.semaphore.entrypoints=https
      - traefik.http.routers.semaphore.tls.certresolver=letsencrypt
      - traefik.http.services.semaphore.loadbalancer.server.port=3000
    restart: unless-stopped

  postgres:
    image: postgres:14
    hostname: postgres
    container_name: semaphore_postgres
    volumes:
     - /appli/data/semaphore/db:/var/lib/postgresql/data
    environment:
      - POSTGRES_USER=${POSTGRES_USER}
      - POSTGRES_PASSWORD=${POSTGRES_PASSWORD}
      - POSTGRES_DB=${POSTGRES_DB}
    networks:
      - backend
    restart: unless-stopped

networks:
  backend:
  web:
    external: true
To generate the encrypting access keys, I use this command:
head -c32 /dev/urandom | base64
With Semaphore running, let’s take a quick tour of the UI and wire it up to a repo.
Discovery
After starting the stack, I can reach the login page at the URL:
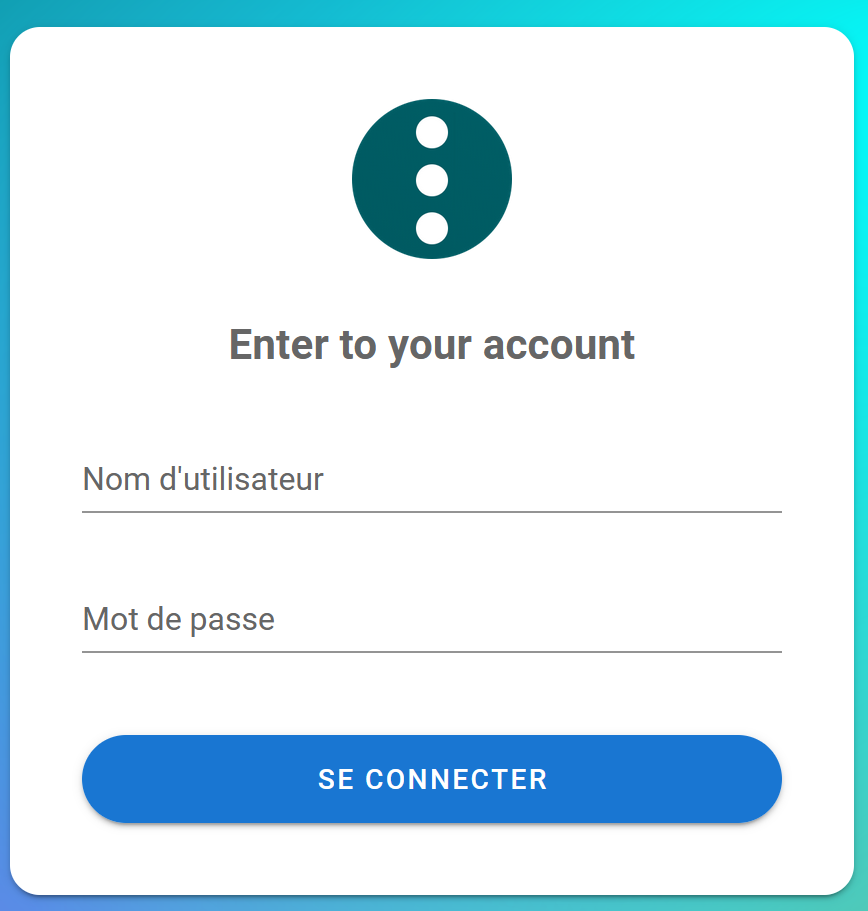
To log in, I use the credentials defined by SEMAPHORE_ADMIN_NAME/SEMAPHORE_ADMIN_PASSWORD.
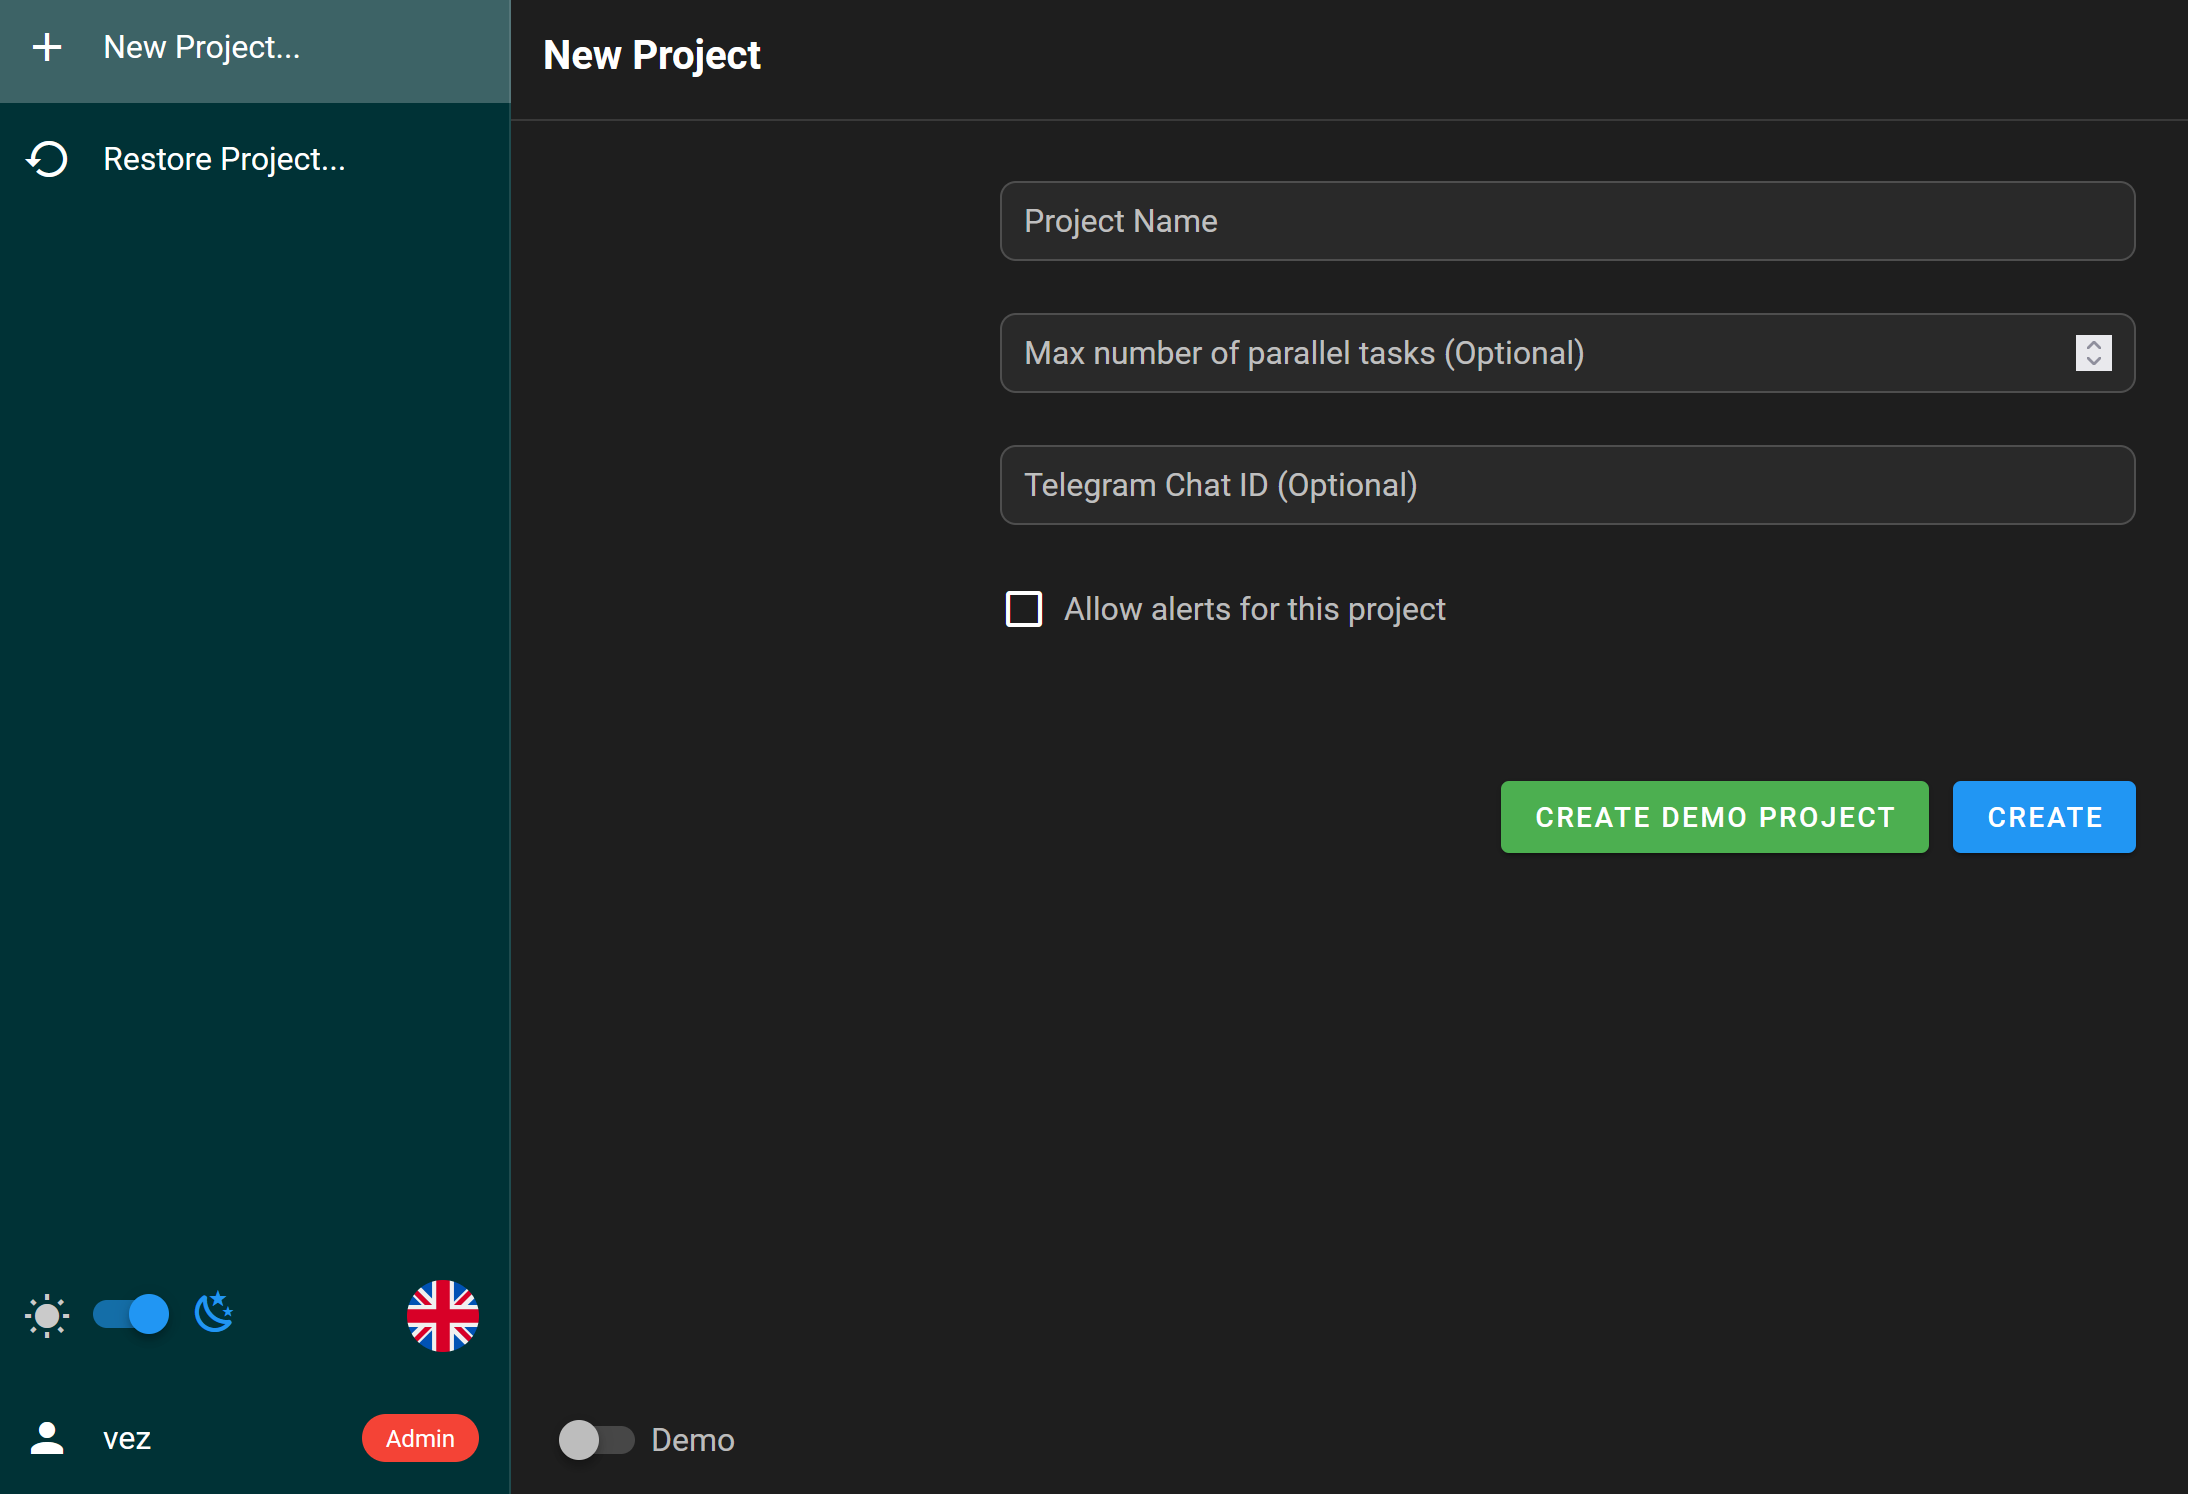
On first login, Semaphore prompt me to create a project. I created the Homelab project:
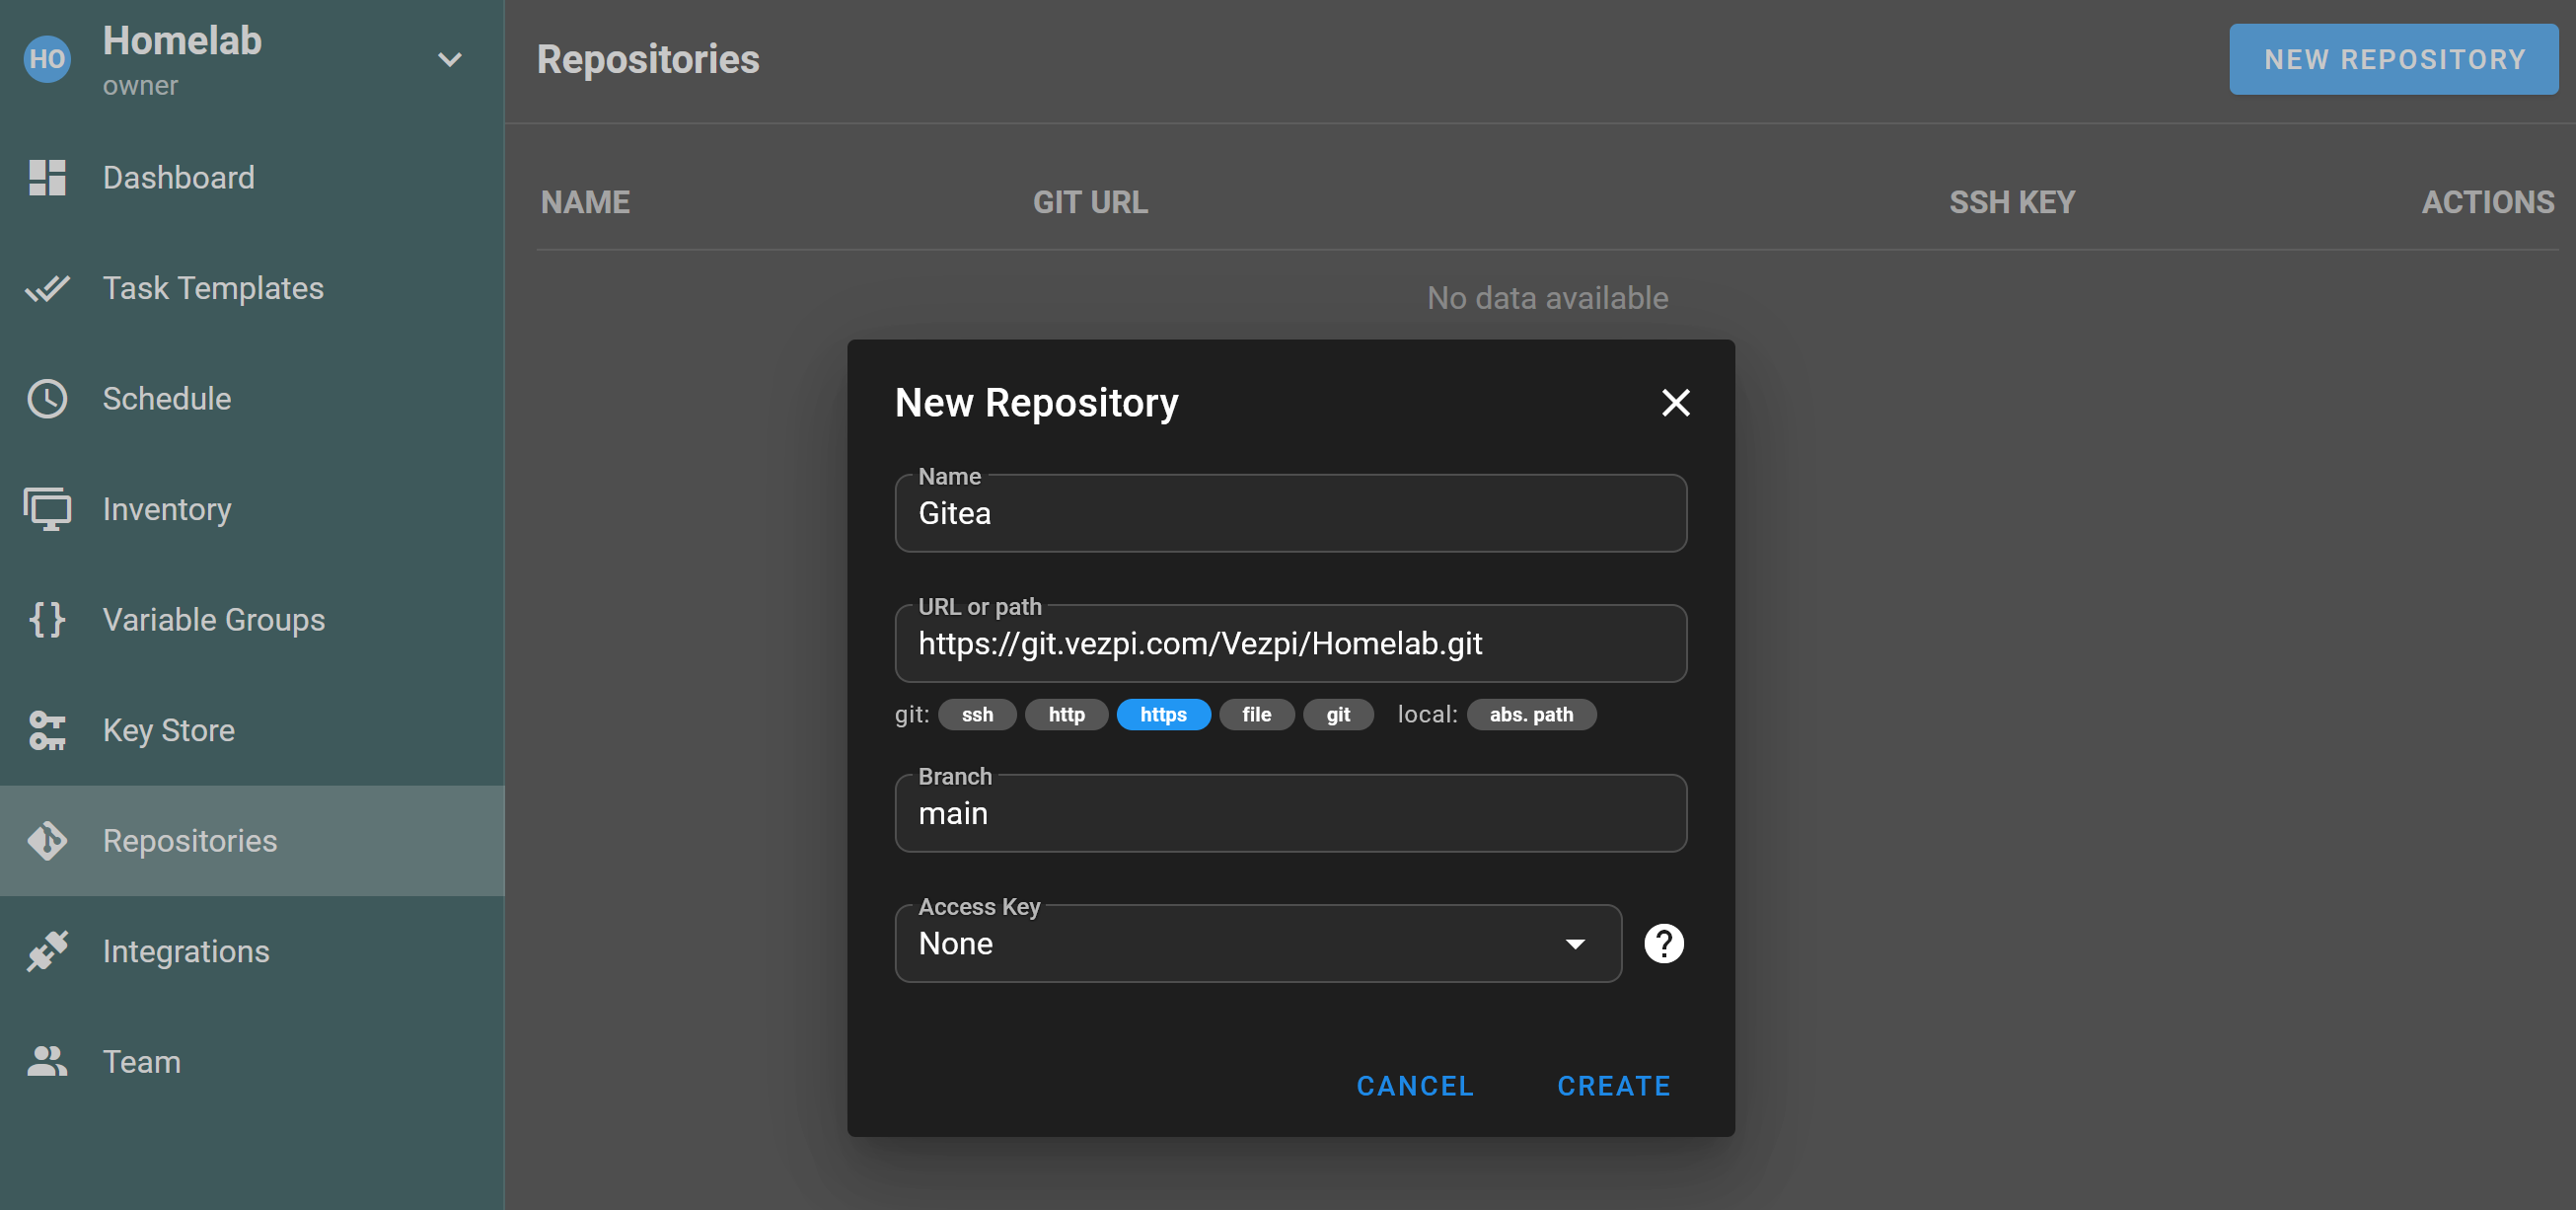
The first thing I want to do is to add my homelab repository (you can find its mirror on Github here). In Repository, I click the New Repository button, and add the repo URL. I don’t specify credentials because the repo is public:
ℹ️ Before continue, I deploy 3 VMs for testing purpose: sem01, sem02 and sem03. I created them using Terraform with this project.
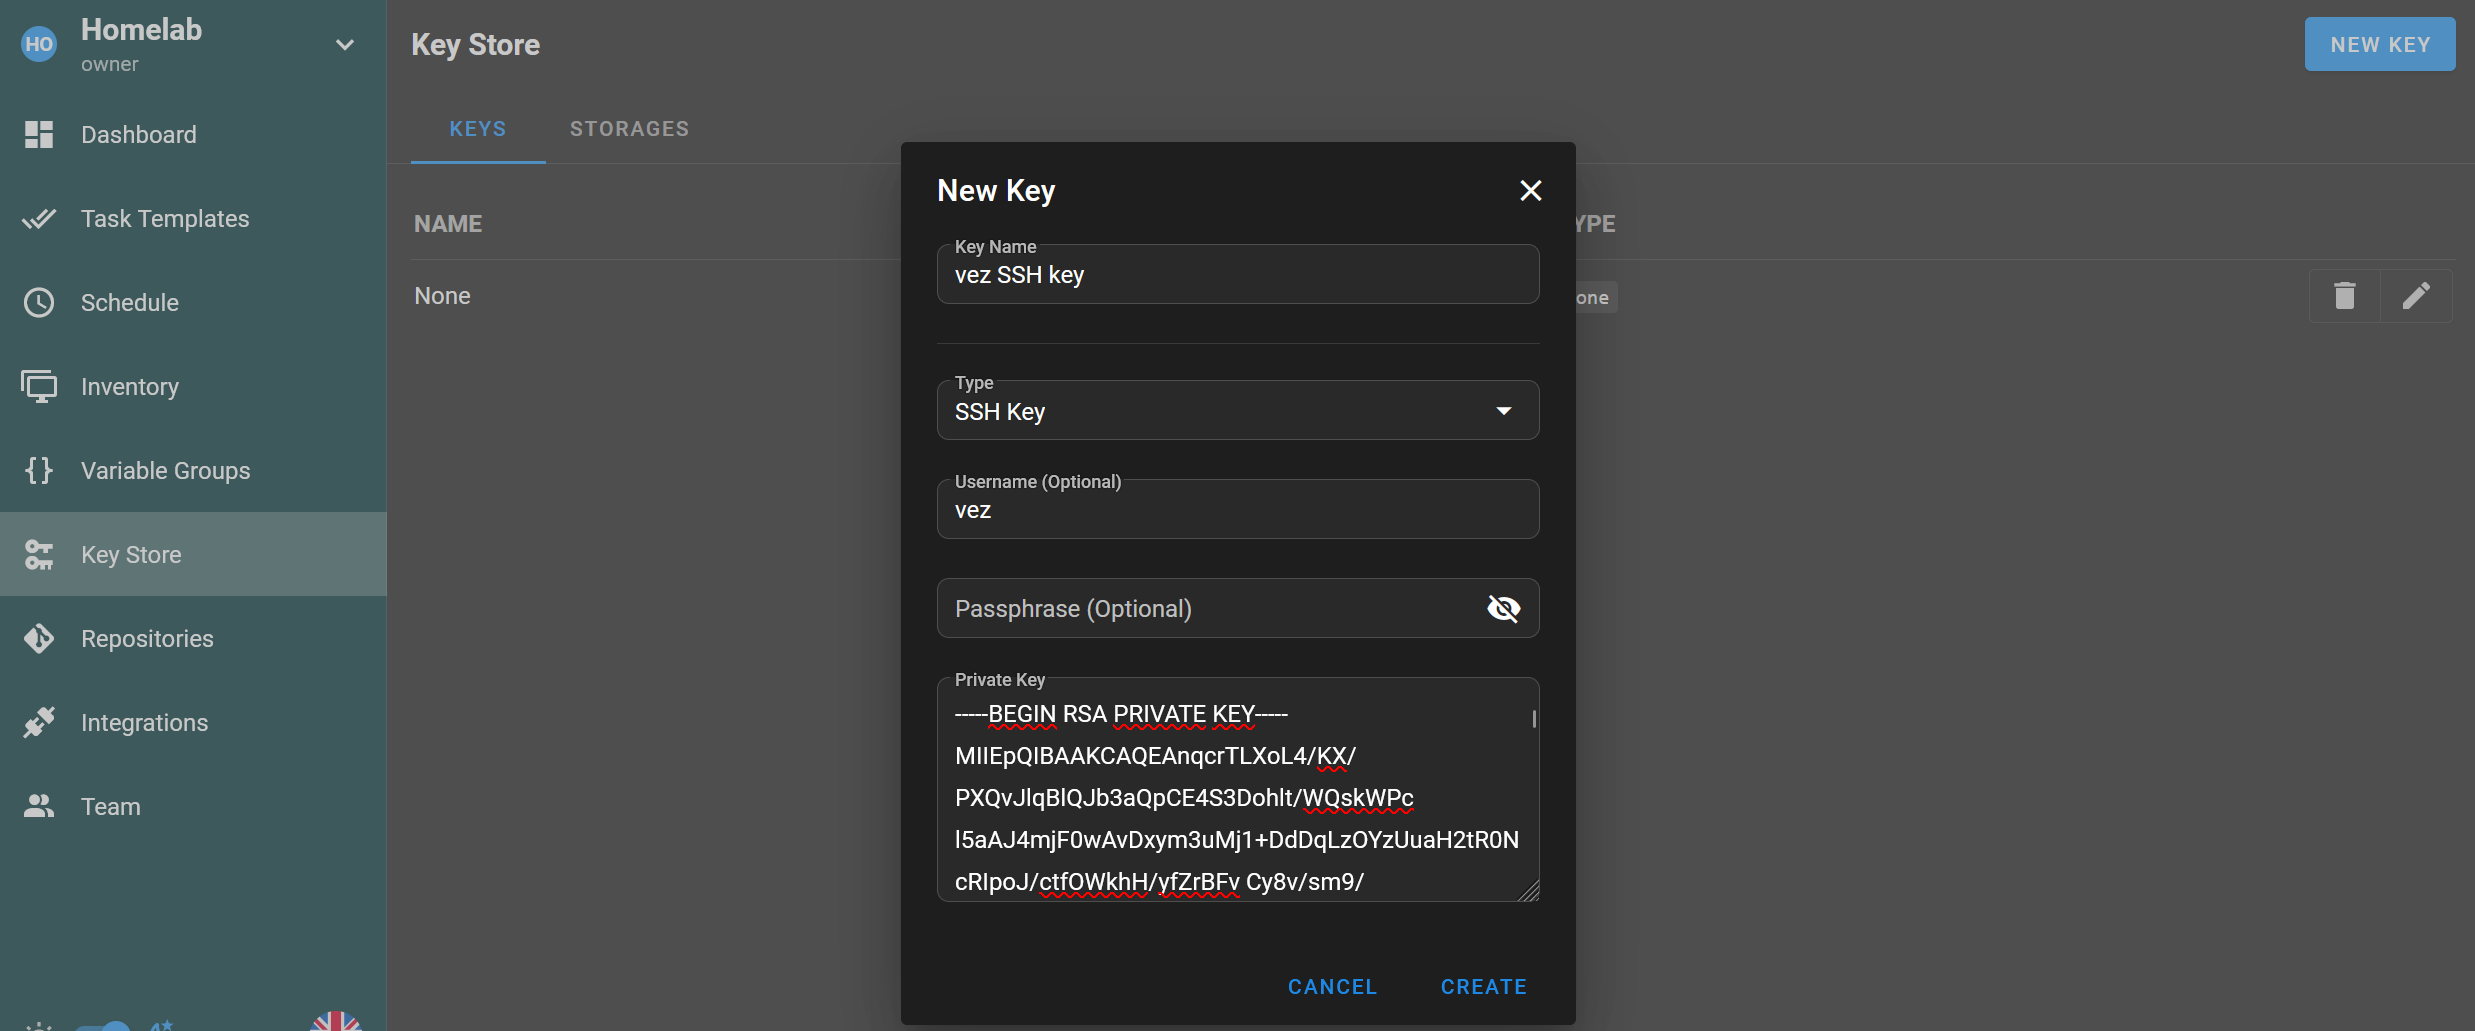
To interact with these VMs I need to configure credentials. In the the Key Store, I add the first credential, a SSH key for my user:
Then I create a new Inventory. I’m using the Ansible inventory format (the only one available). I select the SSH key previously created and select the type as Static. In the fields I enter the 3 hosts created with their FQDN:
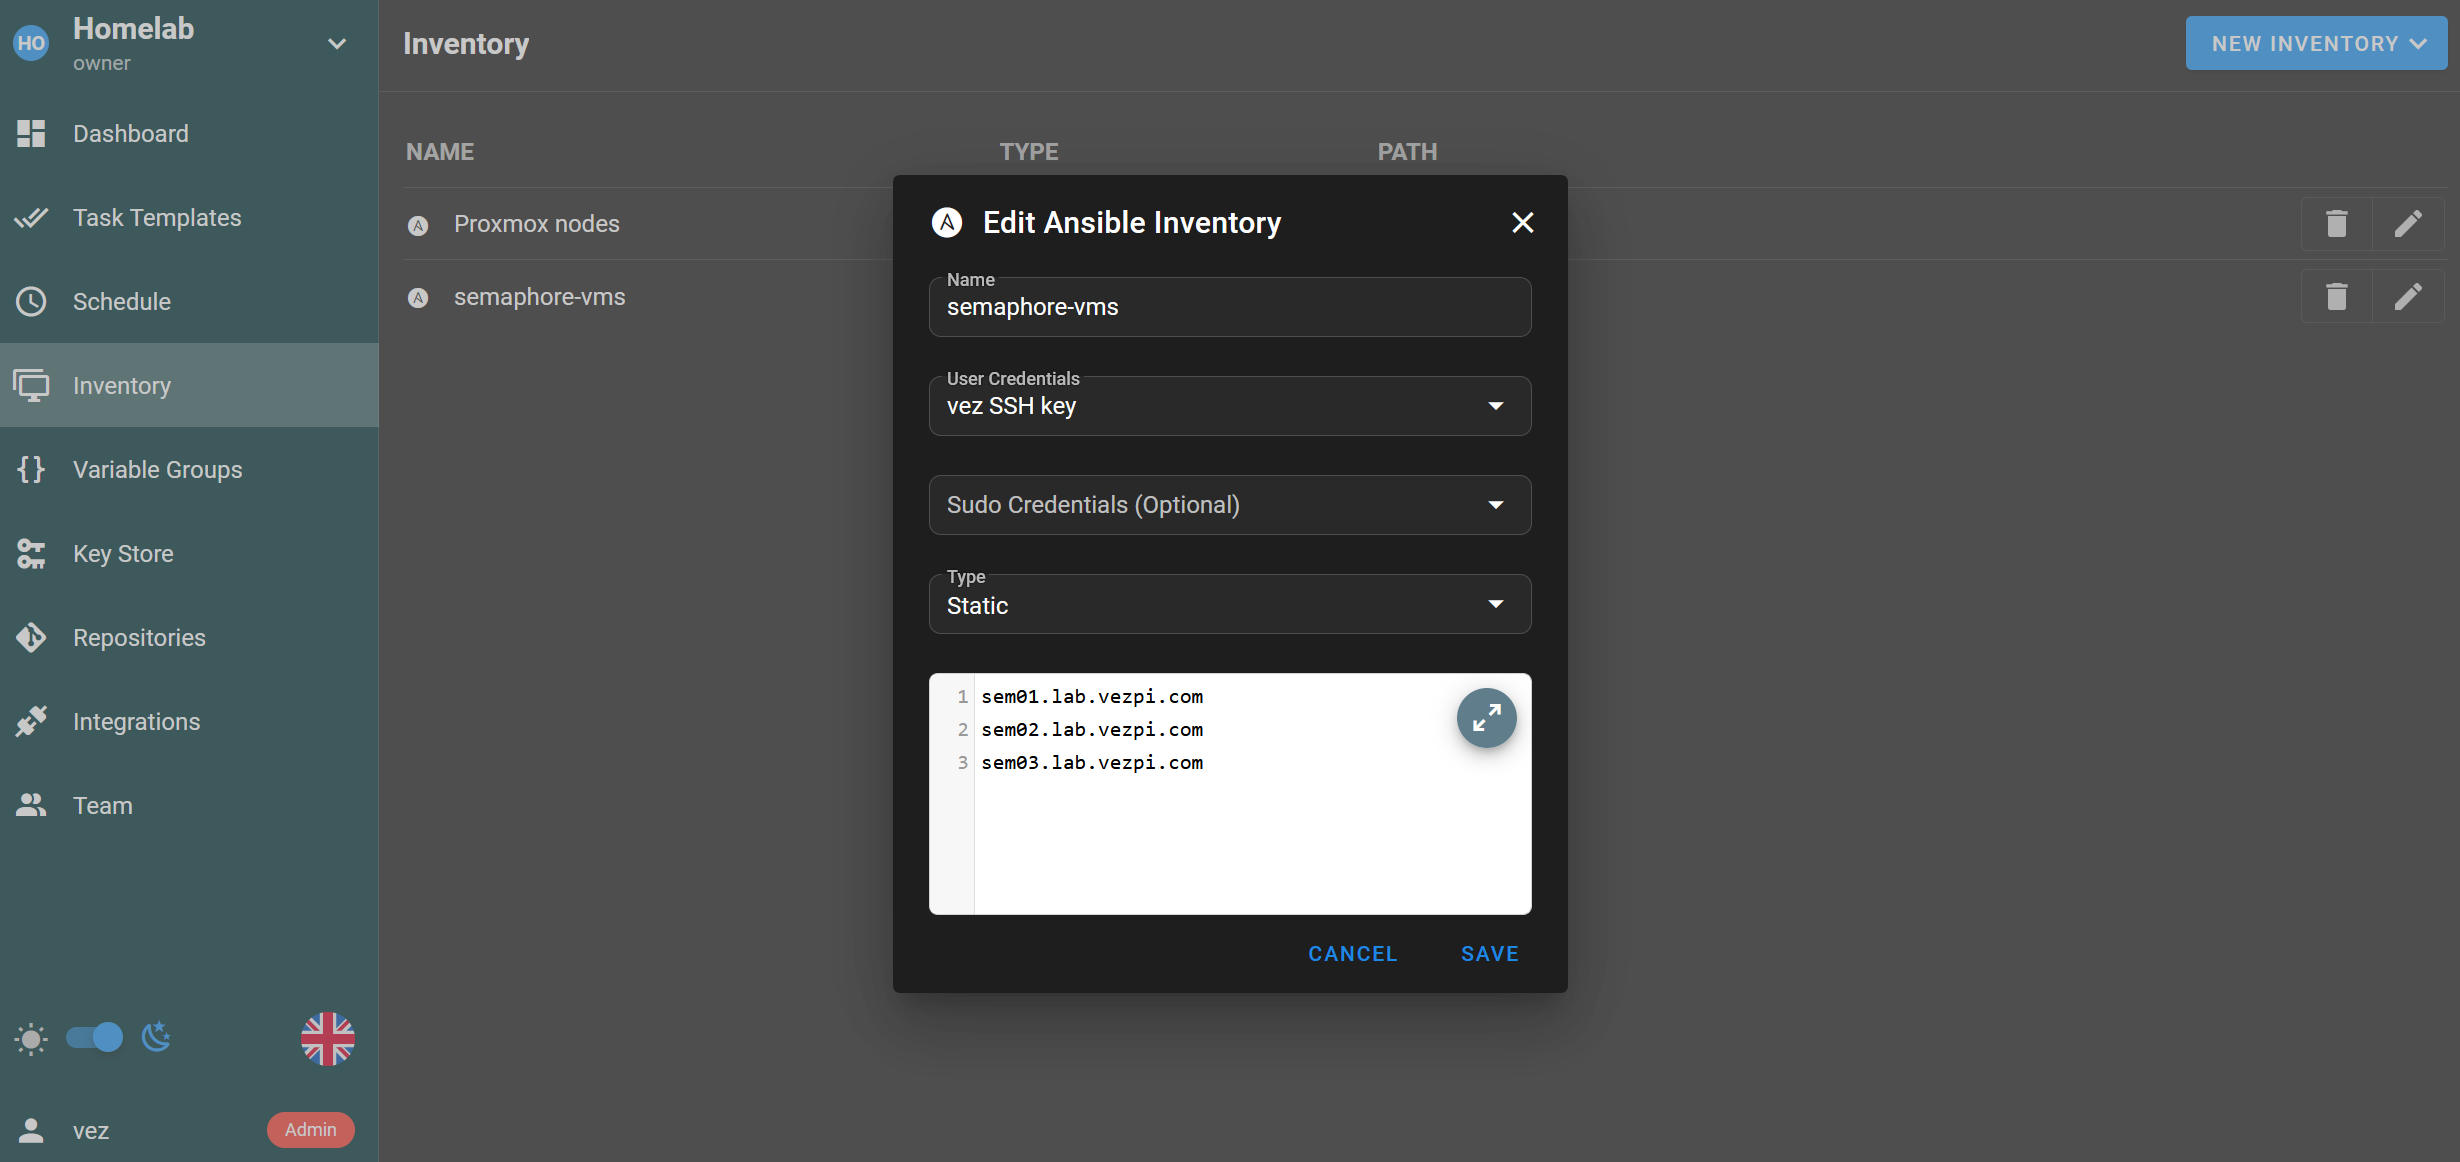
✅ With a project, repo, credentials, and inventory in place, I can move forward and test to run an Ansible playbook.
Launching an Ansible playbook
I want to test something simple, install a web server with a custom page on these 3 VMs, I create the playbook install_nginx.yml:
---
- name: Demo Playbook - Install Nginx and Serve Hostname Page
  hosts: all
  become: true

  tasks:
    - name: Ensure apt cache is updated
      ansible.builtin.apt:
        update_cache: true
        cache_valid_time: 3600

    - name: Install nginx
      ansible.builtin.apt:
        name: nginx
        state: present

    - name: Create index.html with hostname
      ansible.builtin.copy:
        dest: /var/www/html/index.html
        content: |
          <html>
          <head><title>Demo</title></head>
          <body>
              <h1>Hostname: {{ inventory_hostname }}</h1>
          </body>
          </html>
        owner: www-data
        group: www-data
        mode: "0644"

    - name: Ensure nginx is running
      ansible.builtin.service:
        name: nginx
        state: started
        enabled: true
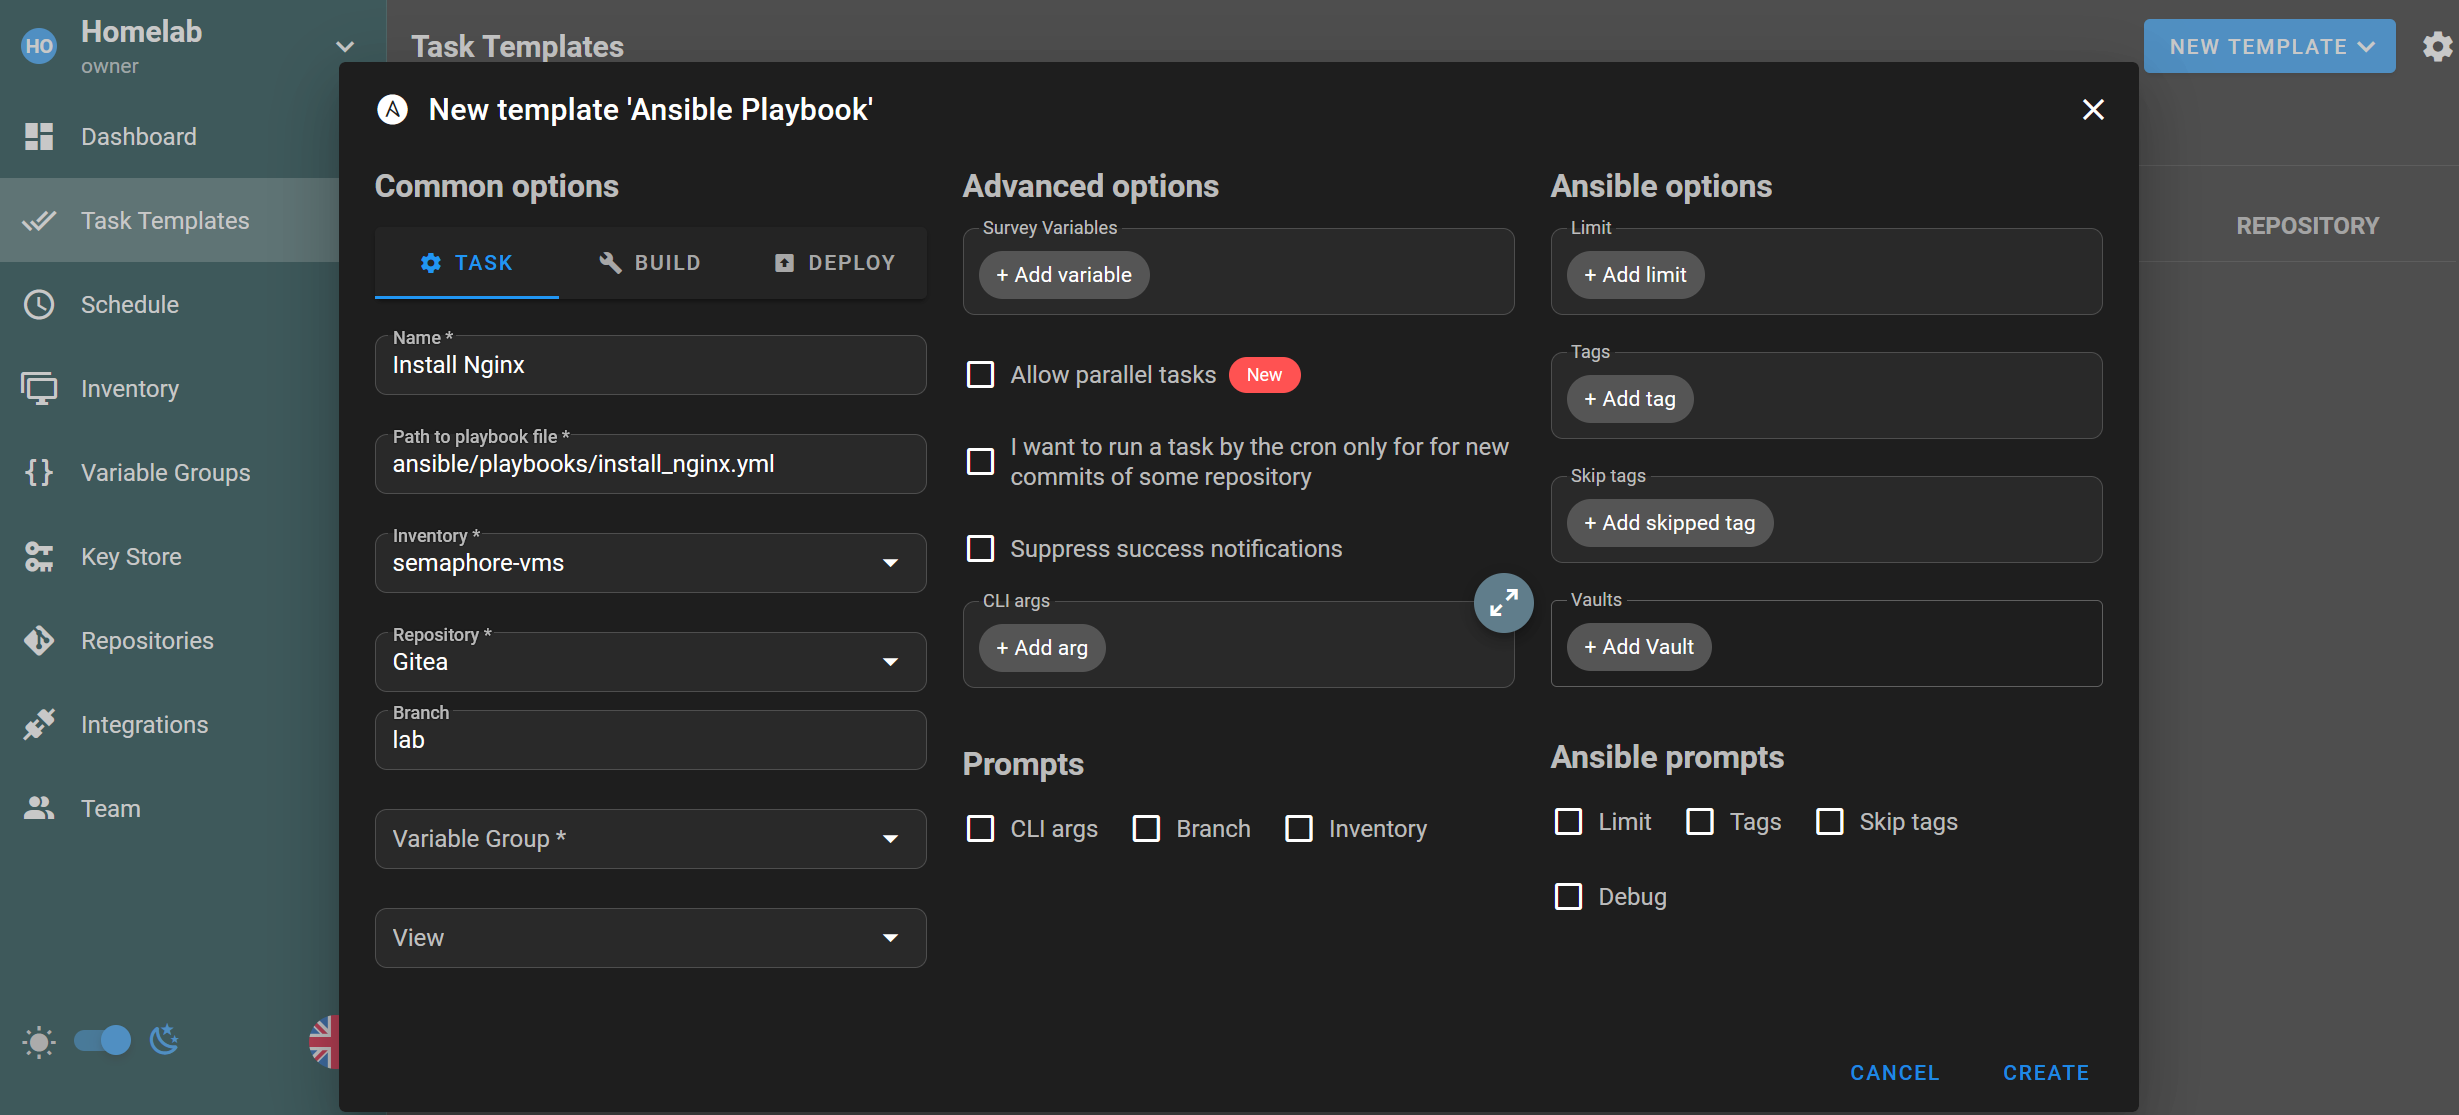
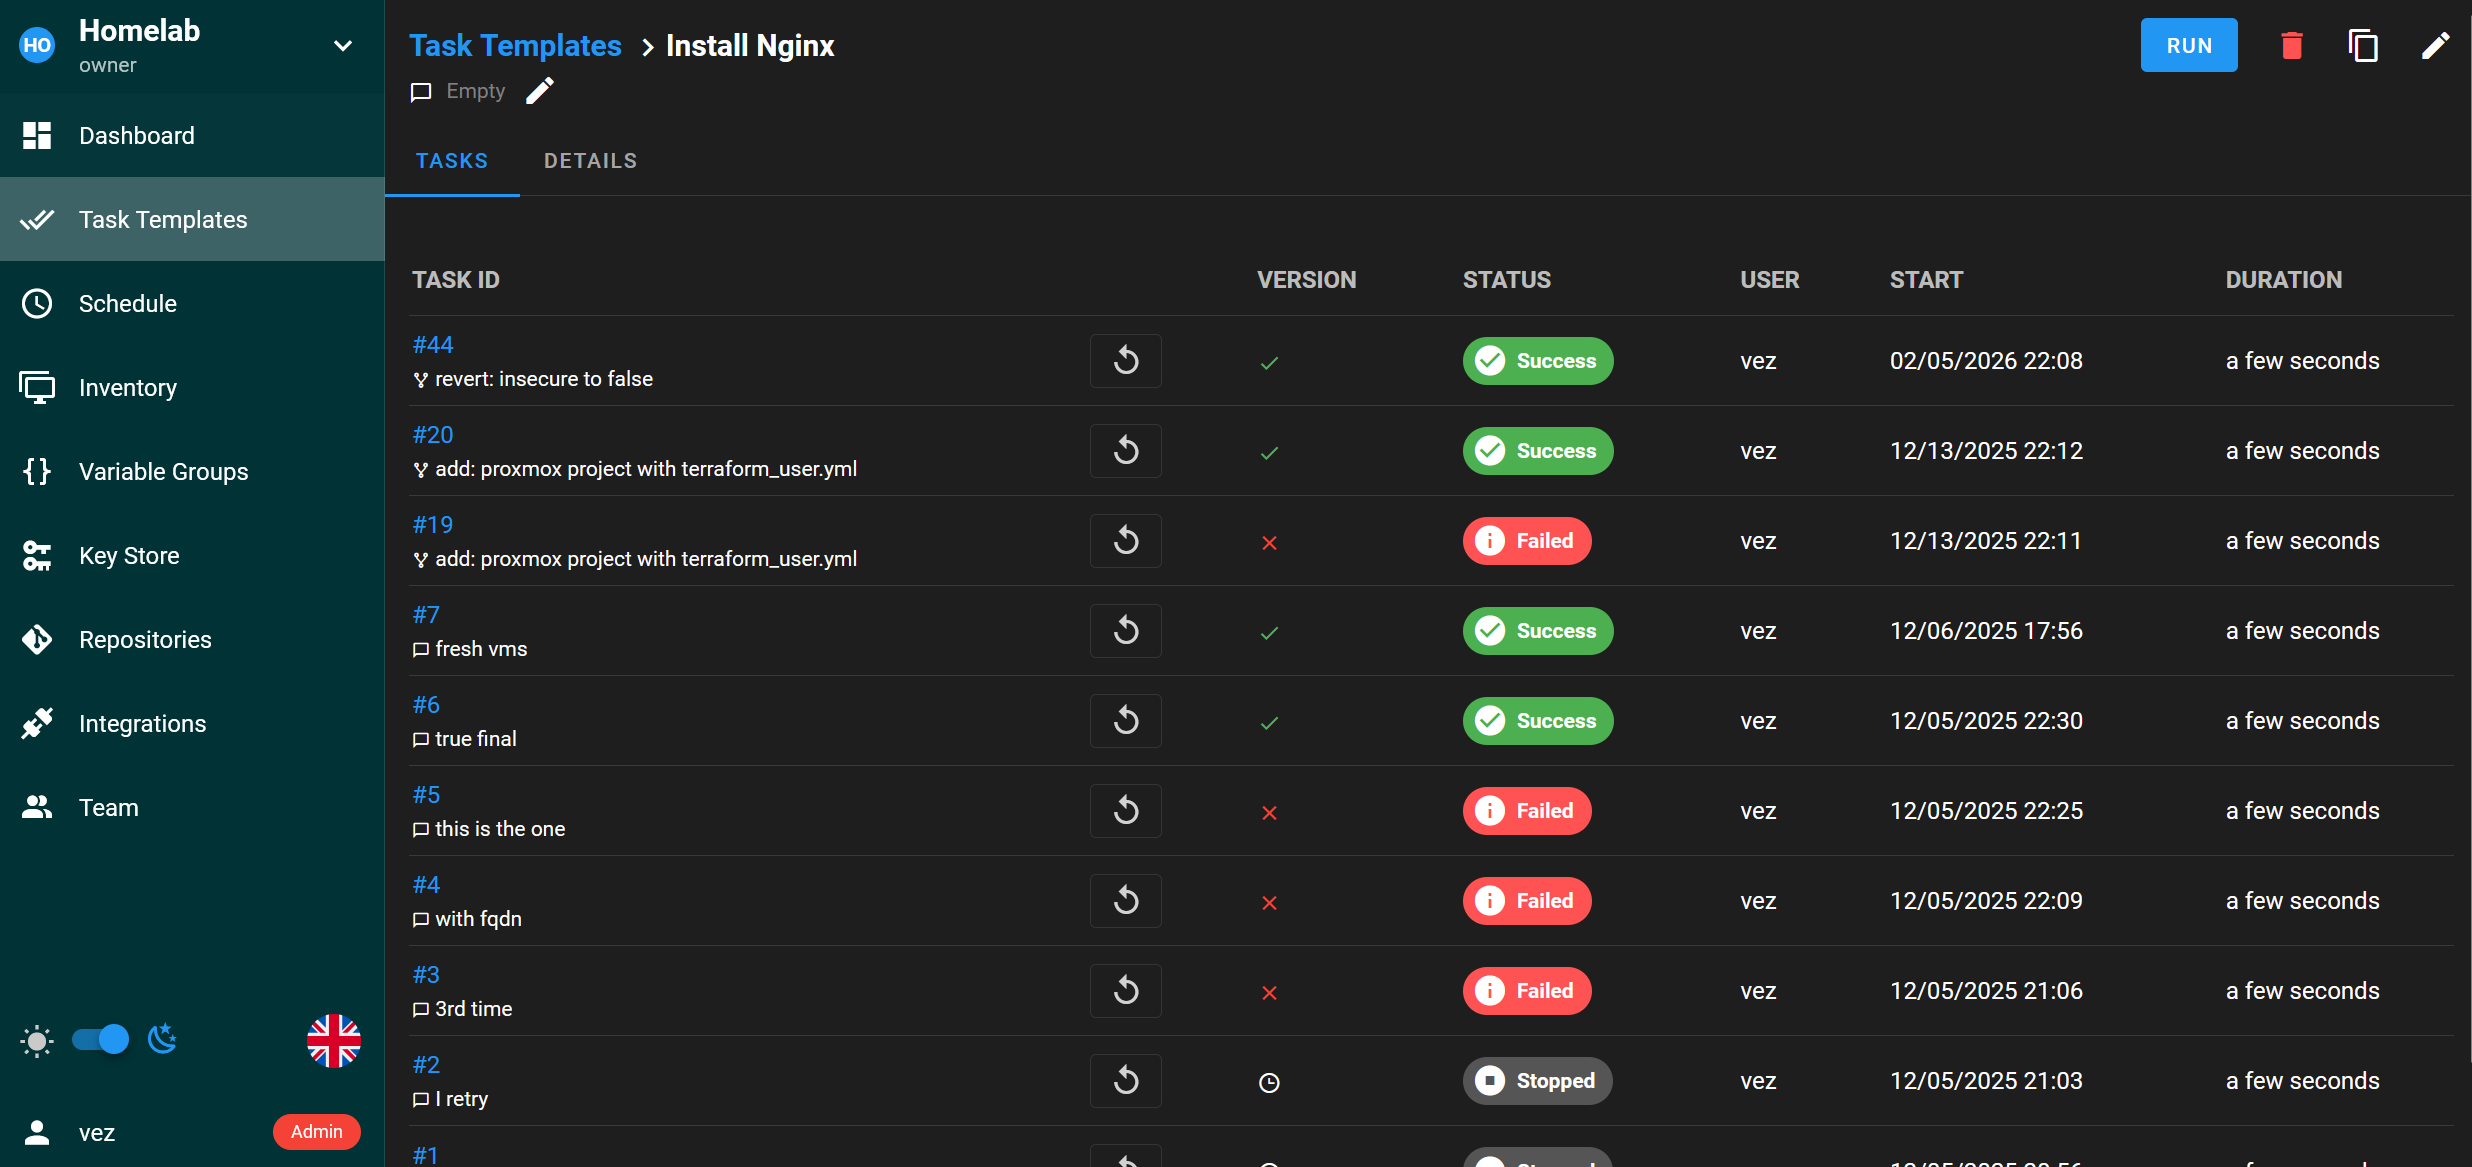
In Semaphore UI, I can now create my first Task Template for Ansible playbook. I give it a name, the playbook path (from the root folder of the repo), the repository and its branch:
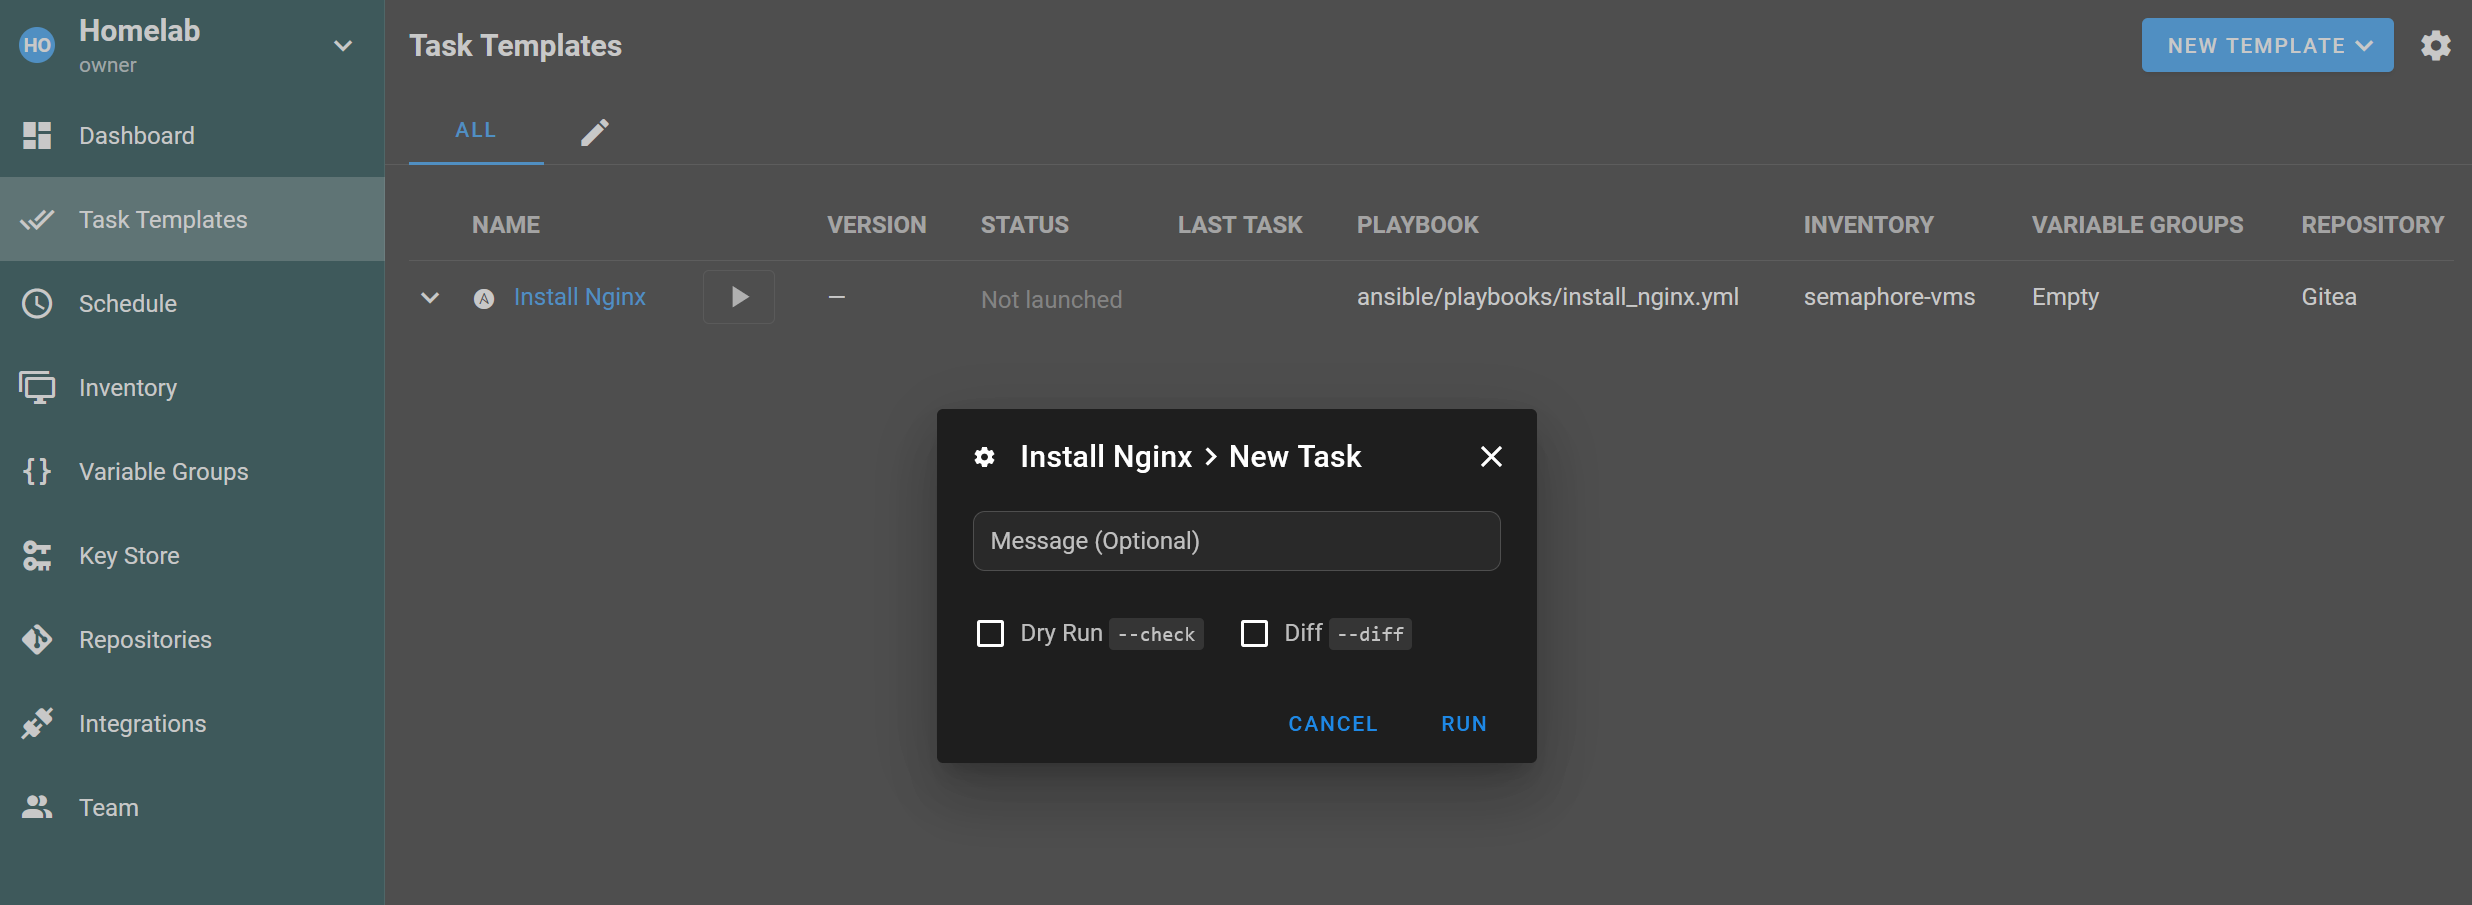
Time to launch the playbook! In the task templates list, I click on the ▶️ button:
The playbook launches and I can follow the output in real time:
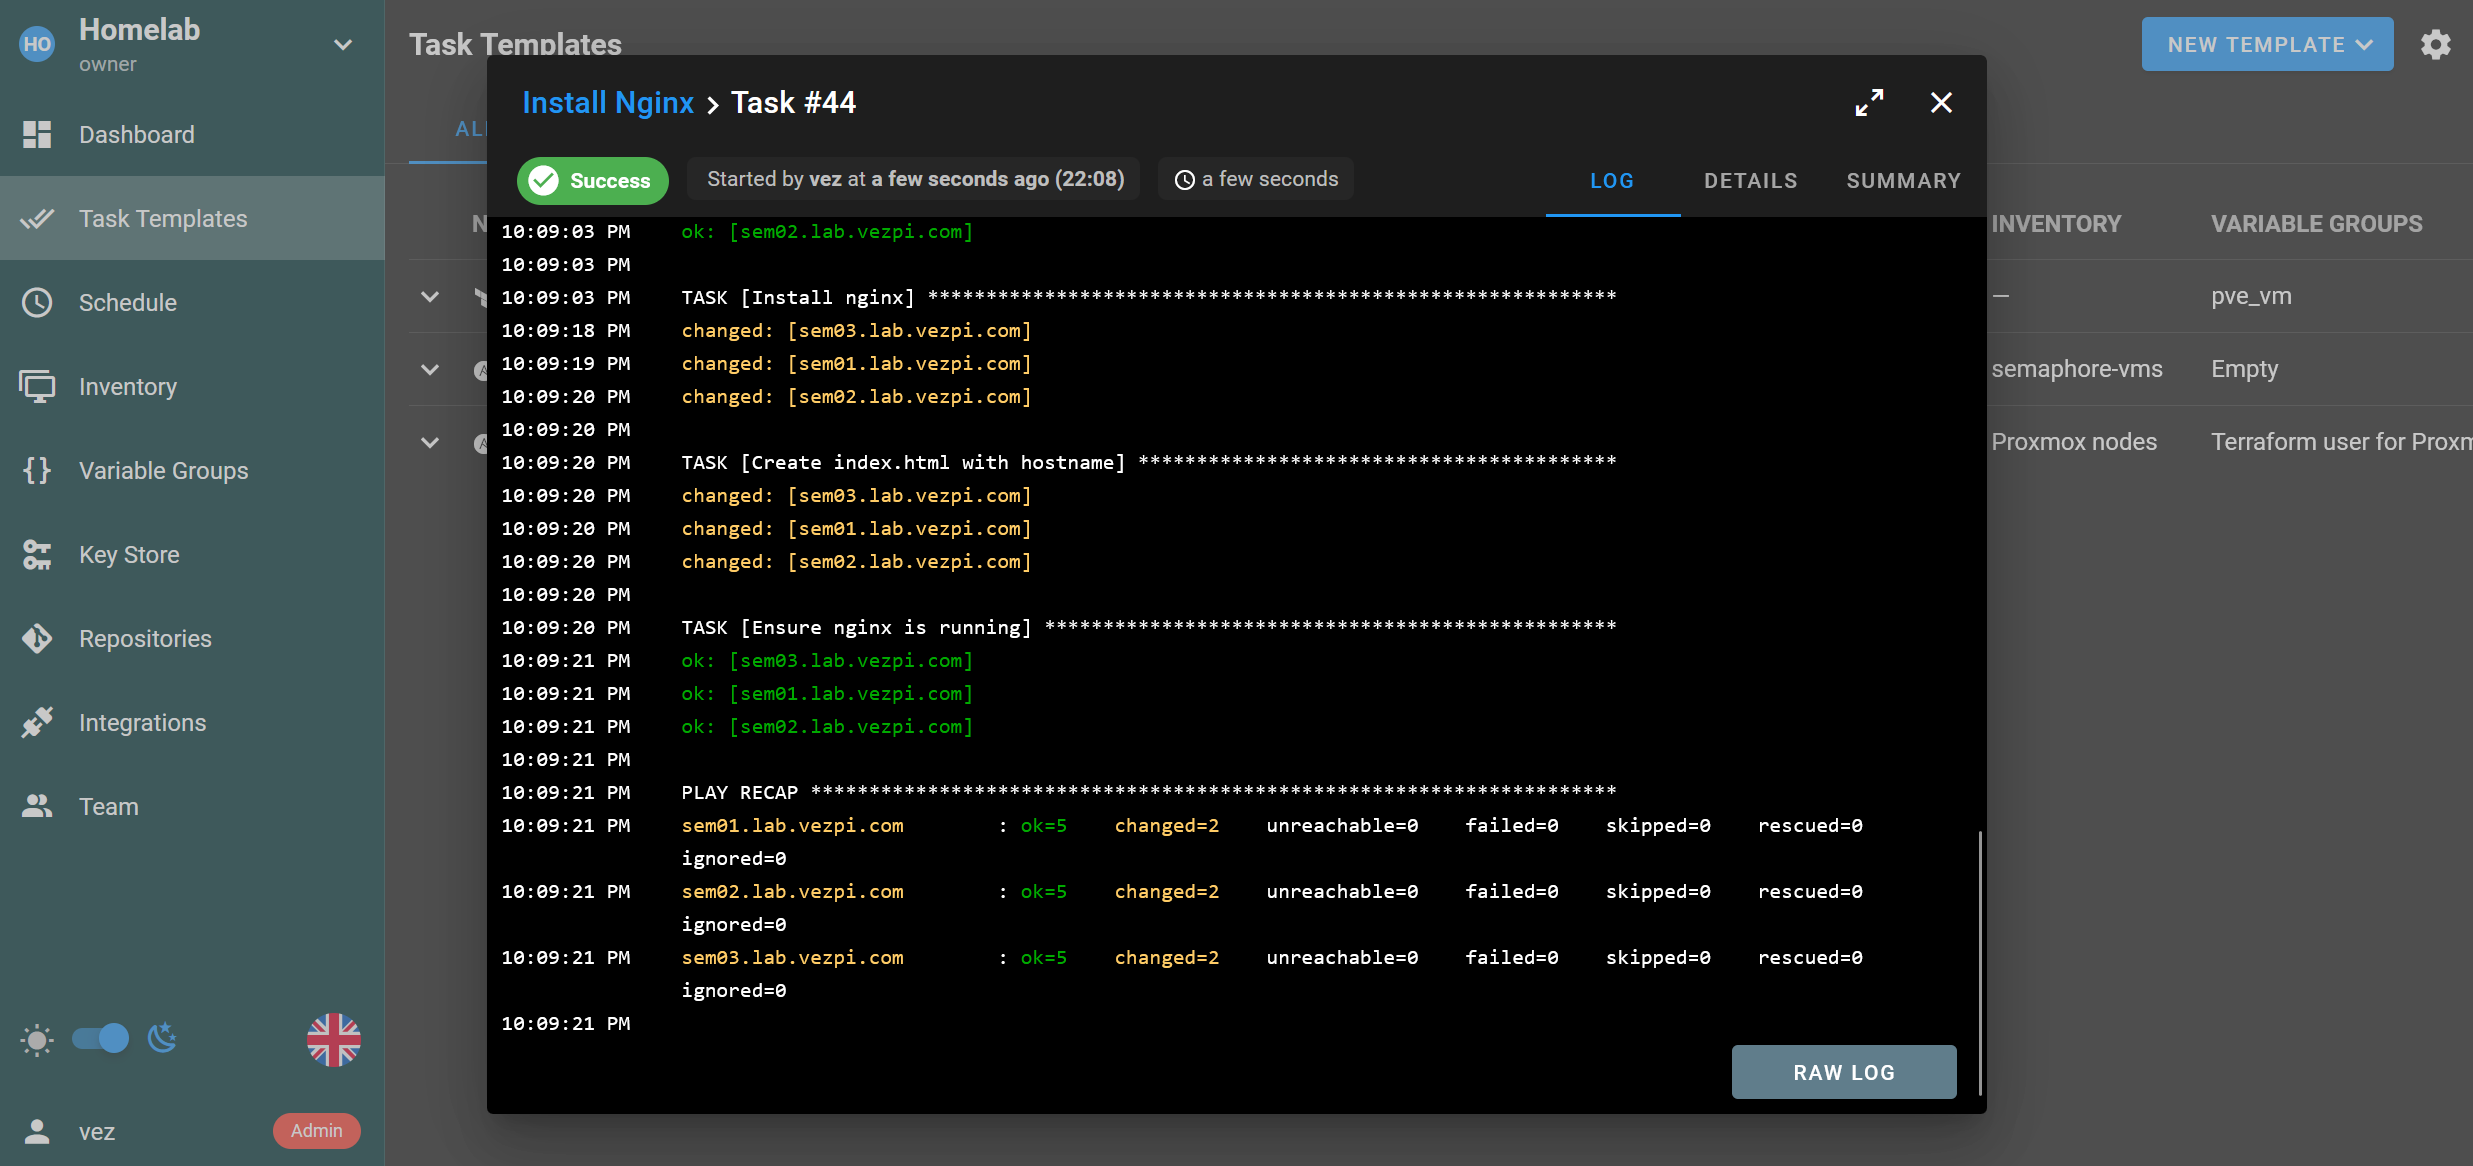
I can also review previous runs:
✅ Finally I can confirm the job is done by checking the URL on port 80 (http):

Managing Ansible playbooks in Semaphore UI is pretty simple and really convenient. The interface is really sleek.
There are also a lot of customization available when setting the task template up. I can use variables in a survey, specify limit or tags. I really like it.
Deploy with Terraform
While running Ansible playbooks was easy out of the box, this was a bit different to deploy with Terraform on Proxmox VE. Before starting, I destroy the 3 VMs deployed earlier.
Previously from the CLI, I was interacting on Terraform with the Proxmox cluster using a SSH key. I was not able to put it to work from Semaphore UI. I had to use a username with a password instead.
I told myself it was a good opportunity to use Ansible to create a dedicated Proxmox user. My first run failed with:
Unable to encrypt nor hash, passlib must be installed. No module named 'passlib'
This is apparently a known issue with Semaphore’s Python environment. As a workaround, I installed passlib directly in the container:
docker exec -it semaphore_ui pip install passlib
With that in place, the playbook succeeded and I could create the user:
---
- name: Create Terraform local user for Proxmox
  hosts: nodes
  become: true
  tasks:

    - name: Create terraform user
      ansible.builtin.user:
        name: "{{ terraform_user }}"
        password: "{{ terraform_password | password_hash('sha512') }}"
        shell: /bin/bash

    - name: Create sudoers file for terraform user
      ansible.builtin.copy:
        dest: /etc/sudoers.d/{{ terraform_user }}
        mode: '0440'
        content: |
          {{ terraform_user }} ALL=(root) NOPASSWD: /sbin/pvesm
          {{ terraform_user }} ALL=(root) NOPASSWD: /sbin/qm
          {{ terraform_user }} ALL=(root) NOPASSWD: /usr/bin/tee /var/lib/vz/*
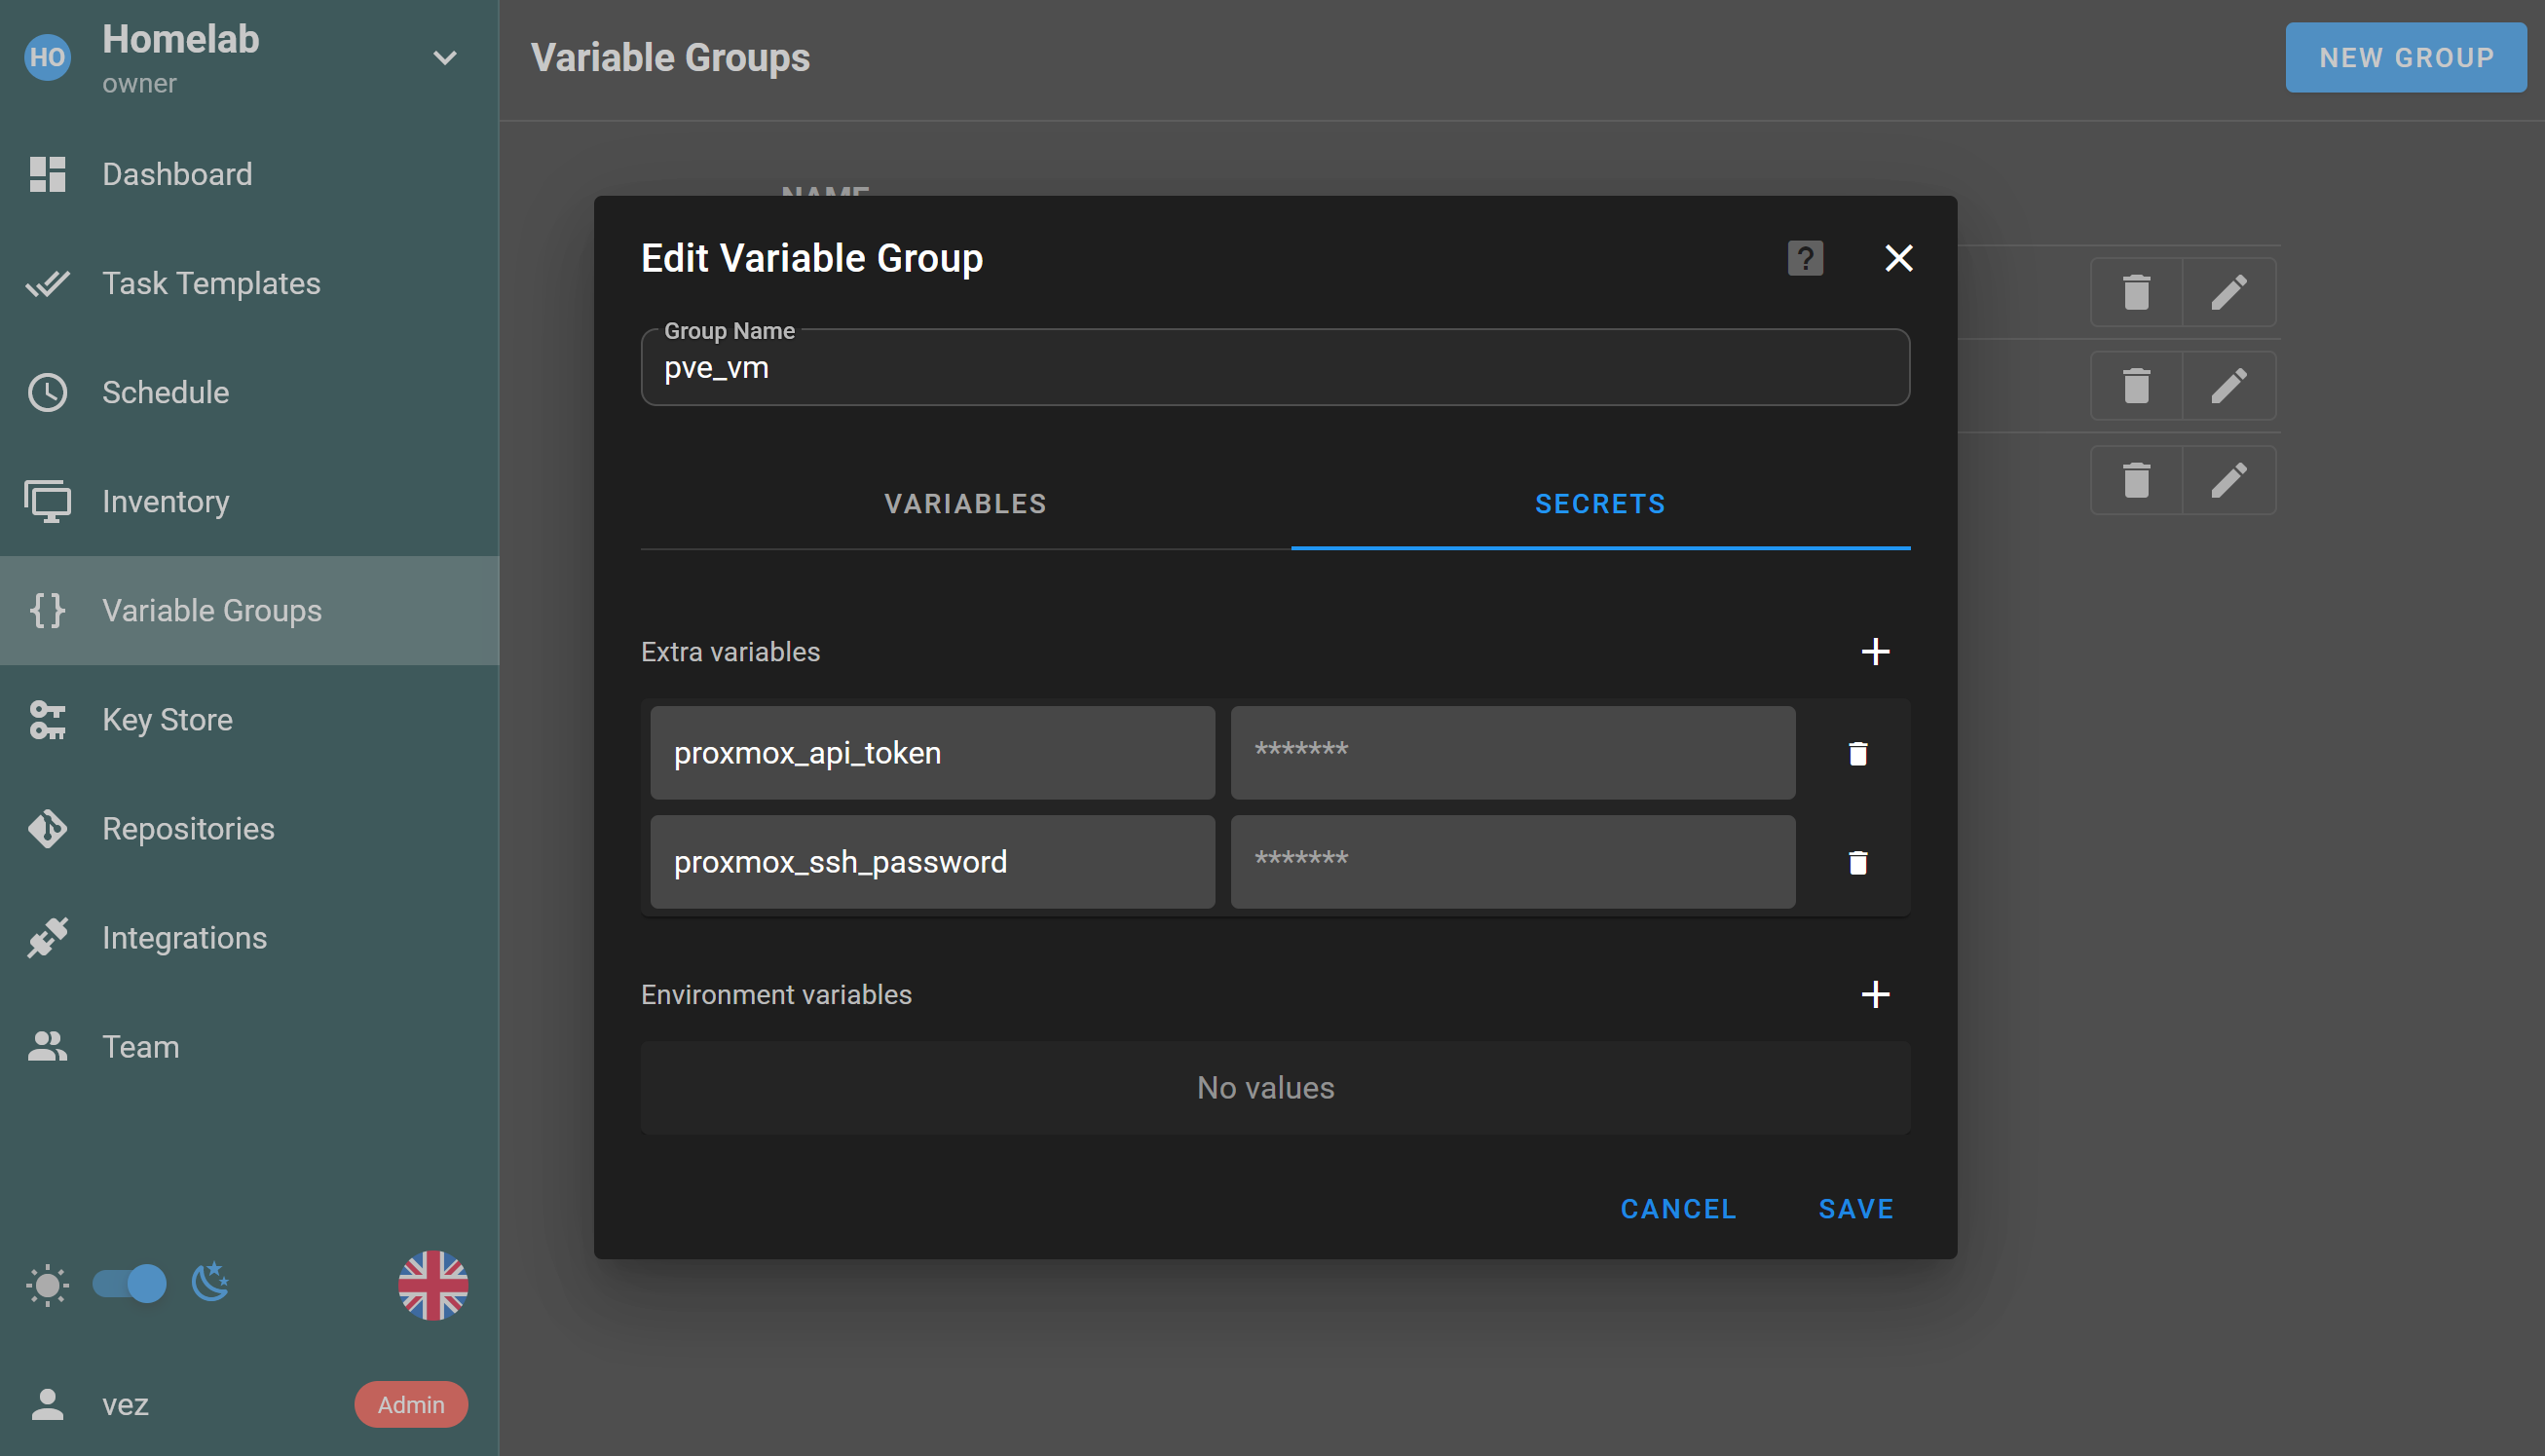
Next I create a variable group pve_vm. A variable group let me define multiple variables and secrets together:
Then I create a new task template, this time with the kind Terraform Code. I give it a name, the path of the terraform project, a workspace, the repository along with its branch and. the variable group:
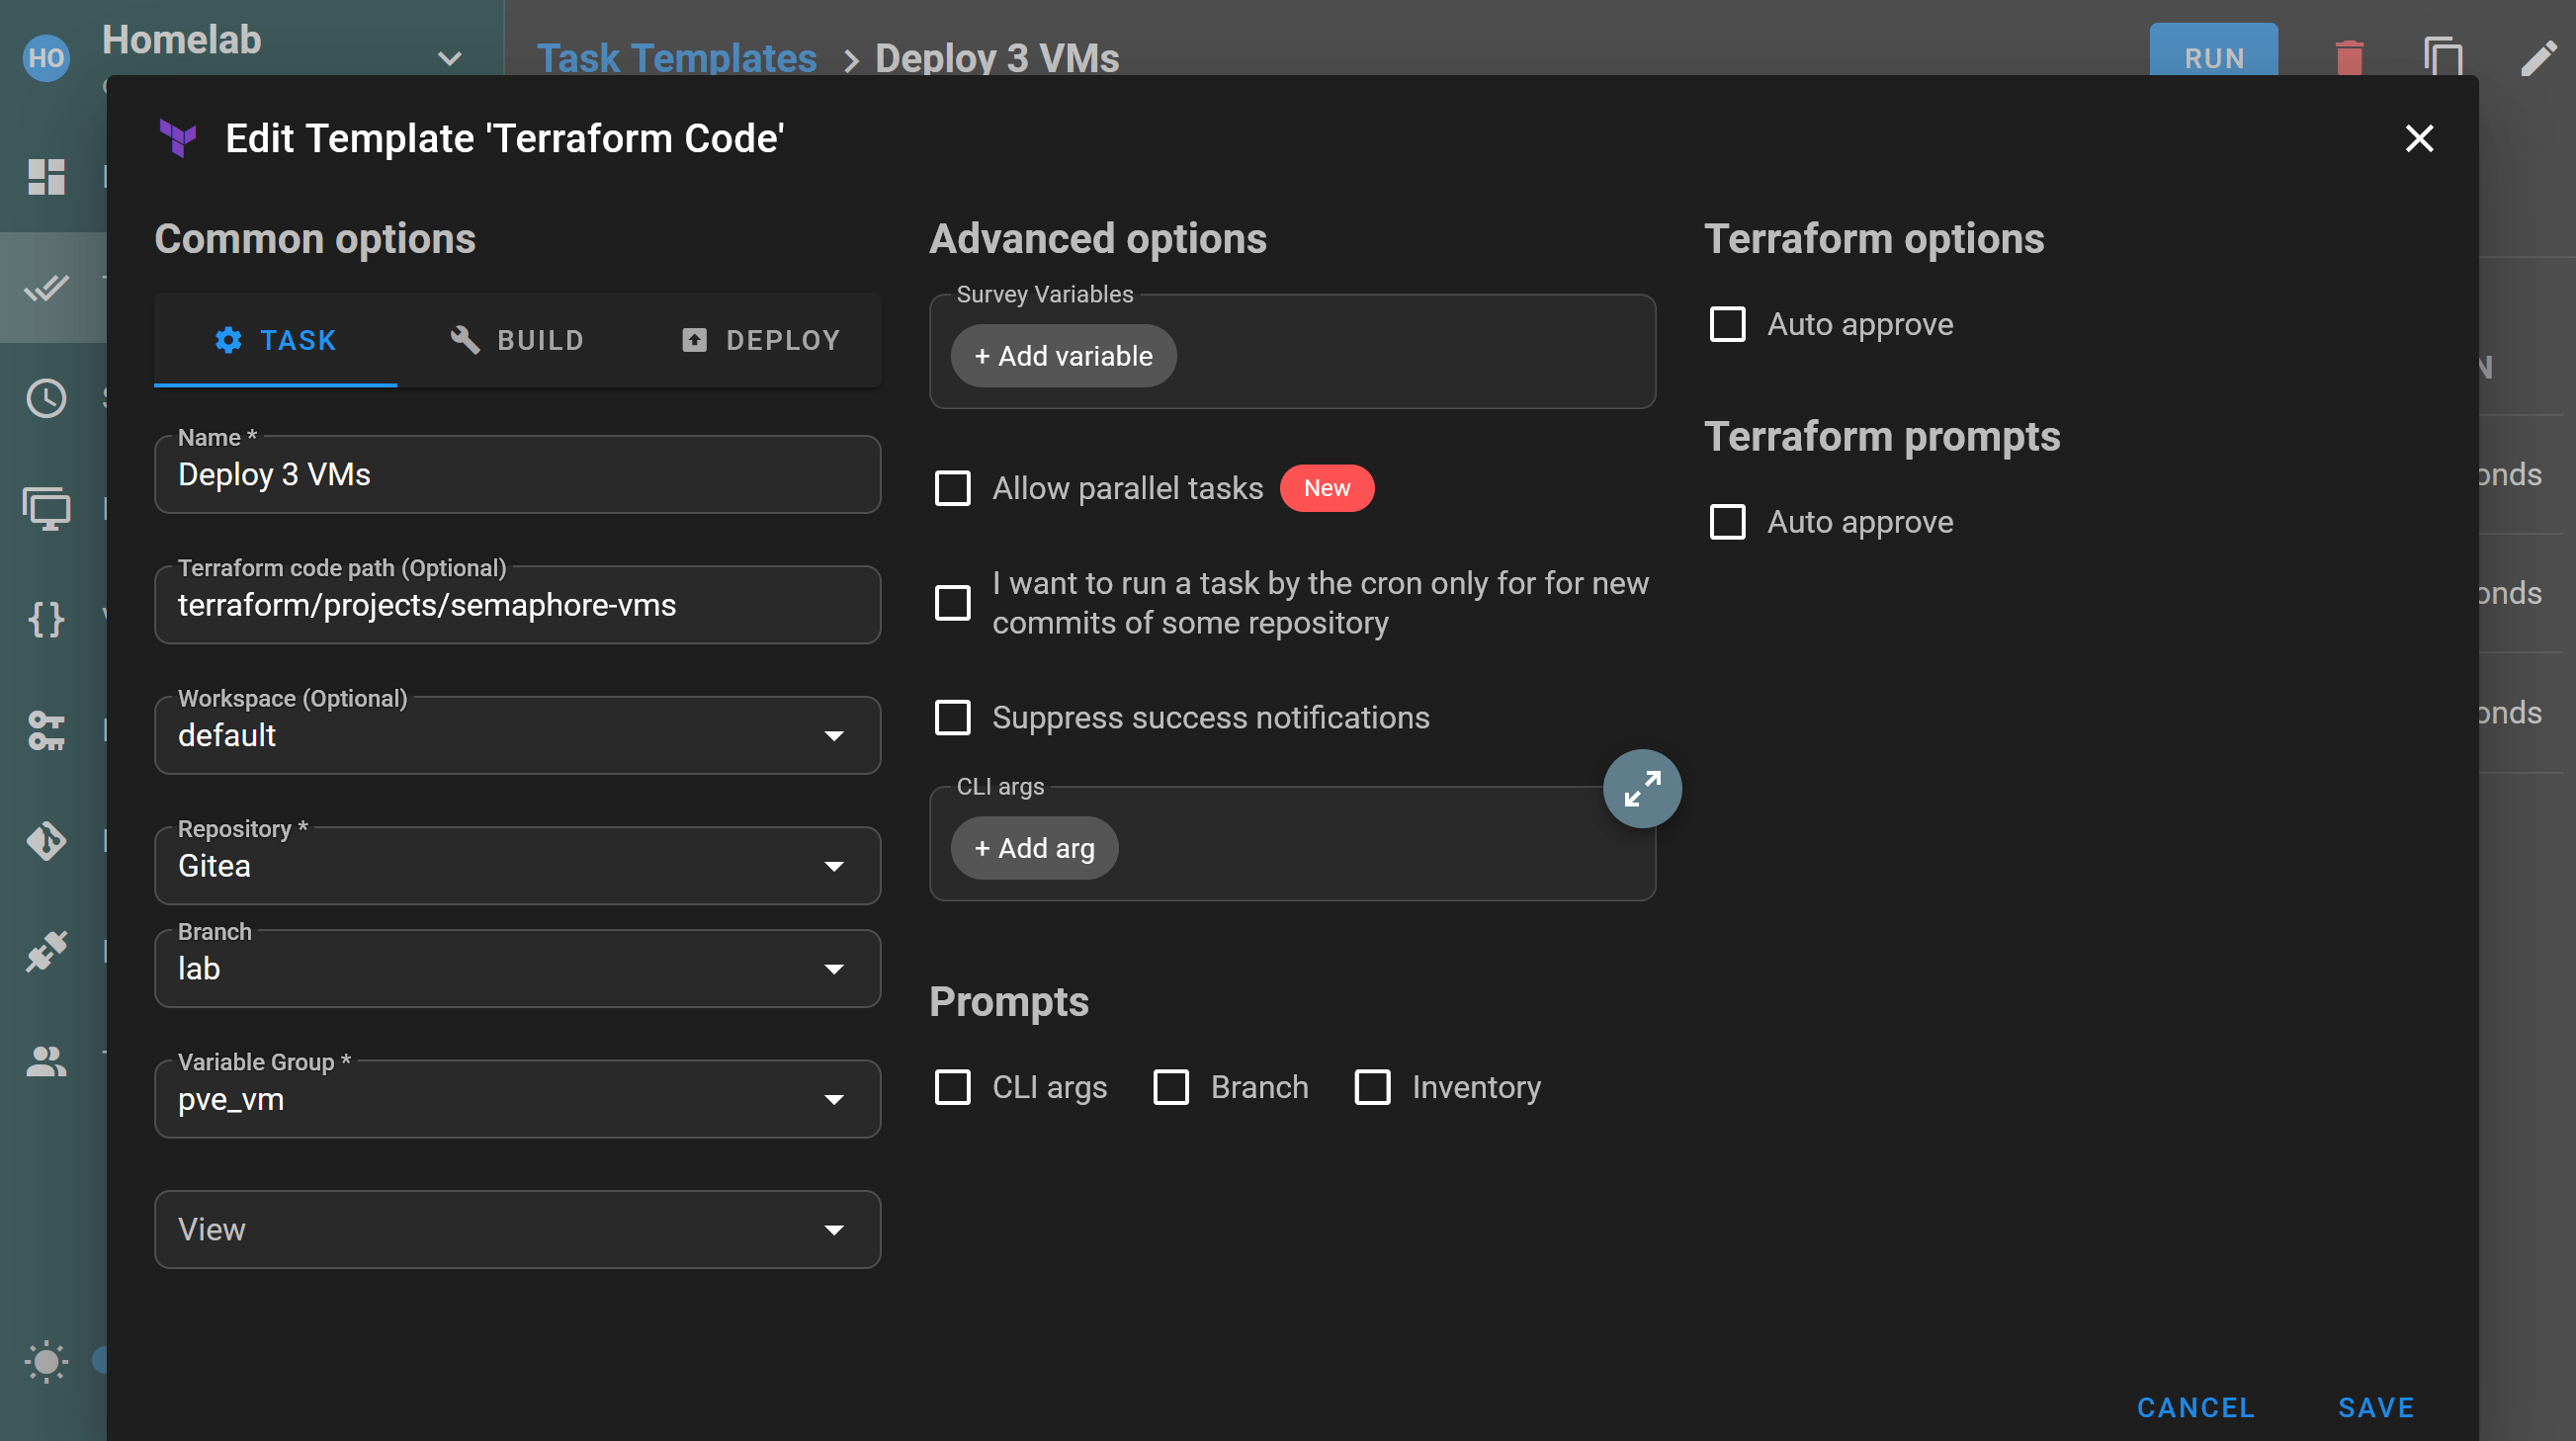
Running the template gives me some additional options related to Terraform:

After the Terraform plan, I’m proposed to apply, cancel or stop:
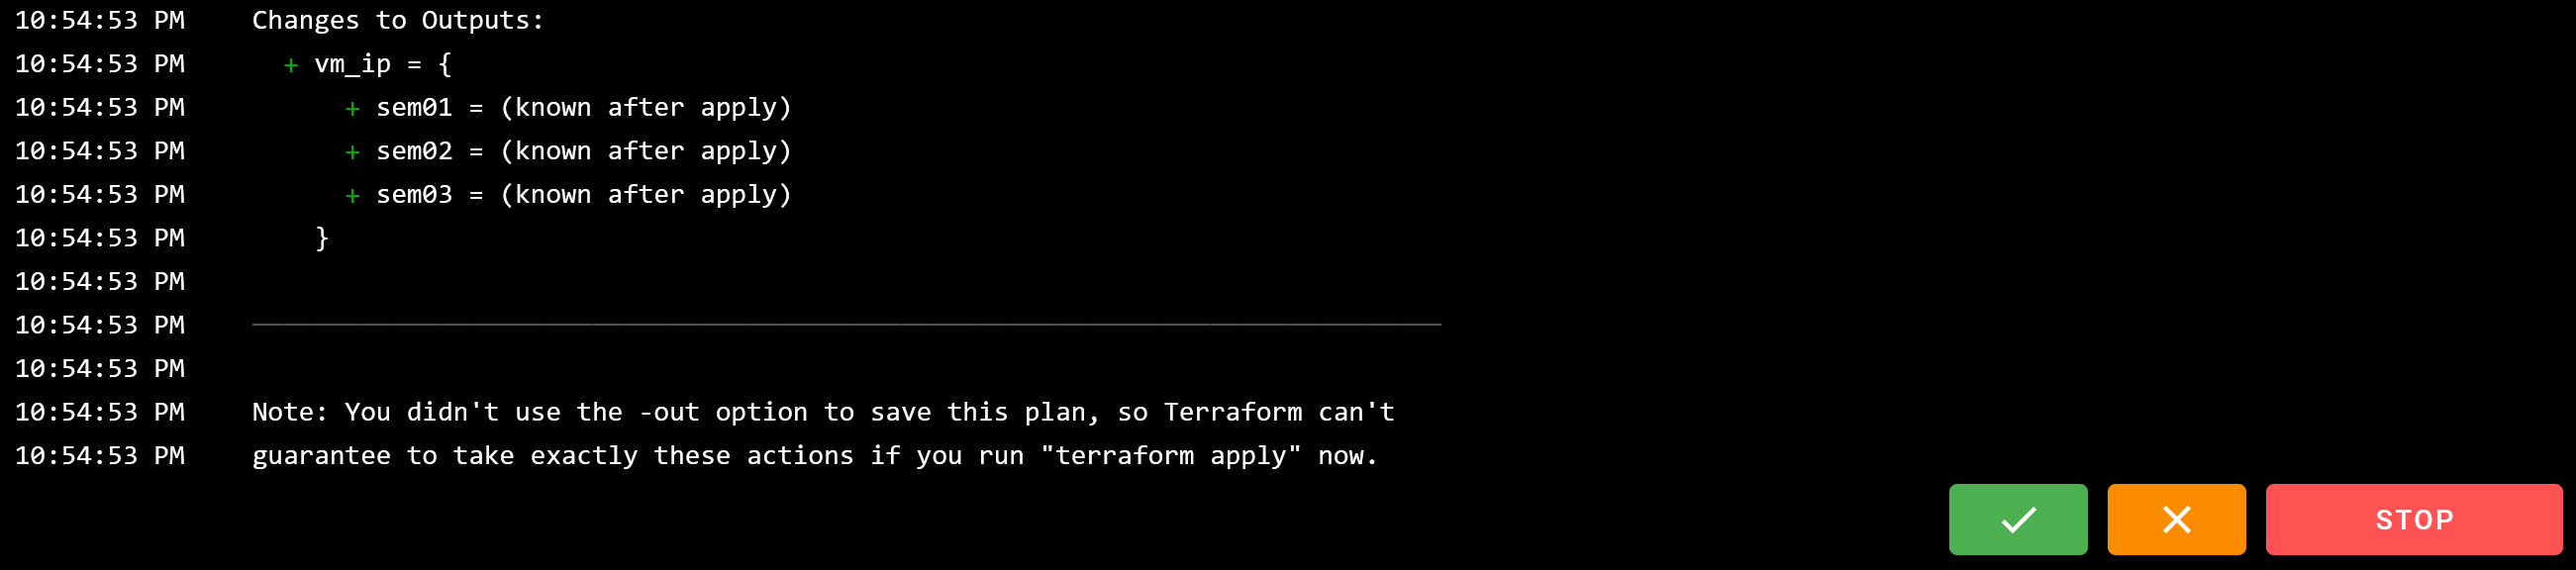
Finally after hitting ✅ to apply, I could watch Terraform build the VMs, just like using the CLI. At the end, the VMs were successfully deployed on Proxmox:

Conclusion
That’s it for my Semaphore UI tests, I hope this could help you to see what you can do with it.
Overall, the interface is clean and pleasant to use. I can definitely see myself scheduling Ansible playbooks with it, like the OPNsense updates I mentioned in the intro.
For Terraform, I’ll probably use it to spin up short-lived VMs for tests. I’d love to use the HTTP backend for tfstate, but that requires the Pro version.
To conclude, Semaphore UI is a great tool, intuitive, good-looking, and practical. Nice work from the project!