Intro
In a previous post, I explained how to deploy Virtual Machines on Proxmox using Terraform, building from a cloud-init template.
In this post, we’ll take that code and turn it into a reusable Terraform module. Then, I’ll show how to use that module in other projects to simplify and scale your infrastructure deployments.
What is a Terraform Module?
Terraform modules are reusable components that let you organize and simplify your infrastructure code by grouping related resources into a single unit. Instead of repeating the same configuration across multiple places, you can define it once in a module and use it wherever needed, just like calling a function in programming.
Modules can be local (within your project) or remote (from the Terraform Registry or a Git repository), making it easy to share and standardize infrastructure patterns across teams or projects. By using modules, you make your code more readable, maintainable, and scalable.
Transform Project into Module
We’re now going to extract the Terraform code from the previous project into a reusable module named pve_vm.
📌 You can find the full source code in my Homelab repo. The specific code for this post lives here. Make sure to adjust the variables to match your environment.
Code Structure
Our module will live next to our projects, in another folder:
terraform
`-- modules
    `-- pve_vm
        |-- main.tf
        |-- provider.tf
        `-- variables.tf
Module’s Code
📝 Basically, the module files are the same as the project files we are transforming. Providers are declared, but not configured, inside the module.
The module pve_vm will be composed of 3 files:
- main: The core logic, same code as before.
- provider: Declares required providers without configuration.
- variables: Declares module variables, excluding provider-specific ones.
main.tf
# Retrieve VM templates available in Proxmox that match the specified name
data "proxmox_virtual_environment_vms" "template" {
  filter {
    name   = "name"
    values = ["${var.vm_template}"] # The name of the template to clone from
  }
}

# Create a cloud-init configuration file as a Proxmox snippet
resource "proxmox_virtual_environment_file" "cloud_config" {
  content_type = "snippets"        # Cloud-init files are stored as snippets in Proxmox
  datastore_id = "local"           # Local datastore used to store the snippet
  node_name    = var.node_name     # The Proxmox node where the file will be uploaded

  source_raw {
    file_name = "${var.vm_name}.cloud-config.yaml" # The name of the snippet file
    data      = <<-EOF
    #cloud-config
    hostname: ${var.vm_name}
    package_update: true
    package_upgrade: true
    packages:
      - qemu-guest-agent           # Ensures the guest agent is installed
    users:
      - default
      - name: ${var.vm_user}
        groups: sudo
        shell: /bin/bash
        ssh-authorized-keys:
          - "${var.vm_user_sshkey}" # Inject user's SSH key
        sudo: ALL=(ALL) NOPASSWD:ALL
    runcmd:
      - systemctl enable qemu-guest-agent
      - reboot                     # Reboot the VM after provisioning
    EOF
  }
}

# Define and provision a new VM by cloning the template and applying initialization
resource "proxmox_virtual_environment_vm" "vm" {
  name      = var.vm_name           # VM name
  node_name = var.node_name         # Proxmox node to deploy the VM
  tags      = var.vm_tags           # Optional VM tags for categorization

  agent {
    enabled = true                  # Enable the QEMU guest agent
  }

  stop_on_destroy = true            # Ensure VM is stopped gracefully when destroyed

  clone {
    vm_id     = data.proxmox_virtual_environment_vms.template.vms[0].vm_id     # ID of the source template
    node_name = data.proxmox_virtual_environment_vms.template.vms[0].node_name # Node of the source template
  }

  bios    = var.vm_bios             # BIOS type (e.g., seabios or ovmf)
  machine = var.vm_machine          # Machine type (e.g., q35)

  cpu {
    cores = var.vm_cpu              # Number of CPU cores
    type  = "host"                  # Use host CPU type for best compatibility/performance
  }

  memory {
    dedicated = var.vm_ram          # RAM in MB
  }

  disk {
    datastore_id = var.node_datastore # Datastore to hold the disk
    interface    = "scsi0"             # Primary disk interface
    size         = 4                   # Disk size in GB
  }

  initialization {
    user_data_file_id = proxmox_virtual_environment_file.cloud_config.id # Link the cloud-init file
    datastore_id      = var.node_datastore
    interface         = "scsi1"             # Separate interface for cloud-init
    ip_config {
      ipv4 {
        address = "dhcp"            # Get IP via DHCP
      }
    }
  }

  network_device {
    bridge  = "vmbr0"               # Use the default bridge
    vlan_id = var.vm_vlan           # VLAN tagging if used
  }

  operating_system {
    type = "l26"                    # Linux 2.6+ kernel
  }

  vga {
    type = "std"                    # Standard VGA type
  }

  lifecycle {
    ignore_changes = [              # Ignore initialization section after first depoloyment for idempotency
      initialization
    ]
  }
}

# Output the assigned IP address of the VM after provisioning
output "vm_ip" {
  value       = proxmox_virtual_environment_vm.vm.ipv4_addresses[1][0] # Second network interface's first IP
  description = "VM IP"
}
provider.tf
terraform {
  required_providers {
    proxmox = {
      source = "bpg/proxmox"
    }
  }
}
variables.tf
⚠️ The defaults are based on my environment, adapt them to yours.
variable "node_name" {
  description = "Proxmox host for the VM"
  type        = string
}

variable "node_datastore" {
  description = "Datastore used for VM storage"
  type        = string
  default     = "ceph-workload"
}

variable "vm_template" {
  description = "Template of the VM"
  type        = string
  default     = "ubuntu-cloud"
}

variable "vm_name" {
  description = "Hostname of the VM"
  type        = string
}

variable "vm_user" {
  description = "Admin user of the VM"
  type        = string
  default     = "vez"
}

variable "vm_user_sshkey" {
  description = "Admin user SSH key of the VM"
  type        = string
  default     = "ssh-ed25519 AAAAC3NzaC1lZDI1NTE5AAAAID62LmYRu1rDUha3timAIcA39LtcIOny1iAgFLnxoBxm vez@bastion"
}

variable "vm_cpu" {
  description = "Number of CPU cores of the VM"
  type        = number
  default     = 1
}

variable "vm_ram" {
  description = "Number of RAM (MB) of the VM"
  type        = number
  default     = 2048
}

variable "vm_bios" {
  description = "Type of BIOS used for the VM"
  type        = string
  default     = "ovmf"
}

variable "vm_machine" {
  description = "Type of machine used for the VM"
  type        = string
  default     = "q35"
}

variable "vm_vlan" {
  description = "VLAN of the VM"
  type        = number
  default     = 66
}

variable "vm_tags" {
  description = "Tags for the VM"
  type        = list(any)
  default     = ["test"]
}
Deploy a VM Using our Module
Now that we’ve extracted all the logic into the pve_vm module, our project code only needs to reference that module and pass the required variables. This makes our setup much cleaner and easier to maintain.
Code Structure
Here what it looks like:
terraform
|-- modules
|   `-- pve_vm
|       |-- main.tf
|       |-- provider.tf
|       `-- variables.tf
`-- projects
    `-- simple-vm-with-module
        |-- credentials.auto.tfvars
        |-- main.tf
        |-- provider.tf
        `-- variables.tf
Project’s Code
In this example, I manually provide the values when calling my module. The provider is configured at project level.
main.tf
module "pve_vm" {
  source            = "../../modules/pve_vm"
  node_name         = "zenith"
  vm_name           = "zenith-vm"
  vm_cpu            = 2
  vm_ram            = 2048
  vm_vlan           = 66
}

output "vm_ip" {
  value = module.pve_vm.vm_ip
}
provider.tf
terraform {
  required_providers {
    proxmox = {
      source = "bpg/proxmox"
    }
  }
}

provider "proxmox" {
  endpoint  = var.proxmox_endpoint
  api_token = var.proxmox_api_token
  insecure  = false
  ssh {
    agent       = false
    private_key = file("~/.ssh/id_ed25519")
    username    = "root"
  }
}
variables.tf
variable "proxmox_endpoint" {
  description = "Proxmox URL endpoint"
  type        = string
}

variable "proxmox_api_token" {
  description = "Proxmox API token"
  type        = string
  sensitive   = true
}
credentials.auto.tfvars
proxmox_endpoint  = <your Proxox endpoint>
proxmox_api_token = <your Proxmox API token for the user terraformer>
Initialize the Terraform Workspace
In our new project, we first need to initialize the Terraform workspace with terraform init:
$ terraform init
Initializing the backend...
Initializing modules...
- pve_vm in ../../modules/pve_vm
Initializing provider plugins...
- Finding latest version of bpg/proxmox...
- Installing bpg/proxmox v0.78.2...
- Installed bpg/proxmox v0.78.2 (self-signed, key ID F0582AD6AE97C188)
Partner and community providers are signed by their developers.
If you'd like to know more about provider signing, you can read about it here:
https://www.terraform.io/docs/cli/plugins/signing.html
Terraform has created a lock file .terraform.lock.hcl to record the provider
selections it made above. Include this file in your version control repository
so that Terraform can guarantee to make the same selections by default when
you run "terraform init" in the future.

Terraform has been successfully initialized!

You may now begin working with Terraform. Try running "terraform plan" to see
any changes that are required for your infrastructure. All Terraform commands
should now work.

If you ever set or change modules or backend configuration for Terraform,
rerun this command to reinitialize your working directory. If you forget, other
commands will detect it and remind you to do so if necessary.
Deploy the VM
Before deploying it, make sure that everything is ok with a terraform plan.
Once ready, you can deploy it with terraform apply:
$ terraform apply
module.pve_vm.data.proxmox_virtual_environment_vms.template: Reading...
module.pve_vm.data.proxmox_virtual_environment_vms.template: Read complete after 0s [id=89b444be-7501-4538-9436-08609b380d39]

Terraform used the selected providers to generate the following execution plan. Resource actions are indicated with the following symbols:
  + create

Terraform will perform the following actions:

  # module.pve_vm.proxmox_virtual_environment_file.cloud_config will be created
  + resource "proxmox_virtual_environment_file" "cloud_config" {
      + content_type           = "snippets"
      + datastore_id           = "local"
      + file_modification_date = (known after apply)
      + file_name              = (known after apply)
      + file_size              = (known after apply)
      + file_tag               = (known after apply)
      + id                     = (known after apply)
      + node_name              = "zenith"
      + overwrite              = true
      + timeout_upload         = 1800

      + source_raw {
          + data      = <<-EOT
                #cloud-config
                hostname: zenith-vm
                package_update: true
                package_upgrade: true
                packages:
                  - qemu-guest-agent
                users:
                  - default
                  - name: vez
                    groups: sudo
                    shell: /bin/bash
                    ssh-authorized-keys:
                      - "ssh-ed25519 AAAAC3NzaC1lZDI1NTE5AAAAID62LmYRu1rDUha3timAIcA39LtcIOny1iAgFLnxoBxm vez@bastion"
                    sudo: ALL=(ALL) NOPASSWD:ALL
                runcmd:
                  - systemctl enable qemu-guest-agent
                  - reboot
            EOT
          + file_name = "zenith-vm.cloud-config.yaml"
          + resize    = 0
        }
    }

  # module.pve_vm.proxmox_virtual_environment_vm.vm will be created
  + resource "proxmox_virtual_environment_vm" "vm" {
      + acpi                    = true
      + bios                    = "ovmf"
      + id                      = (known after apply)
      + ipv4_addresses          = (known after apply)
      + ipv6_addresses          = (known after apply)
      + keyboard_layout         = "en-us"
      + mac_addresses           = (known after apply)
      + machine                 = "q35"
      + migrate                 = false
      + name                    = "zenith-vm"
      + network_interface_names = (known after apply)
      + node_name               = "zenith"
      + on_boot                 = true
      + protection              = false
      + reboot                  = false
      + reboot_after_update     = true
      + scsi_hardware           = "virtio-scsi-pci"
      + started                 = true
      + stop_on_destroy         = true
      + tablet_device           = true
      + tags                    = [
          + "test",
        ]
      + template                = false
      + timeout_clone           = 1800
      + timeout_create          = 1800
      + timeout_migrate         = 1800
      + timeout_move_disk       = 1800
      + timeout_reboot          = 1800
      + timeout_shutdown_vm     = 1800
      + timeout_start_vm        = 1800
      + timeout_stop_vm         = 300
      + vm_id                   = (known after apply)

      + agent {
          + enabled = true
          + timeout = "15m"
          + trim    = false
          + type    = "virtio"
        }

      + clone {
          + full      = true
          + node_name = "apex"
          + retries   = 1
          + vm_id     = 900
        }

      + cpu {
          + cores      = 2
          + hotplugged = 0
          + limit      = 0
          + numa       = false
          + sockets    = 1
          + type       = "host"
          + units      = 1024
        }

      + disk {
          + aio               = "io_uring"
          + backup            = true
          + cache             = "none"
          + datastore_id      = "ceph-workload"
          + discard           = "ignore"
          + file_format       = (known after apply)
          + interface         = "scsi0"
          + iothread          = false
          + path_in_datastore = (known after apply)
          + replicate         = true
          + size              = 4
          + ssd               = false
        }

      + initialization {
          + datastore_id         = "ceph-workload"
          + interface            = "scsi1"
          + meta_data_file_id    = (known after apply)
          + network_data_file_id = (known after apply)
          + type                 = (known after apply)
          + user_data_file_id    = (known after apply)
          + vendor_data_file_id  = (known after apply)

          + ip_config {
              + ipv4 {
                  + address = "dhcp"
                }
            }
        }

      + memory {
          + dedicated      = 2048
          + floating       = 0
          + keep_hugepages = false
          + shared         = 0
        }

      + network_device {
          + bridge      = "vmbr0"
          + enabled     = true
          + firewall    = false
          + mac_address = (known after apply)
          + model       = "virtio"
          + mtu         = 0
          + queues      = 0
          + rate_limit  = 0
          + vlan_id     = 66
        }

      + operating_system {
          + type = "l26"
        }

      + vga {
          + memory = 16
          + type   = "std"
        }
    }

Plan: 2 to add, 0 to change, 0 to destroy.

Changes to Outputs:
  + vm_ip = (known after apply)

Do you want to perform these actions?
  Terraform will perform the actions described above.
  Only 'yes' will be accepted to approve.

  Enter a value: yes

module.pve_vm.proxmox_virtual_environment_file.cloud_config: Creating...
module.pve_vm.proxmox_virtual_environment_file.cloud_config: Creation complete after 1s [id=local:snippets/zenith-vm.cloud-config.yaml]
module.pve_vm.proxmox_virtual_environment_vm.vm: Creating...
module.pve_vm.proxmox_virtual_environment_vm.vm: Still creating... [10s elapsed]
module.pve_vm.proxmox_virtual_environment_vm.vm: Still creating... [20s elapsed]
module.pve_vm.proxmox_virtual_environment_vm.vm: Still creating... [30s elapsed]
module.pve_vm.proxmox_virtual_environment_vm.vm: Still creating... [40s elapsed]
module.pve_vm.proxmox_virtual_environment_vm.vm: Still creating... [50s elapsed]
module.pve_vm.proxmox_virtual_environment_vm.vm: Still creating... [1m0s elapsed]
module.pve_vm.proxmox_virtual_environment_vm.vm: Still creating... [1m10s elapsed]
module.pve_vm.proxmox_virtual_environment_vm.vm: Still creating... [1m20s elapsed]
module.pve_vm.proxmox_virtual_environment_vm.vm: Still creating... [1m30s elapsed]
module.pve_vm.proxmox_virtual_environment_vm.vm: Still creating... [1m40s elapsed]
module.pve_vm.proxmox_virtual_environment_vm.vm: Still creating... [1m50s elapsed]
module.pve_vm.proxmox_virtual_environment_vm.vm: Still creating... [2m0s elapsed]
module.pve_vm.proxmox_virtual_environment_vm.vm: Still creating... [2m10s elapsed]
module.pve_vm.proxmox_virtual_environment_vm.vm: Still creating... [2m20s elapsed]
module.pve_vm.proxmox_virtual_environment_vm.vm: Still creating... [2m30s elapsed]
module.pve_vm.proxmox_virtual_environment_vm.vm: Still creating... [2m40s elapsed]
module.pve_vm.proxmox_virtual_environment_vm.vm: Still creating... [2m50s elapsed]
module.pve_vm.proxmox_virtual_environment_vm.vm: Still creating... [3m0s elapsed]
module.pve_vm.proxmox_virtual_environment_vm.vm: Still creating... [3m10s elapsed]
module.pve_vm.proxmox_virtual_environment_vm.vm: Creation complete after 3m13s [id=103]

Apply complete! Resources: 2 added, 0 changed, 0 destroyed.

Outputs:

vm_ip = "192.168.66.159"
✅ The VM is now ready!
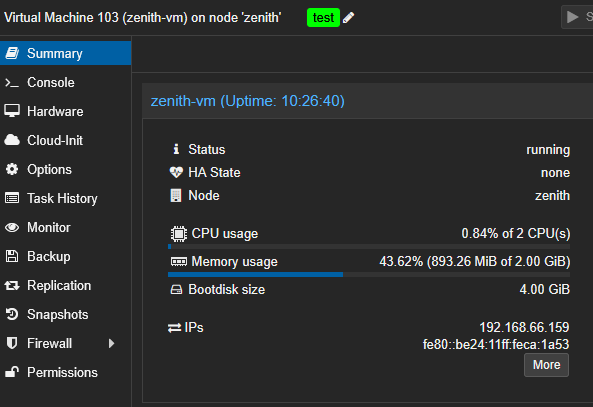
🕗 Don’t pay attention to the uptime, I took the screenshot the next day
Deploy Multiple VM at Once
Ok, I’ve deployed a single VM, fine. But now, how to scale it? How to deploy multiple instances of that template, with different names, on different nodes, with different size? This is what I will show you now.
One VM per Node
In the earlier example, we passed fixed values to the module. Instead, we could define a local object to store the VM specs, and reference its values when calling the module. This approach makes it easier to scale the deployment logic later:
module "pve_vm" {
  source    = "../../modules/pve_vm"
  node_name = local.vm.node_name
  vm_name   = local.vm.vm_name
  vm_cpu    = local.vm.vm_cpu
  vm_ram    = local.vm.vm_ram
  vm_vlan   = local.vm.vm_vlan
}

locals {
  vm = {
    node_name = "zenith"
    vm_name   = "zenith-vm"
    vm_cpu    = 2
    vm_ram    = 2048
    vm_vlan   = 66
  }
}
I could also call the module while iterating on that object:
module "pve_vm" {
  source    = "../../modules/pve_vm"
  for_each  = local.vm_list
  node_name = each.value.node_name
  vm_name   = each.value.vm_name
  vm_cpu    = each.value.vm_cpu
  vm_ram    = each.value.vm_ram
  vm_vlan   = each.value.vm_vlan
}

locals {
  vm_list = {
    zenith = {
      node_name = "zenith"
      vm_name   = "zenith-vm"
      vm_cpu    = 2
      vm_ram    = 2048
      vm_vlan   = 66
    }
  }
}
While this does not make sense with only one VM, I could use this module syntax, for example, to deploy one VM per node:
module "pve_vm" {
  source    = "../../modules/pve_vm"
  for_each  = local.vm_list
  node_name = each.value.node_name
  vm_name   = each.value.vm_name
  vm_cpu    = each.value.vm_cpu
  vm_ram    = each.value.vm_ram
  vm_vlan   = each.value.vm_vlan
}

locals {
  vm_list = {
    for vm in flatten([
      for node in data.proxmox_virtual_environment_nodes.pve_nodes.names : {
        node_name = node
        vm_name   = "${node}-vm"
        vm_cpu    = 2
        vm_ram    = 2048
        vm_vlan   = 66
      }
    ]) : vm.vm_name => vm
  }
}

data "proxmox_virtual_environment_nodes" "pve_nodes" {}

output "vm_ip" {
  value = { for k, v in module.pve_vm : k => v.vm_ip }
}
✅ This would deploy 3 VM on my cluster, one per node:
Multiple VM per Node
Finally, let’s scale things up by deploying multiple VMs with different configurations per node. We’ll define a set of roles and use a nested loop to generate the desired VM configurations for each Proxmox node:
module "pve_vm" {
  source    = "../../modules/pve_vm"
  for_each  = local.vm_list
  node_name = each.value.node_name
  vm_name   = each.value.vm_name
  vm_cpu    = each.value.vm_cpu
  vm_ram    = each.value.vm_ram
  vm_vlan   = each.value.vm_vlan
}

locals {
  vm_attr = {
    "master" = { ram = 2048, cpu = 2, vlan = 66 }
    "worker" = { ram = 1024, cpu = 1, vlan = 66 }
  }

  vm_list = {
    for vm in flatten([
      for node in data.proxmox_virtual_environment_nodes.pve_nodes.names : [
        for role, config in local.vm_attr : {
          node_name = node
          vm_name   = "${node}-${role}"
          vm_cpu    = config.cpu
          vm_ram    = config.ram
          vm_vlan   = config.vlan
        }
      ]
    ]) : vm.vm_name => vm
  }
}

data "proxmox_virtual_environment_nodes" "pve_nodes" {}

output "vm_ip" {
  value = { for k, v in module.pve_vm : k => v.vm_ip }
}
🚀 After deploying it with a terraform apply, I got this:
Apply complete! Resources: 6 added, 0 changed, 0 destroyed.

Outputs:

vm_ip = {
  "apex-master" = "192.168.66.167"
  "apex-worker" = "192.168.66.168"
  "vertex-master" = "192.168.66.169"
  "vertex-worker" = "192.168.66.170"
  "zenith-master" = "192.168.66.166"
  "zenith-worker" = "192.168.66.172"
}
Conclusion
We’ve transformed our Proxmox VM deployment into a reusable Terraform module and used it to easily scale our infrastructure across multiple nodes.
In a next post, I would like to pair Terraform with Ansible to manage the VM deployment and even manage different Terraform workspaces to handle several environments.
Stay tuned!