Intro
One of the most satisfying parts of building a homelab is getting to apply production-grade tooling to a personal setup. I’ve been working on defining my entire infrastructure as code, and the first piece I tackled was VM deployment with Terraform on Proxmox.
In this article, I’ll walk you through creating a simple VM on Proxmox VE 8 using Terraform, based on a cloud-init template I covered in this article. Everything runs from a dedicated LXC container where I manage my whole infrastructure.
📝 The full code used in this article is available in my Homelab GitHub repository
What is Terraform?
Terraform is an open-source IaC tool developed by HashiCorp. It lets you define and provision infrastructure using a high-level configuration language called HCL (HashiCorp Configuration Language). With Terraform, you can manage cloud services, VMs, networks, DNS records, and more.
In my homelab, Terraform can simplify VM deployment and make my environment reproducible and easily re-deploy everything from scratch as needed.
A quick mention of OpenTofu, it is a community-driven fork of Terraform that emerged after some licensing changes. It’s almost fully compatible with Terraform and could be a great alternative down the line. But for now, I’m sticking with Terraform.
Proxmox Terraform Providers
To use Terraform, you’ll need a provider, a plugin that lets Terraform interact with your infrastructure, in the case of Proxmox, it will interact with the Proxmox API. There are currently two providers:
- Telmate/proxmox: One of the original providers. It’s widely used but not very actively maintained. It’s simple to use, with plenty of documentation available online, but has limited features, with only 4 resources are available and no data sources: for example, I wasn’t able to retrieve node resource details.
- bpg/proxmox: A newer and more actively developed provider, apparently developed by a single guy, with cleaner syntax and much wider resources support. It was harder to setup but I found it mature enough to work with it.
I chose the bpg/proxmox provider because it’s better maintained at the time of writing and I needed to retrieve nodes values, such as their hostname, etc.
Prepare the Environment
Create a Cloud-init VM Template in Proxmox
Check out my previous article on Proxmox - Create a Cloud-Init VM Template.
Install Terraform
For the Terraform installation into my LXC container, I followed the documentation.
# Ensure that your system is up to date and you have installed the `gnupg`, `software-properties-common`, and `curl` packages installed. You will use these packages to verify HashiCorp's GPG signature and install HashiCorp's Debian package repository.
apt-get update && apt-get install -y gnupg software-properties-common

# Install the HashiCorp [GPG key](https://apt.releases.hashicorp.com/gpg).
wget -O- <https://apt.releases.hashicorp.com/gpg> | gpg --dearmor | tee /usr/share/keyrings/hashicorp-archive-keyring.gpg > /dev/null

# Verify the key's fingerprint.
gpg --no-default-keyring --keyring /usr/share/keyrings/hashicorp-archive-keyring.gpg --fingerprint

# Add the official HashiCorp repository to your system. The `lsb_release -cs` command finds the distribution release codename for your current system, such as `buster`, `groovy`, or `sid`.
echo "deb [signed-by=/usr/share/keyrings/hashicorp-archive-keyring.gpg] <https://apt.releases.hashicorp.com> $(lsb_release -cs) main" | tee /etc/apt/sources.list.d/hashicorp.list

# Download the package information from HashiCorp.
apt update

# Install Terraform from the new repository.
apt-get install terraform
Create a Dedicated Terraform User on Proxmox
Before Terraform can interact with your Proxmox cluster, you want to create a dedicated user with limited privileges. You could use the root@pam but I wouldn’t recommended it for security perspectives.
SSH into any Proxmox node using a privileged account, root in this case.
- Create the Role
TerraformUser
pveum role add TerraformUser -privs "\
  Datastore.Allocate \
  Datastore.AllocateSpace \
  Datastore.Audit \
  Pool.Allocate \
  Sys.Audit \
  Sys.Console \
  Sys.Modify \
  VM.Allocate \
  VM.Audit \
  VM.Clone \
  VM.Config.CDROM \
  VM.Config.Cloudinit \
  VM.Config.CPU \
  VM.Config.Disk \
  VM.Config.HWType \
  VM.Config.Memory \
  VM.Config.Network \
  VM.Config.Options \
  VM.Console \
  VM.Migrate \
  VM.Monitor \
  VM.PowerMgmt \
  SDN.Use"
⚠️ The list of available privileges has been changed in PVE 9.0, use this command:
pveum role add TerraformUser -privs "\
  Datastore.Allocate \
  Datastore.AllocateSpace \
  Datastore.Audit \
  Pool.Allocate \
  Pool.Audit \
  Sys.Audit \
  Sys.Console \
  Sys.Modify \
  Sys.Syslog \
  VM.Allocate \
  VM.Audit \
  VM.Clone \
  VM.Config.CDROM \
  VM.Config.Cloudinit \
  VM.Config.CPU \
  VM.Config.Disk \
  VM.Config.HWType \
  VM.Config.Memory \
  VM.Config.Network \
  VM.Config.Options \
  VM.Console \
  VM.Migrate \
  VM.GuestAgent.Audit \
  VM.GuestAgent.FileRead \
  VM.GuestAgent.FileWrite \
  VM.GuestAgent.FileSystemMgmt \
  VM.GuestAgent.Unrestricted \
  VM.PowerMgmt \
  Mapping.Audit \
  Mapping.Use \
  SDN.Audit \
  SDN.Use"
- Create the User
terraformer
pveum user add terraformer@pve --password <password>
- Assign the Role
TerraformUserto the Userterraformer
pveum aclmod / -user terraformer@pve -role TerraformUser
- Create API Token for the user
terraformer
pveum user token add terraformer@pve terraform -expire 0 -privsep 0 -comment "Terraform token"
⚠️ Copy and save the token given!
Install SSH Keys on your Proxmox Nodes
This step is required if you’re using certain resources that need to run commands directly on the node to perform actions that are not supported by Proxmox API, detailed here, this would be the case for our setup with cloud-init.
We could either use a SSH-agent or a SSH key, I preferred the latter, so we have to generate a ssh-key and install it on your Proxmox nodes. You generate these keys from where Terraform is installed.
- Generate the SSH key pair
ssh-keygen
- Install it on your Proxmox node(s) for the root user
ssh-copy-id root@<your Proxmox node>
Deploy your First VM
Let’s dive into the fun part! Now we have our environment ready to deploy VM using Terraform on Proxmox, let’s code!
Terraform Code
📌 Reminder, you can find all the code I have written in my Homelab repo, the following code is located here. Don’t forget to match your variables with your environment!
Code Structure
Here is the code structure, you can keep all your code in a single .tf file but I prefer to keep it clean.
terraform
`-- projects
    `-- simple-vm
        |-- credentials.auto.tfvars
        |-- main.tf
        |-- provider.tf
        |-- terraform.tfvars
        `-- variables.tf
provider.tf
Defines the provider configuration (e.g., Proxmox) and how Terraform connects to it.
# Define the required Terraform provider block
terraform {
  required_providers {
    proxmox = {
      source = "bpg/proxmox" # Use the community Proxmox provider from the bpg namespace
    }
  }
}

# Configure the Proxmox provider with API and SSH access
provider "proxmox" {
  endpoint  = var.proxmox_endpoint  # Proxmox API URL (e.g., https://proxmox.local:8006/api2/json)
  api_token = var.proxmox_api_token # API token for authentication (should have appropriate permissions)
  insecure  = false                 # Reject self-signed or invalid TLS certificates (set to true only in trusted/test environments)

  # Optional SSH settings used for VM customization via SSH
  ssh {
    agent       = false                        # Do not use the local SSH agent; use key file instead
    private_key = file("~/.ssh/id_ed25519")    # Load SSH private key from the local file system
    username    = "root"                       # SSH username for connecting to the Proxmox host
  }
}
main.tf
Contains the core infrastructure logic, such as resources and modules to be deployed.
# Retrieve VM templates available in Proxmox that match the specified name
data "proxmox_virtual_environment_vms" "template" {
  filter {
    name   = "name"
    values = ["${var.vm_template}"] # The name of the template to clone from
  }
}

# Create a cloud-init configuration file as a Proxmox snippet
resource "proxmox_virtual_environment_file" "cloud_config" {
  content_type = "snippets"        # Cloud-init files are stored as snippets in Proxmox
  datastore_id = "local"           # Local datastore used to store the snippet
  node_name    = var.node_name     # The Proxmox node where the file will be uploaded

  source_raw {
    file_name = "vm.cloud-config.yaml" # The name of the snippet file
    data      = <<-EOF
    #cloud-config
    hostname: ${var.vm_name}
    package_update: true
    package_upgrade: true
    packages:
      - qemu-guest-agent           # Ensures the guest agent is installed
    users:
      - default
      - name: ${var.vm_user}
        groups: sudo
        shell: /bin/bash
        ssh-authorized-keys:
          - "${var.vm_user_sshkey}" # Inject user's SSH key
        sudo: ALL=(ALL) NOPASSWD:ALL
    runcmd:
      - systemctl enable qemu-guest-agent
      - reboot                     # Reboot the VM after provisioning
    EOF
  }
}

# Define and provision a new VM by cloning the template and applying initialization
resource "proxmox_virtual_environment_vm" "vm" {
  name      = var.vm_name           # VM name
  node_name = var.node_name         # Proxmox node to deploy the VM
  tags      = var.vm_tags           # Optional VM tags for categorization

  agent {
    enabled = true                  # Enable the QEMU guest agent
  }

  stop_on_destroy = true            # Ensure VM is stopped gracefully when destroyed

  clone {
    vm_id     = data.proxmox_virtual_environment_vms.template.vms[0].vm_id     # ID of the source template
    node_name = data.proxmox_virtual_environment_vms.template.vms[0].node_name # Node of the source template
  }

  bios    = var.vm_bios             # BIOS type (e.g., seabios or ovmf)
  machine = var.vm_machine          # Machine type (e.g., q35)

  cpu {
    cores = var.vm_cpu              # Number of CPU cores
    type  = "host"                  # Use host CPU type for best compatibility/performance
  }

  memory {
    dedicated = var.vm_ram          # RAM in MB
  }

  disk {
    datastore_id = var.node_datastore # Datastore to hold the disk
    interface    = "scsi0"             # Primary disk interface
    size         = 4                   # Disk size in GB
  }

  initialization {
    user_data_file_id = proxmox_virtual_environment_file.cloud_config.id # Link the cloud-init file
    datastore_id      = var.node_datastore
    interface         = "scsi1"             # Separate interface for cloud-init
    ip_config {
      ipv4 {
        address = "dhcp"            # Get IP via DHCP
      }
    }
  }

  network_device {
    bridge  = "vmbr0"               # Use the default bridge
    vlan_id = var.vm_vlan           # VLAN tagging if used
  }

  operating_system {
    type = "l26"                    # Linux 2.6+ kernel
  }

  vga {
    type = "std"                    # Standard VGA type
  }

  lifecycle {
    ignore_changes = [              # Ignore initialization section after first depoloyment for idempotency
      initialization
    ]
  }
}

# Output the assigned IP address of the VM after provisioning
output "vm_ip" {
  value       = proxmox_virtual_environment_vm.vm.ipv4_addresses[1][0] # Second network interface's first IP
  description = "VM IP"
}
variables.tf
Declares all input variables, their types, descriptions, and optional default values.
variable "proxmox_endpoint" {
  description = "Proxmox URL endpoint"
  type        = string
}

variable "proxmox_api_token" {
  description = "Proxmox API token"
  type        = string
  sensitive   = true
}

variable "node_name" {
  description = "Proxmox host for the VM"
  type        = string
}

variable "node_datastore" {
  description = "Datastore used for VM storage"
  type        = string
  default     = "ceph-workload"
}

variable "vm_template" {
  description = "Template of the VM"
  type        = string
  default     = "ubuntu-cloud"
}

variable "vm_name" {
  description = "Hostname of the VM"
  type        = string
}

variable "vm_user" {
  description = "Admin user of the VM"
  type        = string
  default     = "vez"
}

variable "vm_user_sshkey" {
  description = "Admin user SSH key of the VM"
  type        = string
  default     = "ssh-ed25519 AAAAC3NzaC1lZDI1NTE5AAAAID62LmYRu1rDUha3timAIcA39LtcIOny1iAgFLnxoBxm vez@bastion"
}

variable "vm_cpu" {
  description = "Number of CPU cores of the VM"
  type        = number
  default     = 1
}

variable "vm_ram" {
  description = "Number of RAM (MB) of the VM"
  type        = number
  default     = 2048
}

variable "vm_bios" {
  description = "Type of BIOS used for the VM"
  type        = string
  default     = "ovmf"
}

variable "vm_machine" {
  description = "Type of machine used for the VM"
  type        = string
  default     = "q35"
}

variable "vm_vlan" {
  description = "VLAN of the VM"
  type        = number
  default     = 66
}

variable "vm_tags" {
  description = "Tags for the VM"
  type        = list(any)
  default     = ["test"]
}
terraform.tfvars
Automatically loaded variable values that override defaults, used to customize deployments.
node_name = "zenith"     # Name of the Proxmox node where the VM will be deployed
vm_name   = "zenith-vm"  # Desired name for the new virtual machine
vm_cpu    = 2            # Number of CPU cores to allocate to the VM
vm_ram    = 2048         # Amount of RAM in MB (2 GB)
vm_vlan   = 66           # VLAN ID for network segmentation
credentials.auto.tfvars
Automatically loads sensitive variables like API tokens or credentials at runtime, it is not in the repository so you will have to create it manually.
proxmox_endpoint  = <your Proxox endpoint>
proxmox_api_token = <your Proxmox API token for the user terraformer>
💡 To improve readability, you can automatically formats your Terraform code
terraform fmt, to follow standard style conventions, making it clean and consistent.
Initialize your Workspace
The first step when working with Terraform is to initialize your workspace. You will do that with the terraform init command, which will:
- Initializes the working directory
- Downloads required providers
- Installs modules
- Sets up the backend
$ terraform init
Initializing the backend...
Initializing provider plugins...
- Finding latest version of bpg/proxmox...
- Installing bpg/proxmox v0.78.0...
- Installed bpg/proxmox v0.78.0 (self-signed, key ID F0582AD6AE97C188)
Partner and community providers are signed by their developers.
If you'd like to know more about provider signing, you can read about it here:
https://www.terraform.io/docs/cli/plugins/signing.html
Terraform has created a lock file .terraform.lock.hcl to record the provider
selections it made above. Include this file in your version control repository
so that Terraform can guarantee to make the same selections by default when
you run "terraform init" in the future.

Terraform has been successfully initialized!

You may now begin working with Terraform. Try running "terraform plan" to see
any changes that are required for your infrastructure. All Terraform commands
should now work.

If you ever set or change modules or backend configuration for Terraform,
rerun this command to reinitialize your working directory. If you forget, other
commands will detect it and remind you to do so if necessary.
Deploy your Terraform Infrastructure
Great, we now have our environment ready for deployment! Before creating your VM, you can run terraform plan against your code and Terraform will tell you what it will do with it!
To actually launch it, you will need to launch terraform apply
$ terraform apply
data.proxmox_virtual_environment_vms.template: Reading...
data.proxmox_virtual_environment_vms.template: Read complete after 0s [id=d3292ffb-f11d-4588-9e97-fabc0f93cc39]

Terraform used the selected providers to generate the following execution plan. Resource actions are indicated with the following symbols:
  + create

Terraform will perform the following actions:

  # proxmox_virtual_environment_file.cloud_config will be created
  + resource "proxmox_virtual_environment_file" "cloud_config" {
      + content_type           = "snippets"
      + datastore_id           = "local"
      + file_modification_date = (known after apply)
      + file_name              = (known after apply)
      + file_size              = (known after apply)
      + file_tag               = (known after apply)
      + id                     = (known after apply)
      + node_name              = "zenith"
      + overwrite              = true
      + timeout_upload         = 1800

      + source_raw {
          + data      = <<-EOT
                #cloud-config
                hostname: zenith-vm
                package_update: true
                package_upgrade: true
                packages:
                  - qemu-guest-agent           # Ensures the guest agent is installed
                users:
                  - default
                  - name: vez
                    groups: sudo
                    shell: /bin/bash
                    ssh-authorized-keys:
                      - "ssh-ed25519 AAAAC3NzaC1lZDI1NTE5AAAAID62LmYRu1rDUha3timAIcA39LtcIOny1iAgFLnxoBxm vez@bastion" # Inject user's SSH key
                    sudo: ALL=(ALL) NOPASSWD:ALL
                runcmd:
                  - systemctl enable qemu-guest-agent
                  - reboot                     # Reboot the VM after provisioning
            EOT
          + file_name = "vm.cloud-config.yaml"
          + resize    = 0
        }
    }

  # proxmox_virtual_environment_vm.vm will be created
  + resource "proxmox_virtual_environment_vm" "vm" {
      + acpi                    = true
      + bios                    = "ovmf"
      + id                      = (known after apply)
      + ipv4_addresses          = (known after apply)
      + ipv6_addresses          = (known after apply)
      + keyboard_layout         = "en-us"
      + mac_addresses           = (known after apply)
      + machine                 = "q35"
      + migrate                 = false
      + name                    = "zenith-vm"
      + network_interface_names = (known after apply)
      + node_name               = "zenith"
      + on_boot                 = true
      + protection              = false
      + reboot                  = false
      + reboot_after_update     = true
      + scsi_hardware           = "virtio-scsi-pci"
      + started                 = true
      + stop_on_destroy         = true
      + tablet_device           = true
      + tags                    = [
          + "test",
        ]
      + template                = false
      + timeout_clone           = 1800
      + timeout_create          = 1800
      + timeout_migrate         = 1800
      + timeout_move_disk       = 1800
      + timeout_reboot          = 1800
      + timeout_shutdown_vm     = 1800
      + timeout_start_vm        = 1800
      + timeout_stop_vm         = 300
      + vm_id                   = (known after apply)

      + agent {
          + enabled = true
          + timeout = "15m"
          + trim    = false
          + type    = "virtio"
        }

      + clone {
          + full      = true
          + node_name = "apex"
          + retries   = 1
          + vm_id     = 900
        }

      + cpu {
          + cores      = 2
          + hotplugged = 0
          + limit      = 0
          + numa       = false
          + sockets    = 1
          + type       = "host"
          + units      = 1024
        }

      + disk {
          + aio               = "io_uring"
          + backup            = true
          + cache             = "none"
          + datastore_id      = "ceph-workload"
          + discard           = "ignore"
          + file_format       = (known after apply)
          + interface         = "scsi0"
          + iothread          = false
          + path_in_datastore = (known after apply)
          + replicate         = true
          + size              = 4
          + ssd               = false
        }

      + initialization {
          + datastore_id         = "ceph-workload"
          + interface            = "scsi1"
          + meta_data_file_id    = (known after apply)
          + network_data_file_id = (known after apply)
          + type                 = (known after apply)
          + user_data_file_id    = (known after apply)
          + vendor_data_file_id  = (known after apply)

          + ip_config {
              + ipv4 {
                  + address = "dhcp"
                }
            }
        }

      + memory {
          + dedicated      = 2048
          + floating       = 0
          + keep_hugepages = false
          + shared         = 0
        }

      + network_device {
          + bridge      = "vmbr0"
          + enabled     = true
          + firewall    = false
          + mac_address = (known after apply)
          + model       = "virtio"
          + mtu         = 0
          + queues      = 0
          + rate_limit  = 0
          + vlan_id     = 66
        }
        + operating_system {
          + type = "l26"
        }

      + vga {
          + memory = 16
          + type   = "std"
        }
    }

Plan: 2 to add, 0 to change, 0 to destroy.

Changes to Outputs:
  + vm_ip = (known after apply)

Do you want to perform these actions?
  Terraform will perform the actions described above.
  Only 'yes' will be accepted to approve.

  Enter a value: yes

proxmox_virtual_environment_file.cloud_config: Creating...
proxmox_virtual_environment_file.cloud_config: Creation complete after 1s [id=local:snippets/vm.cloud-config.yaml]
proxmox_virtual_environment_vm.vm: Creating...
proxmox_virtual_environment_vm.vm: Still creating... [10s elapsed]
proxmox_virtual_environment_vm.vm: Still creating... [20s elapsed]
proxmox_virtual_environment_vm.vm: Still creating... [30s elapsed]
proxmox_virtual_environment_vm.vm: Still creating... [40s elapsed]
proxmox_virtual_environment_vm.vm: Still creating... [50s elapsed]
proxmox_virtual_environment_vm.vm: Still creating... [1m0s elapsed]
proxmox_virtual_environment_vm.vm: Still creating... [1m10s elapsed]
proxmox_virtual_environment_vm.vm: Still creating... [1m20s elapsed]
proxmox_virtual_environment_vm.vm: Still creating... [1m30s elapsed]
proxmox_virtual_environment_vm.vm: Still creating... [1m40s elapsed]
proxmox_virtual_environment_vm.vm: Still creating... [1m50s elapsed]
proxmox_virtual_environment_vm.vm: Still creating... [2m0s elapsed]
proxmox_virtual_environment_vm.vm: Still creating... [2m10s elapsed]
proxmox_virtual_environment_vm.vm: Still creating... [2m20s elapsed]
proxmox_virtual_environment_vm.vm: Still creating... [2m30s elapsed]
proxmox_virtual_environment_vm.vm: Still creating... [2m40s elapsed]
proxmox_virtual_environment_vm.vm: Still creating... [2m50s elapsed]
proxmox_virtual_environment_vm.vm: Creation complete after 2m53s [id=103]

Apply complete! Resources: 2 added, 0 changed, 0 destroyed.

Outputs:

vm_ip = "192.168.66.156"
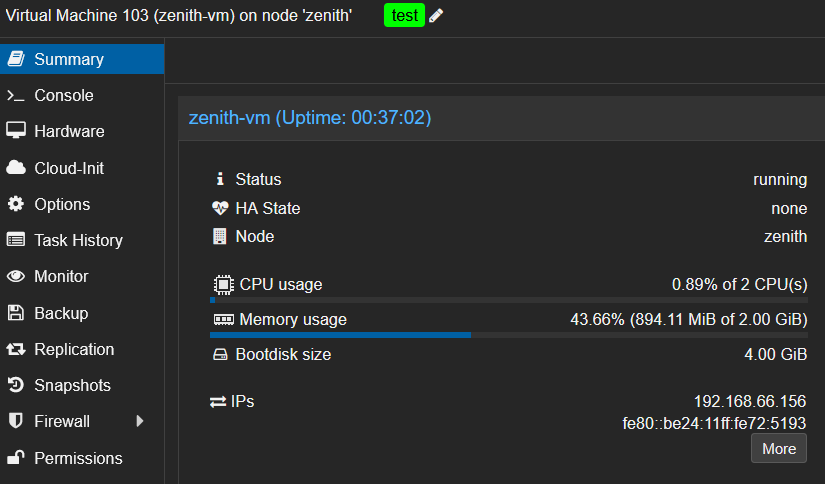
✅ Done! We’ve successfully created our first VM on Proxmox using Terraform in just a few minutes.
SSH Connection
🍒 Cherry on the cake: Terraform gives us the IP address, and thanks to cloud-init, SSH is ready to go.
$ ssh 192.168.66.156
The authenticity of host '192.168.66.156 (192.168.66.156)' can't be established.
ED25519 key fingerprint is SHA256:kSaXpIJYpJOBYfpVqiiH8OxhpgBY9WH/ggqFHo/20rg.
This key is not known by any other names.
Are you sure you want to continue connecting (yes/no/[fingerprint])? yes
Warning: Permanently added '192.168.66.156' (ED25519) to the list of known hosts.
Welcome to Ubuntu 24.04.2 LTS (GNU/Linux 6.8.0-60-generic x86_64)

 * Documentation:  https://help.ubuntu.com
 * Management:     https://landscape.canonical.com
 * Support:        https://ubuntu.com/pro

 System information as of Tue May 27 21:16:51 UTC 2025

  System load:  0.0               Processes:             120
  Usage of /:   78.2% of 2.84GB   Users logged in:       0
  Memory usage: 10%               IPv4 address for eth0: 192.168.66.156
  Swap usage:   0%

Expanded Security Maintenance for Applications is not enabled.

0 updates can be applied immediately.

Enable ESM Apps to receive additional future security updates.
See https://ubuntu.com/esm or run: sudo pro status


The programs included with the Ubuntu system are free software;
the exact distribution terms for each program are described in the
individual files in /usr/share/doc/*/copyright.

Ubuntu comes with ABSOLUTELY NO WARRANTY, to the extent permitted by
applicable law.

To run a command as administrator (user "root"), use "sudo <command>".
See "man sudo_root" for details.

vez@zenith-vm:~$
✅ This works like a charm, wonderful. We can see that my user is already created, it has all sudo permissions and the system is up-to-date.
Idempotency
Idempotency is a core principle in Terraform that ensures running your code multiple times won’t create duplicates or unexpected changes. Terraform checks what’s already running and only makes updates if something has actually changed. If nothing has changed, Terraform simply exits without modifying your infrastructure. This makes your deployments safe, repeatable, and easy to trust.
So let’s terraform apply a second time to see what is happening
$ terraform apply
data.proxmox_virtual_environment_vms.template: Reading...
proxmox_virtual_environment_file.cloud_config: Refreshing state... [id=local:snippets/vm.cloud-config.yaml]
data.proxmox_virtual_environment_vms.template: Read complete after 1s [id=bc1b25f0-77d5-4b6a-b1a6-21cf39fbda17]
proxmox_virtual_environment_vm.vm: Refreshing state... [id=103]

No changes. Your infrastructure matches the configuration.

Terraform has compared your real infrastructure against your configuration and found no differences, so no changes are needed.

Apply complete! Resources: 0 added, 0 changed, 0 destroyed.

Outputs:

vm_ip = "192.168.66.156"
✅ No change as expected!
Remove your Infrastructure
To remove a Terraform-managed infrastructure, simply run the command terraform destroy.
Terraform will show you a detailed plan of everything it’s about to delete, and ask for confirmation before proceeding. Once confirmed, it removes all resources it previously created.
$ terraform destroy
data.proxmox_virtual_environment_vms.template: Reading...
proxmox_virtual_environment_file.cloud_config: Refreshing state... [id=local:snippets/vm.cloud-config.yaml]
data.proxmox_virtual_environment_vms.template: Read complete after 1s [id=d5b47a57-8074-4ddf-83cd-a99dceab0232]
proxmox_virtual_environment_vm.vm: Refreshing state... [id=103]

Terraform used the selected providers to generate the following execution plan. Resource actions are indicated with the following symbols:
  - destroy

Terraform will perform the following actions:

  # proxmox_virtual_environment_file.cloud_config will be destroyed
  - resource "proxmox_virtual_environment_file" "cloud_config" {
      - content_type   = "snippets" -> null
      - datastore_id   = "local" -> null
      - file_name      = "vm.cloud-config.yaml" -> null
      - id             = "local:snippets/vm.cloud-config.yaml" -> null
      - node_name      = "zenith" -> null
      - overwrite      = true -> null
      - timeout_upload = 1800 -> null

      - source_raw {
          - data      = <<-EOT
                #cloud-config
                hostname: zenith-vm
                package_update: true
                package_upgrade: true
                packages:
                  - qemu-guest-agent           # Ensures the guest agent is installed
                users:
                  - default
                  - name: vez
                    groups: sudo
                    shell: /bin/bash
                    ssh-authorized-keys:
                      - "ssh-ed25519 AAAAC3NzaC1lZDI1NTE5AAAAID62LmYRu1rDUha3timAIcA39LtcIOny1iAgFLnxoBxm vez@bastion" # Inject user's SSH key
                    sudo: ALL=(ALL) NOPASSWD:ALL
                runcmd:
                  - systemctl enable qemu-guest-agent
                  - reboot                     # Reboot the VM after provisioning
            EOT -> null
          - file_name = "vm.cloud-config.yaml" -> null
          - resize    = 0 -> null
        }
    }

  # proxmox_virtual_environment_vm.vm will be destroyed
  - resource "proxmox_virtual_environment_vm" "vm" {
      - acpi                    = true -> null
      - bios                    = "ovmf" -> null
      - id                      = "103" -> null
      - ipv4_addresses          = [
          - [
              - "127.0.0.1",
            ],
          - [
              - "192.168.66.156",
            ],
        ] -> null
      - ipv6_addresses          = [
          - [
              - "::1",
            ],
          - [
              - "fe80::be24:11ff:feca:dc3f",
            ],
        ] -> null
      - keyboard_layout         = "en-us" -> null
      - mac_addresses           = [
          - "00:00:00:00:00:00",
          - "BC:24:11:CA:DC:3F",
        ] -> null
      - machine                 = "q35" -> null
      - migrate                 = false -> null
      - name                    = "zenith-vm" -> null
      - network_interface_names = [
          - "lo",
          - "eth0",
        ] -> null
      - node_name               = "zenith" -> null
      - on_boot                 = true -> null
      - protection              = false -> null
      - reboot                  = false -> null
      - reboot_after_update     = true -> null
      - scsi_hardware           = "virtio-scsi-pci" -> null
      - started                 = true -> null
      - stop_on_destroy         = true -> null
      - tablet_device           = true -> null
      - tags                    = [
          - "test",
        ] -> null
      - template                = false -> null
      - timeout_clone           = 1800 -> null
      - timeout_create          = 1800 -> null
      - timeout_migrate         = 1800 -> null
      - timeout_move_disk       = 1800 -> null
      - timeout_reboot          = 1800 -> null
      - timeout_shutdown_vm     = 1800 -> null
      - timeout_start_vm        = 1800 -> null
      - timeout_stop_vm         = 300 -> null
      - vm_id                   = 103 -> null

      - agent {
          - enabled = true -> null
          - timeout = "15m" -> null
          - trim    = false -> null
          - type    = "virtio" -> null
        }

      - clone {
          - full         = true -> null
          - node_name    = "apex" -> null
          - retries      = 1 -> null
          - vm_id        = 900 -> null
            # (1 unchanged attribute hidden)
        }

      - cpu {
          - cores        = 2 -> null
          - flags        = [] -> null
          - hotplugged   = 0 -> null
          - limit        = 0 -> null
          - numa         = false -> null
          - sockets      = 1 -> null
          - type         = "host" -> null
          - units        = 1024 -> null
            # (2 unchanged attributes hidden)
        }

      - disk {
          - aio               = "io_uring" -> null
          - backup            = true -> null
          - cache             = "none" -> null
          - datastore_id      = "ceph-workload" -> null
          - discard           = "ignore" -> null
          - file_format       = "raw" -> null
          - interface         = "scsi0" -> null
          - iothread          = false -> null
          - path_in_datastore = "vm-103-disk-1" -> null
          - replicate         = true -> null
          - size              = 4 -> null
          - ssd               = false -> null
            # (2 unchanged attributes hidden)
        }

      - initialization {
          - datastore_id         = "ceph-workload" -> null
          - interface            = "scsi1" -> null
          - user_data_file_id    = "local:snippets/vm.cloud-config.yaml" -> null
            # (4 unchanged attributes hidden)

          - ip_config {
              - ipv4 {
                  - address = "dhcp" -> null
                    # (1 unchanged attribute hidden)
                }
            }

          - user_account {
              - keys     = [
                  - "ssh-rsa AAAAB3NzaC1yc2EAAAADAQABAAABAQCepytMtegvj8pf89dC8mWoGVAlvdpCkIThLcOiGW39ZCyRY9yXloAniaMXTAC8PHKbe4yPX4N0OovM5jNS5ofa1HQ1xEimgn9y185aSEf/J9msEW8LLy/+yb38vsDj5vYpRaurjUXfDVFti8rO1UWZ8zKuFvXJ18nBFJpViA8mHqwxUFnoNRyAMs4O8Fh3V8EnELOxb+T8p+nTTzBnYhUgYNPt61S3iAqD6QYHjelUzs8VxcxOdP/qO664jxQ7N96/zNsaTuV13FR286BuAelg3LUCpjZ2fy2mrSeKM6xOIY1mwPPCoglPiiHLTxZzo33pR0MAnDV9A3rJb3jBBifB vez-key",
                ] -> null
              - password = (sensitive value) -> null
              - username = "vez" -> null
            }
        }

      - memory {
          - dedicated      = 2048 -> null
          - floating       = 0 -> null
          - keep_hugepages = false -> null
          - shared         = 0 -> null
            # (1 unchanged attribute hidden)
        }

      - network_device {
          - bridge       = "vmbr0" -> null
          - disconnected = false -> null
          - enabled      = true -> null
          - firewall     = false -> null
          - mac_address  = "BC:24:11:CA:DC:3F" -> null
          - model        = "virtio" -> null
          - mtu          = 0 -> null
          - queues       = 0 -> null
          - rate_limit   = 0 -> null
          - vlan_id      = 66 -> null
            # (1 unchanged attribute hidden)
        }

      - operating_system {
          - type = "l26" -> null
        }

      - vga {
          - memory    = 16 -> null
          - type      = "std" -> null
            # (1 unchanged attribute hidden)
        }
    }

Plan: 0 to add, 0 to change, 2 to destroy.

Changes to Outputs:
  - vm_ip = "192.168.66.156" -> null

Do you really want to destroy all resources?
  Terraform will destroy all your managed infrastructure, as shown above.
  There is no undo. Only 'yes' will be accepted to confirm.

  Enter a value: yes

proxmox_virtual_environment_vm.vm: Destroying... [id=103]
proxmox_virtual_environment_vm.vm: Destruction complete after 5s
proxmox_virtual_environment_file.cloud_config: Destroying... [id=local:snippets/vm.cloud-config.yaml]
proxmox_virtual_environment_file.cloud_config: Destruction complete after 0s

Destroy complete! Resources: 2 destroyed.
💣 Boom! The VM has been destroyed and we can now redeploy another instance at will!
Conclusion
In this post, we explored how to deploy a VM on Proxmox using Terraform, starting from a cloud-init template and ending with a working virtual machine you can SSH into. With this setup in place, I now have a reliable way to deploy and destroy VMs quickly and consistently.
My next step is to turn this foundation into a reusable module and use it as a base for future projects, like integrating with Ansible for further automation and even deploying my Kubernetes cluster. Stay tuned!