Intro
L’un des aspects les plus satisfaisant de la création de mon homelab, c’est de pouvoir y appliquer des outils production-grade. J’ai voulu définir toute mon infrastructure as code, et la première étape que j’ai abordée est le déploiement de Machines Virtuelles avec Terraform sur Proxmox.
Dans cet article, je vous guide pas à pas pour créer une simple VM sur Proxmox VE 8 en utilisant Terraform, basée sur un template cloud-init que j’ai détaillé dans cet article. L’exécution se fait depuis un conteneur LXC dédié qui centralise toute la gestion de mon infrastructure.
📝 Le code complet utilisé dans cet article est disponible dans mon dépôt GitHub Homelab
Qu’est-ce que Terraform ?
Terraform est un outil open-source d’IaC (Infrastructure as Code) développé par HashiCorp. Il permet de définir et de provisionner de l’infrastructure à l’aide d’un langage de configuration haut niveau appelé HCL (HashiCorp Configuration Language). Grâce à Terraform, on peut gérer des services cloud, des VMs, des réseaux, des enregistrements DNS, etc.
Dans mon homelab, Terraform simplifie considérablement le déploiement de VMs et rend mon environnement reproductible, permettant de tout redéployer facilement si nécessaire.
Un petit mot sur OpenTofu, un fork communautaire de Terraform apparu suite à des changements de licence. Il est presque entièrement compatible avec Terraform et pourrait être une bonne alternative à l’avenir. Mais pour le moment, je reste sur Terraform.
Les Providers Terraform pour Proxmox
Pour utiliser Terraform, il faut un provider, un plugin permettant à Terraform d’interagir avec l’infrastructure. Dans le cas de Proxmox, le provider va utiliser son API. Il en existe actuellement deux :
- Telmate/proxmox : L’un des premiers providers disponibles. Il est très utilisé mais peu maintenu. Facile à utiliser, avec pas mal de documentation, mais limité en fonctionnalités, avec seulement 4 ressources disponibles et aucun data source. Par exemple, je n’ai pas pu récupérer les informations sur les nœuds.
- bpg/proxmox : Un provider plus récent, développé activement (apparemment par une seule personne), avec une syntaxe plus propre et un support plus étendu. Il a été un peu plus complexe à mettre en place, mais suffisamment mature à mon goût.
J’ai choisi bpg/proxmox car il est mieux maintenu à l’heure où j’écris ces lignes, et je voulais pouvoir récupérer certaines infos sur les nœuds comme leur hostname, etc.
Préparer l’Environnement
Créer un Template Cloud-init sur Proxmox
Consultez mon précédent article sur Proxmox - Créer un Template de VM Cloud-Init.
Installer Terraform
Pour l’installation de Terraform dans mon conteneur LXC, je me suis basé sur la documentation officielle.
# Ensure that your system is up to date and you have installed the `gnupg`, `software-properties-common`, and `curl` packages installed. You will use these packages to verify HashiCorp's GPG signature and install HashiCorp's Debian package repository.
apt-get update && apt-get install -y gnupg software-properties-common

# Install the HashiCorp [GPG key](https://apt.releases.hashicorp.com/gpg).
wget -O- <https://apt.releases.hashicorp.com/gpg> | gpg --dearmor | tee /usr/share/keyrings/hashicorp-archive-keyring.gpg > /dev/null

# Verify the key's fingerprint.
gpg --no-default-keyring --keyring /usr/share/keyrings/hashicorp-archive-keyring.gpg --fingerprint

# Add the official HashiCorp repository to your system. The `lsb_release -cs` command finds the distribution release codename for your current system, such as `buster`, `groovy`, or `sid`.
echo "deb [signed-by=/usr/share/keyrings/hashicorp-archive-keyring.gpg] <https://apt.releases.hashicorp.com> $(lsb_release -cs) main" | tee /etc/apt/sources.list.d/hashicorp.list

# Download the package information from HashiCorp.
apt update

# Install Terraform from the new repository.
apt-get install terraform
Créer un utilisateur Terraform dédié dans Proxmox
Avant que Terraform puisse interagir avec votre cluster Proxmox, il est préférable de créer un utilisateur dédié avec des permissions limitées. Vous pouvez utiliser root@pam, mais ce n’est pas recommandé pour des raisons de sécurité.
Connectez-vous en SSH sur un nœud Proxmox avec un compte ayant les droits nécessaires, root dans ce cas.
- Créer le Rôle
TerraformUser
pveum role add TerraformUser -privs "\
  Datastore.Allocate \
  Datastore.AllocateSpace \
  Datastore.Audit \
  Pool.Allocate \
  Sys.Audit \
  Sys.Console \
  Sys.Modify \
  VM.Allocate \
  VM.Audit \
  VM.Clone \
  VM.Config.CDROM \
  VM.Config.Cloudinit \
  VM.Config.CPU \
  VM.Config.Disk \
  VM.Config.HWType \
  VM.Config.Memory \
  VM.Config.Network \
  VM.Config.Options \
  VM.Console \
  VM.Migrate \
  VM.Monitor \
  VM.PowerMgmt \
  SDN.Use"
⚠️ La liste des privilèges disponibles a été modifiée dans PVE 9.0, utilisez cette commande:
pveum role add TerraformUser -privs "\
  Datastore.Allocate \
  Datastore.AllocateSpace \
  Datastore.Audit \
  Pool.Allocate \
  Pool.Audit \
  Sys.Audit \
  Sys.Console \
  Sys.Modify \
  Sys.Syslog \
  VM.Allocate \
  VM.Audit \
  VM.Clone \
  VM.Config.CDROM \
  VM.Config.Cloudinit \
  VM.Config.CPU \
  VM.Config.Disk \
  VM.Config.HWType \
  VM.Config.Memory \
  VM.Config.Network \
  VM.Config.Options \
  VM.Console \
  VM.Migrate \
  VM.GuestAgent.Audit \
  VM.GuestAgent.FileRead \
  VM.GuestAgent.FileWrite \
  VM.GuestAgent.FileSystemMgmt \
  VM.GuestAgent.Unrestricted \
  VM.PowerMgmt \
  Mapping.Audit \
  Mapping.Use \
  SDN.Audit \
  SDN.Use"
- Créer l’Utilisateur
terraformer
pveum user add terraformer@pve --password <password>
- Assigner le Rôle
TerraformUserà l’Utilisateurterraformer
pveum aclmod / -user terraformer@pve -role TerraformUser
- Créer le Jeton API pour l’Utilisateur
terraformer
pveum user token add terraformer@pve terraform -expire 0 -privsep 0 -comment "Terraform token"
⚠️ Copiez et conservez bien le jeton généré !
Installer des Clés SSH sur vos Nœuds Proxmox
Cette étape est nécessaire pour certaines ressources qui exécutent des commandes directement sur les nœuds, lorsque l’API Proxmox ne suffit pas, comme expliqué ici. C’est le cas avec cloud-init.
On peut utiliser un agent SSH ou une clé SSH classique. J’ai choisi la clé SSH, donc on doit en générer une et l’installer sur les nœuds. Depuis la machine qui exécute Terraform.
- Générer une paire de clés SSH
ssh-keygen
- L’Installer sur le(s) nœud(s) Proxmox pour l’utilisateur root
ssh-copy-id root@<your Proxmox node>
Déployer votre Première VM
Passons à la partie fun ! Maintenant que tout est prêt, on peut déployer une VM avec Terraform sur Proxmox. C’est parti pour le code !
Code Terraform
📌 Pour rappel, tout le code est disponible dans mon dépôt Homelab, le projet utilisé ici se trouve ici. N’oubliez pas d’adapter les variables à votre environnement.
Structure du projet
Voici l’arborescence du code. Vous pouvez tout mettre dans un seul fichier .tf, mais je préfère l’organiser proprement.
terraform
`-- projects
    `-- simple-vm
        |-- credentials.auto.tfvars
        |-- main.tf
        |-- provider.tf
        |-- terraform.tfvars
        `-- variables.tf
provider.tf
Définit la configuration du provider (par exemple, Proxmox) et la manière dont Terraform s’y connecte.
# Define the required Terraform provider block
terraform {
  required_providers {
    proxmox = {
      source = "bpg/proxmox" # Use the community Proxmox provider from the bpg namespace
    }
  }
}

# Configure the Proxmox provider with API and SSH access
provider "proxmox" {
  endpoint  = var.proxmox_endpoint  # Proxmox API URL (e.g., https://proxmox.local:8006/api2/json)
  api_token = var.proxmox_api_token # API token for authentication (should have appropriate permissions)
  insecure  = false                 # Reject self-signed or invalid TLS certificates (set to true only in trusted/test environments)

  # Optional SSH settings used for VM customization via SSH
  ssh {
    agent       = false                        # Do not use the local SSH agent; use key file instead
    private_key = file("~/.ssh/id_ed25519")    # Load SSH private key from the local file system
    username    = "root"                       # SSH username for connecting to the Proxmox host
  }
}
main.tf
Contient la logique principale de l’infrastructure , telle que les ressources et les modules à déployer.
# Retrieve VM templates available in Proxmox that match the specified name
data "proxmox_virtual_environment_vms" "template" {
  filter {
    name   = "name"
    values = ["${var.vm_template}"] # The name of the template to clone from
  }
}

# Create a cloud-init configuration file as a Proxmox snippet
resource "proxmox_virtual_environment_file" "cloud_config" {
  content_type = "snippets"        # Cloud-init files are stored as snippets in Proxmox
  datastore_id = "local"           # Local datastore used to store the snippet
  node_name    = var.node_name     # The Proxmox node where the file will be uploaded

  source_raw {
    file_name = "vm.cloud-config.yaml" # The name of the snippet file
    data      = <<-EOF
    #cloud-config
    hostname: ${var.vm_name}
    package_update: true
    package_upgrade: true
    packages:
      - qemu-guest-agent           # Ensures the guest agent is installed
    users:
      - default
      - name: ${var.vm_user}
        groups: sudo
        shell: /bin/bash
        ssh-authorized-keys:
          - "${var.vm_user_sshkey}" # Inject user's SSH key
        sudo: ALL=(ALL) NOPASSWD:ALL
    runcmd:
      - systemctl enable qemu-guest-agent
      - reboot                     # Reboot the VM after provisioning
    EOF
  }
}

# Define and provision a new VM by cloning the template and applying initialization
resource "proxmox_virtual_environment_vm" "vm" {
  name      = var.vm_name           # VM name
  node_name = var.node_name         # Proxmox node to deploy the VM
  tags      = var.vm_tags           # Optional VM tags for categorization

  agent {
    enabled = true                  # Enable the QEMU guest agent
  }

  stop_on_destroy = true            # Ensure VM is stopped gracefully when destroyed

  clone {
    vm_id     = data.proxmox_virtual_environment_vms.template.vms[0].vm_id     # ID of the source template
    node_name = data.proxmox_virtual_environment_vms.template.vms[0].node_name # Node of the source template
  }

  bios    = var.vm_bios             # BIOS type (e.g., seabios or ovmf)
  machine = var.vm_machine          # Machine type (e.g., q35)

  cpu {
    cores = var.vm_cpu              # Number of CPU cores
    type  = "host"                  # Use host CPU type for best compatibility/performance
  }

  memory {
    dedicated = var.vm_ram          # RAM in MB
  }

  disk {
    datastore_id = var.node_datastore # Datastore to hold the disk
    interface    = "scsi0"             # Primary disk interface
    size         = 4                   # Disk size in GB
  }

  initialization {
    user_data_file_id = proxmox_virtual_environment_file.cloud_config.id # Link the cloud-init file
    datastore_id      = var.node_datastore
    interface         = "scsi1"             # Separate interface for cloud-init
    ip_config {
      ipv4 {
        address = "dhcp"            # Get IP via DHCP
      }
    }
  }

  network_device {
    bridge  = "vmbr0"               # Use the default bridge
    vlan_id = var.vm_vlan           # VLAN tagging if used
  }

  operating_system {
    type = "l26"                    # Linux 2.6+ kernel
  }

  vga {
    type = "std"                    # Standard VGA type
  }

  lifecycle {
    ignore_changes = [              # Ignore initialization section after first depoloyment for idempotency
      initialization
    ]
  }
}

# Output the assigned IP address of the VM after provisioning
output "vm_ip" {
  value       = proxmox_virtual_environment_vm.vm.ipv4_addresses[1][0] # Second network interface's first IP
  description = "VM IP"
}
variables.tf
Déclare toutes les variables d’entrée, leurs types, leurs descriptions et leurs valeurs par défaut facultatives.
variable "proxmox_endpoint" {
  description = "Proxmox URL endpoint"
  type        = string
}

variable "proxmox_api_token" {
  description = "Proxmox API token"
  type        = string
  sensitive   = true
}

variable "node_name" {
  description = "Proxmox host for the VM"
  type        = string
}

variable "node_datastore" {
  description = "Datastore used for VM storage"
  type        = string
  default     = "ceph-workload"
}

variable "vm_template" {
  description = "Template of the VM"
  type        = string
  default     = "ubuntu-cloud"
}

variable "vm_name" {
  description = "Hostname of the VM"
  type        = string
}

variable "vm_user" {
  description = "Admin user of the VM"
  type        = string
  default     = "vez"
}

variable "vm_user_sshkey" {
  description = "Admin user SSH key of the VM"
  type        = string
  default     = "ssh-ed25519 AAAAC3NzaC1lZDI1NTE5AAAAID62LmYRu1rDUha3timAIcA39LtcIOny1iAgFLnxoBxm vez@bastion"
}

variable "vm_cpu" {
  description = "Number of CPU cores of the VM"
  type        = number
  default     = 1
}

variable "vm_ram" {
  description = "Number of RAM (MB) of the VM"
  type        = number
  default     = 2048
}

variable "vm_bios" {
  description = "Type of BIOS used for the VM"
  type        = string
  default     = "ovmf"
}

variable "vm_machine" {
  description = "Type of machine used for the VM"
  type        = string
  default     = "q35"
}

variable "vm_vlan" {
  description = "VLAN of the VM"
  type        = number
  default     = 66
}

variable "vm_tags" {
  description = "Tags for the VM"
  type        = list(any)
  default     = ["test"]
}
terraform.tfvars
Valeurs de variables chargées automatiquement qui remplacent les valeurs par défaut, utilisées pour personnaliser les déploiements.
node_name = "zenith"     # Name of the Proxmox node where the VM will be deployed
vm_name   = "zenith-vm"  # Desired name for the new virtual machine
vm_cpu    = 2            # Number of CPU cores to allocate to the VM
vm_ram    = 2048         # Amount of RAM in MB (2 GB)
vm_vlan   = 66           # VLAN ID for network segmentation
credentials.auto.tfvars
Charge automatiquement les variables sensibles telles que les jetons API ou les informations d’identification au moment de l’exécution, elles ne se trouvent pas dans le dépôt, vous devrez donc les créer manuellement.
proxmox_endpoint  = <your Proxox endpoint>
proxmox_api_token = <your Proxmox API token for the user terraformer>
💡 Pour améliorer la lisibilité, vous pouvez formater automatiquement votre code Terraform
terraform fmt, pour appliquer les conventions de style standard, le rendant propre et cohérent.
Initialiser l’espace de travail
Avant de faire quoi que ce soit, commencez par initialiser votre environnement avec terraform init. Cette commande va :
- Initialiser le répertoire
- Télécharger les providers
- Installer les modules
- Préparer le backend
$ terraform init
Initializing the backend...
Initializing provider plugins...
- Finding latest version of bpg/proxmox...
- Installing bpg/proxmox v0.78.0...
- Installed bpg/proxmox v0.78.0 (self-signed, key ID F0582AD6AE97C188)
Partner and community providers are signed by their developers.
If you'd like to know more about provider signing, you can read about it here:
https://www.terraform.io/docs/cli/plugins/signing.html
Terraform has created a lock file .terraform.lock.hcl to record the provider
selections it made above. Include this file in your version control repository
so that Terraform can guarantee to make the same selections by default when
you run "terraform init" in the future.

Terraform has been successfully initialized!

You may now begin working with Terraform. Try running "terraform plan" to see
any changes that are required for your infrastructure. All Terraform commands
should now work.

If you ever set or change modules or backend configuration for Terraform,
rerun this command to reinitialize your working directory. If you forget, other
commands will detect it and remind you to do so if necessary.
Déployer votre VM avec Terraform
Super, notre environnement est maintenant prêt pour le déploiement ! Avant de créer votre VM, vous pouvez exécuter terraform plan sur votre code et Terraform vous indiquera ce qu’il en fera !
Pour le lancer, vous devrez lancer terraform apply.
$ terraform apply
data.proxmox_virtual_environment_vms.template: Reading...
data.proxmox_virtual_environment_vms.template: Read complete after 0s [id=d3292ffb-f11d-4588-9e97-fabc0f93cc39]

Terraform used the selected providers to generate the following execution plan. Resource actions are indicated with the following symbols:
  + create

Terraform will perform the following actions:

  # proxmox_virtual_environment_file.cloud_config will be created
  + resource "proxmox_virtual_environment_file" "cloud_config" {
      + content_type           = "snippets"
      + datastore_id           = "local"
      + file_modification_date = (known after apply)
      + file_name              = (known after apply)
      + file_size              = (known after apply)
      + file_tag               = (known after apply)
      + id                     = (known after apply)
      + node_name              = "zenith"
      + overwrite              = true
      + timeout_upload         = 1800

      + source_raw {
          + data      = <<-EOT
                #cloud-config
                hostname: zenith-vm
                package_update: true
                package_upgrade: true
                packages:
                  - qemu-guest-agent           # Ensures the guest agent is installed
                users:
                  - default
                  - name: vez
                    groups: sudo
                    shell: /bin/bash
                    ssh-authorized-keys:
                      - "ssh-ed25519 AAAAC3NzaC1lZDI1NTE5AAAAID62LmYRu1rDUha3timAIcA39LtcIOny1iAgFLnxoBxm vez@bastion" # Inject user's SSH key
                    sudo: ALL=(ALL) NOPASSWD:ALL
                runcmd:
                  - systemctl enable qemu-guest-agent
                  - reboot                     # Reboot the VM after provisioning
            EOT
          + file_name = "vm.cloud-config.yaml"
          + resize    = 0
        }
    }

  # proxmox_virtual_environment_vm.vm will be created
  + resource "proxmox_virtual_environment_vm" "vm" {
      + acpi                    = true
      + bios                    = "ovmf"
      + id                      = (known after apply)
      + ipv4_addresses          = (known after apply)
      + ipv6_addresses          = (known after apply)
      + keyboard_layout         = "en-us"
      + mac_addresses           = (known after apply)
      + machine                 = "q35"
      + migrate                 = false
      + name                    = "zenith-vm"
      + network_interface_names = (known after apply)
      + node_name               = "zenith"
      + on_boot                 = true
      + protection              = false
      + reboot                  = false
      + reboot_after_update     = true
      + scsi_hardware           = "virtio-scsi-pci"
      + started                 = true
      + stop_on_destroy         = true
      + tablet_device           = true
      + tags                    = [
          + "test",
        ]
      + template                = false
      + timeout_clone           = 1800
      + timeout_create          = 1800
      + timeout_migrate         = 1800
      + timeout_move_disk       = 1800
      + timeout_reboot          = 1800
      + timeout_shutdown_vm     = 1800
      + timeout_start_vm        = 1800
      + timeout_stop_vm         = 300
      + vm_id                   = (known after apply)

      + agent {
          + enabled = true
          + timeout = "15m"
          + trim    = false
          + type    = "virtio"
        }

      + clone {
          + full      = true
          + node_name = "apex"
          + retries   = 1
          + vm_id     = 900
        }

      + cpu {
          + cores      = 2
          + hotplugged = 0
          + limit      = 0
          + numa       = false
          + sockets    = 1
          + type       = "host"
          + units      = 1024
        }

      + disk {
          + aio               = "io_uring"
          + backup            = true
          + cache             = "none"
          + datastore_id      = "ceph-workload"
          + discard           = "ignore"
          + file_format       = (known after apply)
          + interface         = "scsi0"
          + iothread          = false
          + path_in_datastore = (known after apply)
          + replicate         = true
          + size              = 4
          + ssd               = false
        }

      + initialization {
          + datastore_id         = "ceph-workload"
          + interface            = "scsi1"
          + meta_data_file_id    = (known after apply)
          + network_data_file_id = (known after apply)
          + type                 = (known after apply)
          + user_data_file_id    = (known after apply)
          + vendor_data_file_id  = (known after apply)

          + ip_config {
              + ipv4 {
                  + address = "dhcp"
                }
            }
        }

      + memory {
          + dedicated      = 2048
          + floating       = 0
          + keep_hugepages = false
          + shared         = 0
        }

      + network_device {
          + bridge      = "vmbr0"
          + enabled     = true
          + firewall    = false
          + mac_address = (known after apply)
          + model       = "virtio"
          + mtu         = 0
          + queues      = 0
          + rate_limit  = 0
          + vlan_id     = 66
        }
        + operating_system {
          + type = "l26"
        }

      + vga {
          + memory = 16
          + type   = "std"
        }
    }

Plan: 2 to add, 0 to change, 0 to destroy.

Changes to Outputs:
  + vm_ip = (known after apply)

Do you want to perform these actions?
  Terraform will perform the actions described above.
  Only 'yes' will be accepted to approve.

  Enter a value: yes

proxmox_virtual_environment_file.cloud_config: Creating...
proxmox_virtual_environment_file.cloud_config: Creation complete after 1s [id=local:snippets/vm.cloud-config.yaml]
proxmox_virtual_environment_vm.vm: Creating...
proxmox_virtual_environment_vm.vm: Still creating... [10s elapsed]
proxmox_virtual_environment_vm.vm: Still creating... [20s elapsed]
proxmox_virtual_environment_vm.vm: Still creating... [30s elapsed]
proxmox_virtual_environment_vm.vm: Still creating... [40s elapsed]
proxmox_virtual_environment_vm.vm: Still creating... [50s elapsed]
proxmox_virtual_environment_vm.vm: Still creating... [1m0s elapsed]
proxmox_virtual_environment_vm.vm: Still creating... [1m10s elapsed]
proxmox_virtual_environment_vm.vm: Still creating... [1m20s elapsed]
proxmox_virtual_environment_vm.vm: Still creating... [1m30s elapsed]
proxmox_virtual_environment_vm.vm: Still creating... [1m40s elapsed]
proxmox_virtual_environment_vm.vm: Still creating... [1m50s elapsed]
proxmox_virtual_environment_vm.vm: Still creating... [2m0s elapsed]
proxmox_virtual_environment_vm.vm: Still creating... [2m10s elapsed]
proxmox_virtual_environment_vm.vm: Still creating... [2m20s elapsed]
proxmox_virtual_environment_vm.vm: Still creating... [2m30s elapsed]
proxmox_virtual_environment_vm.vm: Still creating... [2m40s elapsed]
proxmox_virtual_environment_vm.vm: Still creating... [2m50s elapsed]
proxmox_virtual_environment_vm.vm: Creation complete after 2m53s [id=103]

Apply complete! Resources: 2 added, 0 changed, 0 destroyed.

Outputs:

vm_ip = "192.168.66.156"
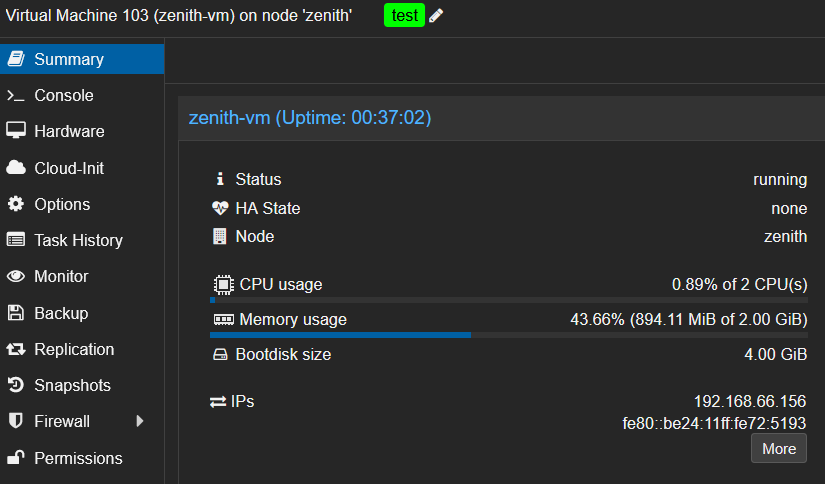
✅ Voilà, on vient de créer une VM sur Proxmox en quelques minutes.
Connexion SSH
🍒 Cerise sur le gâteau : Terraform nous donne l’adresse IP, et grâce à cloud-init, la connexion SSH fonctionne immédiatement.
$ ssh 192.168.66.156
The authenticity of host '192.168.66.156 (192.168.66.156)' can't be established.
ED25519 key fingerprint is SHA256:kSaXpIJYpJOBYfpVqiiH8OxhpgBY9WH/ggqFHo/20rg.
This key is not known by any other names.
Are you sure you want to continue connecting (yes/no/[fingerprint])? yes
Warning: Permanently added '192.168.66.156' (ED25519) to the list of known hosts.
Welcome to Ubuntu 24.04.2 LTS (GNU/Linux 6.8.0-60-generic x86_64)

 * Documentation:  https://help.ubuntu.com
 * Management:     https://landscape.canonical.com
 * Support:        https://ubuntu.com/pro

 System information as of Tue May 27 21:16:51 UTC 2025

  System load:  0.0               Processes:             120
  Usage of /:   78.2% of 2.84GB   Users logged in:       0
  Memory usage: 10%               IPv4 address for eth0: 192.168.66.156
  Swap usage:   0%

Expanded Security Maintenance for Applications is not enabled.

0 updates can be applied immediately.

Enable ESM Apps to receive additional future security updates.
See https://ubuntu.com/esm or run: sudo pro status


The programs included with the Ubuntu system are free software;
the exact distribution terms for each program are described in the
individual files in /usr/share/doc/*/copyright.

Ubuntu comes with ABSOLUTELY NO WARRANTY, to the extent permitted by
applicable law.

To run a command as administrator (user "root"), use "sudo <command>".
See "man sudo_root" for details.

vez@zenith-vm:~$
✅ Tout fonctionne à merveille. Mon utilisateur est bien présent, avec les droits sudo, et le système est à jour.
Idempotence
L’idempotence est un principe fondamental de Terraform : elle garantit que l’exécution répétée de votre code ne crée pas de doublons ni de modifications inattendues. Terraform vérifie ce qui est déjà en cours d’exécution et n’effectue de mises à jour qu’en cas de modification. Si rien n’a changé, Terraform se termine simplement sans modifier votre infrastructure. Vos déploiements sont ainsi sécurisés, reproductibles et fiables.
Testons ça avec un second terraform apply.
$ terraform apply
data.proxmox_virtual_environment_vms.template: Reading...
proxmox_virtual_environment_file.cloud_config: Refreshing state... [id=local:snippets/vm.cloud-config.yaml]
data.proxmox_virtual_environment_vms.template: Read complete after 1s [id=bc1b25f0-77d5-4b6a-b1a6-21cf39fbda17]
proxmox_virtual_environment_vm.vm: Refreshing state... [id=103]

No changes. Your infrastructure matches the configuration.

Terraform has compared your real infrastructure against your configuration and found no differences, so no changes are needed.

Apply complete! Resources: 0 added, 0 changed, 0 destroyed.

Outputs:

vm_ip = "192.168.66.156"
✅ Aucun changement, comme prévu !
Supprimer l’Infrastructure
Pour supprimer une infrastructure gérée par Terraform, exécutez simplement la commande terraform destroy.
Terraform vous présentera un plan détaillé de tout ce qu’il va supprimer et vous demandera confirmation avant de poursuivre. Une fois la confirmation effectuée, toutes les ressources précédemment créées seront supprimées.
$ terraform destroy
data.proxmox_virtual_environment_vms.template: Reading...
proxmox_virtual_environment_file.cloud_config: Refreshing state... [id=local:snippets/vm.cloud-config.yaml]
data.proxmox_virtual_environment_vms.template: Read complete after 1s [id=d5b47a57-8074-4ddf-83cd-a99dceab0232]
proxmox_virtual_environment_vm.vm: Refreshing state... [id=103]

Terraform used the selected providers to generate the following execution plan. Resource actions are indicated with the following symbols:
  - destroy

Terraform will perform the following actions:

  # proxmox_virtual_environment_file.cloud_config will be destroyed
  - resource "proxmox_virtual_environment_file" "cloud_config" {
      - content_type   = "snippets" -> null
      - datastore_id   = "local" -> null
      - file_name      = "vm.cloud-config.yaml" -> null
      - id             = "local:snippets/vm.cloud-config.yaml" -> null
      - node_name      = "zenith" -> null
      - overwrite      = true -> null
      - timeout_upload = 1800 -> null

      - source_raw {
          - data      = <<-EOT
                #cloud-config
                hostname: zenith-vm
                package_update: true
                package_upgrade: true
                packages:
                  - qemu-guest-agent           # Ensures the guest agent is installed
                users:
                  - default
                  - name: vez
                    groups: sudo
                    shell: /bin/bash
                    ssh-authorized-keys:
                      - "ssh-ed25519 AAAAC3NzaC1lZDI1NTE5AAAAID62LmYRu1rDUha3timAIcA39LtcIOny1iAgFLnxoBxm vez@bastion" # Inject user's SSH key
                    sudo: ALL=(ALL) NOPASSWD:ALL
                runcmd:
                  - systemctl enable qemu-guest-agent
                  - reboot                     # Reboot the VM after provisioning
            EOT -> null
          - file_name = "vm.cloud-config.yaml" -> null
          - resize    = 0 -> null
        }
    }

  # proxmox_virtual_environment_vm.vm will be destroyed
  - resource "proxmox_virtual_environment_vm" "vm" {
      - acpi                    = true -> null
      - bios                    = "ovmf" -> null
      - id                      = "103" -> null
      - ipv4_addresses          = [
          - [
              - "127.0.0.1",
            ],
          - [
              - "192.168.66.156",
            ],
        ] -> null
      - ipv6_addresses          = [
          - [
              - "::1",
            ],
          - [
              - "fe80::be24:11ff:feca:dc3f",
            ],
        ] -> null
      - keyboard_layout         = "en-us" -> null
      - mac_addresses           = [
          - "00:00:00:00:00:00",
          - "BC:24:11:CA:DC:3F",
        ] -> null
      - machine                 = "q35" -> null
      - migrate                 = false -> null
      - name                    = "zenith-vm" -> null
      - network_interface_names = [
          - "lo",
          - "eth0",
        ] -> null
      - node_name               = "zenith" -> null
      - on_boot                 = true -> null
      - protection              = false -> null
      - reboot                  = false -> null
      - reboot_after_update     = true -> null
      - scsi_hardware           = "virtio-scsi-pci" -> null
      - started                 = true -> null
      - stop_on_destroy         = true -> null
      - tablet_device           = true -> null
      - tags                    = [
          - "test",
        ] -> null
      - template                = false -> null
      - timeout_clone           = 1800 -> null
      - timeout_create          = 1800 -> null
      - timeout_migrate         = 1800 -> null
      - timeout_move_disk       = 1800 -> null
      - timeout_reboot          = 1800 -> null
      - timeout_shutdown_vm     = 1800 -> null
      - timeout_start_vm        = 1800 -> null
      - timeout_stop_vm         = 300 -> null
      - vm_id                   = 103 -> null

      - agent {
          - enabled = true -> null
          - timeout = "15m" -> null
          - trim    = false -> null
          - type    = "virtio" -> null
        }

      - clone {
          - full         = true -> null
          - node_name    = "apex" -> null
          - retries      = 1 -> null
          - vm_id        = 900 -> null
            # (1 unchanged attribute hidden)
        }

      - cpu {
          - cores        = 2 -> null
          - flags        = [] -> null
          - hotplugged   = 0 -> null
          - limit        = 0 -> null
          - numa         = false -> null
          - sockets      = 1 -> null
          - type         = "host" -> null
          - units        = 1024 -> null
            # (2 unchanged attributes hidden)
        }

      - disk {
          - aio               = "io_uring" -> null
          - backup            = true -> null
          - cache             = "none" -> null
          - datastore_id      = "ceph-workload" -> null
          - discard           = "ignore" -> null
          - file_format       = "raw" -> null
          - interface         = "scsi0" -> null
          - iothread          = false -> null
          - path_in_datastore = "vm-103-disk-1" -> null
          - replicate         = true -> null
          - size              = 4 -> null
          - ssd               = false -> null
            # (2 unchanged attributes hidden)
        }

      - initialization {
          - datastore_id         = "ceph-workload" -> null
          - interface            = "scsi1" -> null
          - user_data_file_id    = "local:snippets/vm.cloud-config.yaml" -> null
            # (4 unchanged attributes hidden)

          - ip_config {
              - ipv4 {
                  - address = "dhcp" -> null
                    # (1 unchanged attribute hidden)
                }
            }

          - user_account {
              - keys     = [
                  - "ssh-rsa AAAAB3NzaC1yc2EAAAADAQABAAABAQCepytMtegvj8pf89dC8mWoGVAlvdpCkIThLcOiGW39ZCyRY9yXloAniaMXTAC8PHKbe4yPX4N0OovM5jNS5ofa1HQ1xEimgn9y185aSEf/J9msEW8LLy/+yb38vsDj5vYpRaurjUXfDVFti8rO1UWZ8zKuFvXJ18nBFJpViA8mHqwxUFnoNRyAMs4O8Fh3V8EnELOxb+T8p+nTTzBnYhUgYNPt61S3iAqD6QYHjelUzs8VxcxOdP/qO664jxQ7N96/zNsaTuV13FR286BuAelg3LUCpjZ2fy2mrSeKM6xOIY1mwPPCoglPiiHLTxZzo33pR0MAnDV9A3rJb3jBBifB vez-key",
                ] -> null
              - password = (sensitive value) -> null
              - username = "vez" -> null
            }
        }

      - memory {
          - dedicated      = 2048 -> null
          - floating       = 0 -> null
          - keep_hugepages = false -> null
          - shared         = 0 -> null
            # (1 unchanged attribute hidden)
        }

      - network_device {
          - bridge       = "vmbr0" -> null
          - disconnected = false -> null
          - enabled      = true -> null
          - firewall     = false -> null
          - mac_address  = "BC:24:11:CA:DC:3F" -> null
          - model        = "virtio" -> null
          - mtu          = 0 -> null
          - queues       = 0 -> null
          - rate_limit   = 0 -> null
          - vlan_id      = 66 -> null
            # (1 unchanged attribute hidden)
        }

      - operating_system {
          - type = "l26" -> null
        }

      - vga {
          - memory    = 16 -> null
          - type      = "std" -> null
            # (1 unchanged attribute hidden)
        }
    }

Plan: 0 to add, 0 to change, 2 to destroy.

Changes to Outputs:
  - vm_ip = "192.168.66.156" -> null

Do you really want to destroy all resources?
  Terraform will destroy all your managed infrastructure, as shown above.
  There is no undo. Only 'yes' will be accepted to confirm.

  Enter a value: yes

proxmox_virtual_environment_vm.vm: Destroying... [id=103]
proxmox_virtual_environment_vm.vm: Destruction complete after 5s
proxmox_virtual_environment_file.cloud_config: Destroying... [id=local:snippets/vm.cloud-config.yaml]
proxmox_virtual_environment_file.cloud_config: Destruction complete after 0s

Destroy complete! Resources: 2 destroyed.
💣 Boom ! La VM est supprimée, prête à être redéployée si besoin.
Conclusion
Dans cet article, on a vu comment déployer une VM sur Proxmox avec Terraform : depuis un template cloud-init jusqu’à une machine fonctionnelle accessible en SSH. Cette base me donne un environnement fiable, rapide à reconstruire.
Prochaine étape : transformer ce projet en module réutilisable, l’intégrer avec Ansible pour aller plus loin, et préparer le terrain pour déployer mon cluster Kubernetes. À suivre !